If you’ve been fortunate enough to look up at the sky and see some celestial bodies in all their splendor, chances are you thought how great it would be to be able to take pictures of them.
Well, you can – astrophotography doesn’t have to be a difficult or expensive hobby.
What, exactly, is astrophotography?
We can define astrophotography as taking photos of celestial objects in space with a camera.
While that’s quite a broad description, you will need to ensure that you get your hands on the right equipment and choose the best camera to make your images look amazing.
You spend so much time staring at the beautiful celestial bodies in the night sky, why not freeze the memories of what you get to see?
Let’s explore everything you need in order to start enjoying astrophotography from your backyard!
Can Anyone Do Astrophotography?
If you’ve been studying the stars for a while or just enjoying their sight from your backyard lounger, you might be tempted to start taking pictures of them and maybe the planets or galaxies too.
While you might think that this is an activity reserved for professional photographers, it really doesn’t have to be.
The truth is that anyone can do astrophotography. You just require some gear, and, more importantly, you need to invest some time and energy into learning how to use it. In addition to that, you don’t have to spend a lot of money on astrophotography gear.
You can even do it with your smartphone and some old binoculars!
With that in mind, let’s see what you need to take pictures of the beautiful night sky.
Astrophotography 101
Here’s a rundown of everything you need in order to make astrophotography your new hobby. We’ll start with the camera.
Can You Use A Smartphone For Astrophotography?
Now, if convenience is your number-one priority, you might wonder if you can just use your smartphone to take pictures of the glorious night sky. You can!
As a bonus, many telescopes these days come with smartphone adapters so that you can easily use your smartphone to take pictures of what you see.
However, the truth of the matter is that your smartphone can only take you so far. You’ll need a more powerful camera that has a long shutter speed.
This means that its shutter can stay open for a long time – sometimes longer than half a minute – in order for more light to reach the camera’s digital sensor.
On the subject of camera sensors, you’ll also need to consider if you should use a DSLR or SLR camera. Here’s a rundown of both.
DSLR Vs. SLR
- A DSLR (Digital Single-Lens Reflex) camera has a reflex mirror that enables both live and digital optical viewing through its lens. It can store thousands of images.
- An SLR (single lens reflex) camera also has a reflex mirror, but it focuses on live optical viewing through its lens.
Why DSLR Cameras Are Better
When it comes to shutter speed, an SLR has speeds of up to 1/1000, while a DSLR camera has shutter speeds of up to 1/4000. This means a DSLR will enable you to record faster images.
One of the beneficial things about a DSLR camera is that it will provide you with a live preview, while SLR cameras don’t. DSLR cameras have the latest technology that can benefit you, such as when it comes to how much you can store on them.
Since they make use of memory cards, DSLR cameras are perfect for astrophotography sessions because you can store thousands of images without a problem. SLRs, on the other hand, use film and can only store about 36 images at a time.
Finally, DSLR cameras allow you to change lenses, which is not possible with SLRs. This provides you with more options when taking pictures of the sky.
What about mirrorless cameras?
You’ve probably heard the term “mirrorless camera” come up when people talk about astrophotography. These cameras can be useful. They don’t have mirrors, as their name suggests. In a DSLR camera, the mirror transmits light to the optical viewfinder.
With mirrorless cameras, there is no optical viewfinder, which means that the sensor is exposed to light all the time (via Digital Trends).
Seeing as though having as much light as possible is really important for astrophotography, it’s clear to see why these cameras can be so beneficial. The lack of mirrors in their design also makes the mirrorless camera lack vibrations so it can produce detailed images.
Other benefits of mirrorless cameras include that they are less expensive than DSLR cameras.
That’s not to say that they’re the clear winner! One of their potential drawbacks is that they lack the range of accessories and lenses that make DSLRs so fantastic for astrophotography.
What Camera Settings You’ll Need For Astrophotography
When choosing a camera for astrophotography, it’s important to ensure that it has all of these features:
Wide aperture size
If the camera is open to collect more light, more light will reach the camera lens, so make sure the camera has an aperture size of between f/2.8 to f/5.6.
You need as much light as possible to strike the camera’s sensor in order to enable you to take pictures in the dark.
Full-frame sensor
A camera with a full-frame sensor will collect more light than a crop sensor, so it’s worth it.
Full-frame sensors also perform better in low-light conditions, and that’s because they tend to have larger pixels than smaller sensors. This means that they can produce more detailed photos with less noise.
Image Stabilization
You don’t want your images to look unfocused, so investing in a camera that offers image stabilization features is always a good choice to allow you to create sharper, cleaner pictures.
However, sometimes you have to turn it off – we’ll discuss that later in this article!
High ISO
You also need to spare a thought for your camera’s ISO. This is how much light reaches the camera sensor, so it should be as high as possible without creating any disturbances on the images.
Ideally, you should opt for an ISO between 800 and 1600. It’s worth it to choose a camera that’s either mirrorless or DSLR. Both of these can boost the image quality and improve ISO sensitivity without disturbing your image, such as by making it blurry.
How To Choose An Astrophotography Telescope
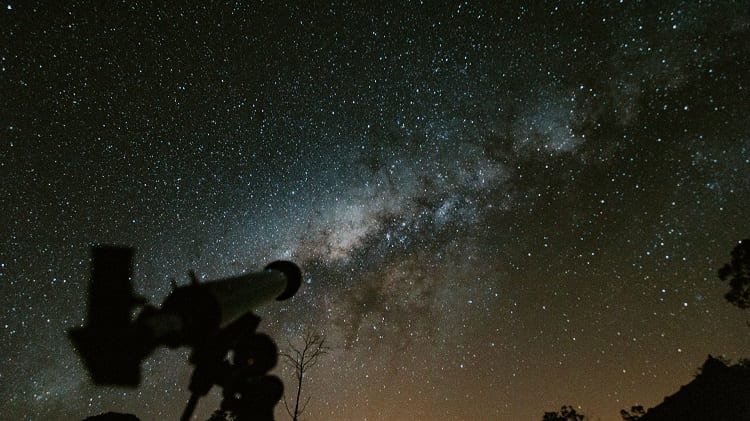
If you don’t have a telescope for astrophotography, you should purchase one that has the features you need to take beautiful pictures of deep-space objects.
While you can get away without the use of one, you want to be able to make the most of the telescope’s features – such as how it has eyepieces that will increase the magnification of what you see. Here are some tips to help you choose the best telescope for astrophotography.
Choose One With An Equatorial Mount
Your telescope mount will help you track celestial objects across the night sky, so you want it to be as accurate as possible to prevent shaking, which will translate into image distortions.
A motorized mount is a valuable asset, as is an equatorial mount. It moves in many directions to be able to effectively track the celestial objects you wish to study.
Of course, there’s also the option of an altazimuth mount, but this is a bit limited because it doesn’t move in as many directions as the equatorial mount. It can only move up and down and side to side, although it is very easy for beginners to use.
A mount for astrophotography is non-negotiable, as it will allow you to track the stars without star trails or motion blur.
Buy A Telescope With A Wide Aperture
Just like the camera you’ll use for astrophotography, you should choose a telescope with a wide aperture. The telescope lens needs to be as large as possible to draw in enough light because deep-space objects are dim.
A general rule is to choose an aperture that’s at least 75mm, but go larger if you can. You can find telescopes that have a 130mm or larger diameter, which will collect even more light.
Look for User-Friendliness
Whether you’re a beginner or not, you want a telescope that’s easy to use. Some things that make a telescope easy to use include its compactness and ease of set-up. You’ll have to choose between refractor and reflector telescopes.
Reflectors are better for beginners because they’re easy to use, but they require collimation more regularly, which can be tricky. (To find out more, read “How Do I Know If My Telescope Needs Collimation.”).
Refractors, on the other hand, are easier to use because they don’t usually require collimation.
Since both telescopes have pros and cons, it’s easier to choose between the two according to your astrophotography needs.
Refractor telescopes enable you to take pictures of the moon and planets. You can also find apochromatic telescopes that are built to eliminate chromatic aberration in your images.
They work by bringing all the light colors to one point, which prevents star trails while giving you a much clearer picture.
Reflectors, on the other hand, are better suited for deep-sky pictures, such as if you want to take pictures of star clusters or nebulae.
An example of a reflector telescope that enables you to take pictures of deep-sky objects effectively is the Dobsonian telescope. This type of reflector provides an excellent aperture, which is what you want to bring more light to your images.
Opt For A Smartphone Or Camera Adapter
To make your astrophotography session even more convenient and help you produce crisper images, purchase a smartphone or camera adapter for your telescope.
You’ll find many telescopes on the market are sold with these included, which is a bonus. These adapters make it very easy for you to get started with astrophotography because you’ll be able to use your camera and phone with your telescope to get the best celestial views.
How To Start Your First Astrophotography Session
Now that you have all your astrophotography gear and you’re excited to use it, here are some other tips to ensure that you can find planets or stars and maybe even snap a few pictures of them in one night.
Choose The Best Conditions
You can’t just set up your camera and telescope on any night you choose and expect to see celestial objects in the sky.
Weather conditions play a big role. Make sure it’s a cloudless night, preferably moonless, so that you won’t have image or viewing disruptions. To find out more, read “What Are The Best Conditions For Stargazing?”
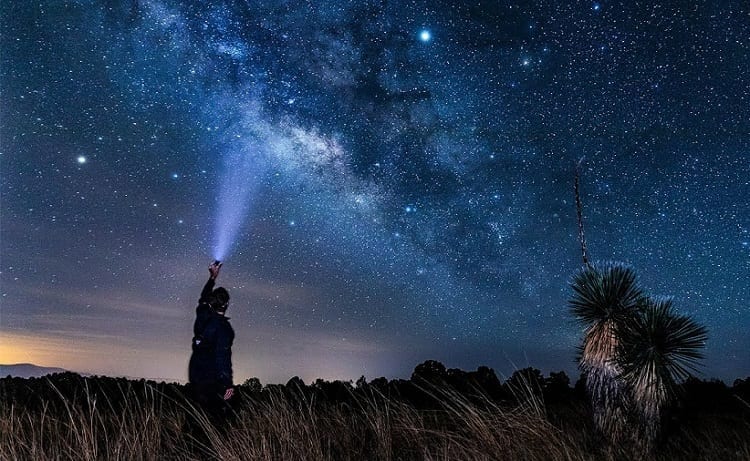
Download An App
If you’re just starting out with your astrophotography hobby, it’s crucial to download an app that will help you locate the stars and maybe even some planets.
If you’re new to astronomy and astrophotography, you can’t just go outside and expect to point your telescope at any part of the sky. Well, you can, but you’ll quickly lose patience!
A handy sky-chart app to use is SkyView Lite. Open the app on your phone, point it to the sky above you, and see what’s there so that you know where to start looking. It’s available on Android and iPhone and is really simple to navigate.
You can also use a physical star chart that shows you all the available celestial objects where you are located depending on the time of the year.
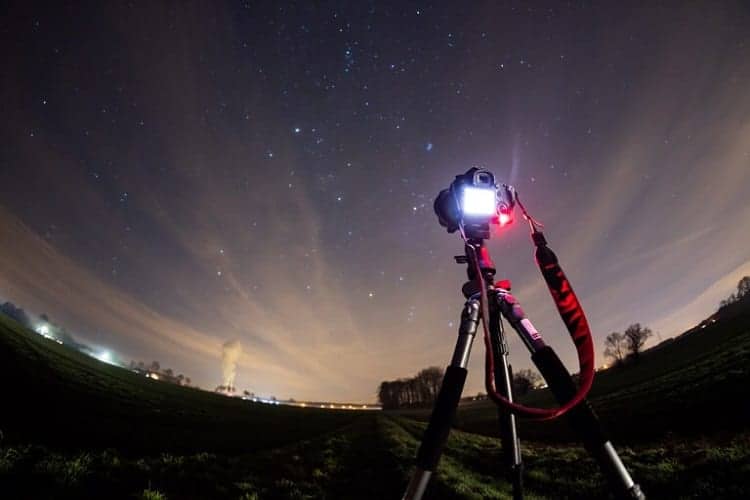
Set Up Your Tripod
Now that you know what bright star or planet you’re keen to locate with your telescope, set up the tripod so that your camera will be pointed at the object.
It’s useful to turn on the camera’s “live view” feature so that you won’t have to check the viewfinder to see what the camera is capturing. When you’ve settled on a bright star, make sure you use the camera’s zoom settings and adjust the focus.
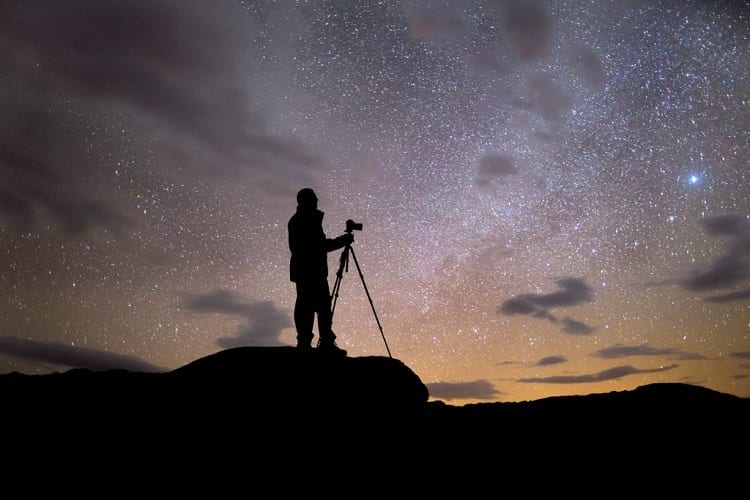
Keep It Steady
If you’re using a tripod (and you really should be), you should turn off your phone’s image stabilization.
It’s a good idea to keep everything as still as possible, so use a timer on your phone or a remote shutter release to prevent your phone from vibrating when you press the button to take a photo. Remember that the slightest vibration can cause blurriness to appear in your shots.
Take Lots Of Pics
You can’t expect to take just one picture and be satisfied with the result.
It’s better to take many pictures of the same view because then you can stack images later. This is important to do when you process your images, but we’ll get to that later.
Have Fun!
Once you have everything in place, have fun! Take a lot of pictures, and don’t expect everything to turn out perfectly.
Astrophotography requires time to learn loads of skills, and the most important thing is to have patience – as well as image processing!
Why You Need To Process Your Astrophotography Images
It’s worth mentioning that every astrophotographer, from beginner to pro, needs to use image-processing software. Without it, those celestial pics will never be as amazing as they could be.
Astrophotography software can help you to deal with problems such as image noise and lack of clarity and even eliminate light pollution that causes orange glows in your images. While you certainly don’t want to overprocess your images, you do want to make sure that they look their best.
Astrophotography software doesn’t have to be expensive – you can find tons of software that works really well. Excellent choices include Adobe Lightroom and Adobe Photoshop.
These will also enable you to stack your images. This is when you take many pictures of the same view, and then the image-stacking software combines them to create one image that’s clearer and more visually appealing.
Related Questions
What’s the 500 Rule in astrophotography?
It’s when you divide the focal length of your lens by 500 in order to get the longest amount of time you’ll have before stars start to trail.
Are star trails bad?
While some people want to avoid star trails, others want to capture them! Star trails are continuous paths that are produced by the stars during long-exposure photos (via EarthSky).
Conclusion
Viewing the celestial objects in the night sky is fun, but being able to photograph them is even more satisfying.
In this article, we’ve looked at how you can set yourself up with the right astrophotography gear and we’ve also provided you with tips you’ll need once you’re all set up and ready to go.