Table of Contents
- What Is a Dobsonian Telescope and Why It’s Popular?
- Aperture, Focal Length, and F-Ratio: How They Shape Views
- Solid-Tube vs Truss-Tube Dobsonians: Portability Trade-offs
- Mount Design, Balance, and Motions: The Dobsonian Way
- Essential Accessories for Dobsonian Owners
- Eyepieces, Exit Pupil, and Magnification Planning
- Collimation and Thermal Management: Sharp Views Fast
- Light Pollution, Filters, and Target Selection
- Push-to, GoTo, and Electronically Assisted Astronomy
- Observing Techniques: Star Hopping, Sketching, and Logs
- Buying Guide: New vs Used, 6-inch vs 8-inch vs 10–12-inch
- Setup, Transport, and Storage: Practical Tips
- Safety, Care, and Mirror Coatings
- Frequently Asked Questions
- Final Thoughts on Choosing the Right Dobsonian Telescope
What Is a Dobsonian Telescope and Why It’s Popular?
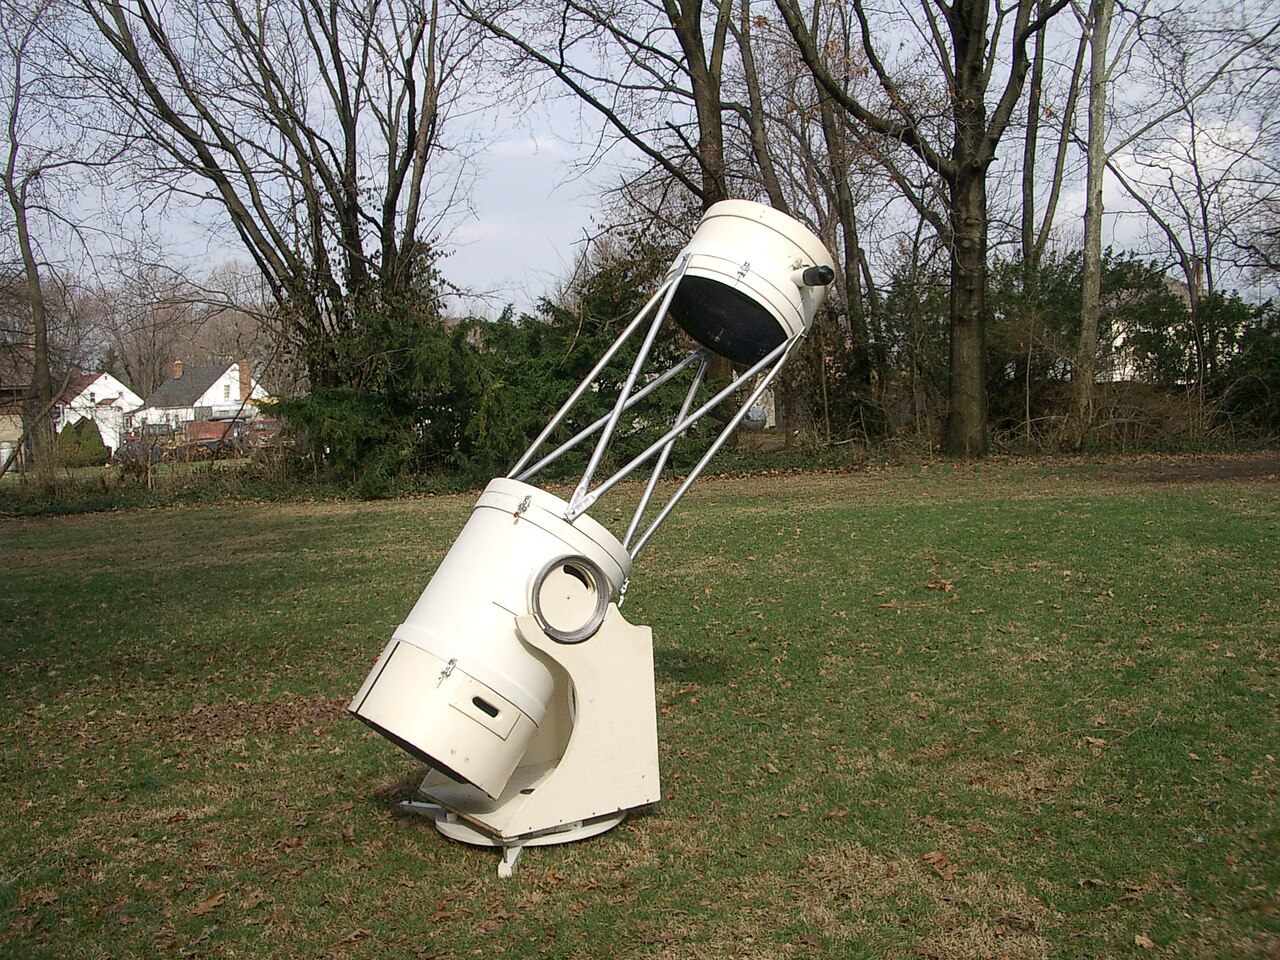
A Dobsonian telescope is a Newtonian reflector mounted on a simple, low-cost, alt-azimuth base made primarily from plywood or composite panels. The optical tube assembly (OTA) houses a parabolic primary mirror at the bottom and a small flat secondary mirror near the top that redirects light into a side-mounted focuser. The “Dobsonian” part refers to the mount and practical philosophy popularized by John Dobson in the 1970s: large aperture for the lowest possible price, combined with intuitive, push-to pointing and smooth manual tracking. For visual astronomy—especially deep-sky observing—Dobsonians deliver tremendous light grasp per dollar and per kilogram.

Credit: first uploaded on the English-speaking Wikipedia under the same filename
Why are Dobsonians beloved by beginners and veterans alike?
- Aperture per dollar: Compared to refractors and compound designs, a Dobsonian offers larger primary mirrors—often 6–12 inches and beyond—for the same budget, revealing faint galaxies, nebulae, and globular clusters.
- Simplicity: The alt-az mount moves in two axes: altitude (up/down) and azimuth (left/right). There’s little to learn and even less to break. The modest learning curve is perfect for newcomers.
- Stability and damping: The wide footprint and simple bearings yield steady views. Vibrations damp quickly, which is crucial at higher powers on planets or double stars.
- Customizability: Owners can upgrade focusers, add setting circles or digital encoders, install cooling fans, swap finders, or even rebuild the base.
If you want to understand the basics before diving into aperture choices, skip ahead to Aperture, Focal Length, and F-Ratio. If portability is your main concern, jump to Solid-Tube vs Truss-Tube Dobsonians. For visual performance tuning (sharpness and contrast), you’ll especially benefit from Collimation and Thermal Management.
Aperture, Focal Length, and F-Ratio: How They Shape Views
Dobsonian performance is fundamentally governed by three linked parameters: aperture, focal length, and focal ratio (f/ratio). Understanding these will help you choose the right size and plan eyepiece purchases.
Aperture: Light Grasp and Resolution
Aperture is the diameter of the primary mirror. Larger aperture gathers more light (fainter objects become visible) and provides higher theoretical resolution. Two simple rules:
- Light grasp scales with the area of the mirror: proportional to diameter squared. An 8-inch mirror collects roughly 78% more light than a 6-inch (8^2 / 6^2 ≈ 1.78).
- Resolution improves as aperture increases, but in practice atmospheric seeing limits usable detail, especially on planets. On nights of steady seeing, bigger mirrors shine.
Focal Length and F-Ratio
Focal length is the distance over which the mirror brings light to focus; the f/ratio is focal length divided by aperture (e.g., 1200 mm / 200 mm = f/6). These affect several practical aspects:
- Magnification range: Higher focal length produces higher magnification with the same eyepiece. A 10 mm eyepiece yields 120× in a 1200 mm telescope but 200× in a 2000 mm one.
- Field of view and coma: Shorter f/ratios (f/4–f/5) support wider fields at lower magnification but display more off-axis coma in reflectors, potentially benefiting from a coma corrector. Longer f/ratios (f/6–f/8) have gentler light cones, easier collimation tolerances, and less coma, but narrower maximum fields for a given focuser/eyepiece format.
- Eyepiece requirements: Fast scopes (f/4–f/5) are more demanding on eyepieces; premium designs better control astigmatism and edge aberrations. Slower scopes are more forgiving of simpler eyepieces.

Artist: Fernly at English Wikibooks
Simple Planning Equations
Use these rules-of-thumb to plan magnification, exit pupil, and true field of view (TFOV):
magnification = telescope_focal_length / eyepiece_focal_length
exit_pupil (mm) = eyepiece_focal_length / f_ratio
TFOV (approx, degrees) ≈ eyepiece_apparent_FOV / magnification
Example: An 8-inch f/6 Dob (1200 mm focal length) with a 30 mm, 68° eyepiece gives:
- magnification ≈ 1200 / 30 = 40×
- exit pupil ≈ 30 / 6 = 5 mm
- TFOV ≈ 68° / 40 ≈ 1.7° (big enough for many open clusters)
For high-power planetary work, a 6 mm eyepiece gives 200× (1200 / 6), with a 1 mm exit pupil (6 / 6)—a comfortable brightness and a common sweet spot under steady seeing. If you are unfamiliar with exit pupil and why it matters for brightness and contrast, see Eyepieces, Exit Pupil, and Magnification Planning.
Solid-Tube vs Truss-Tube Dobsonians: Portability Trade-offs
Dobsonians come in two broad constructions: solid-tube and truss-tube. Your choice affects portability, cooldown, and setup time.
Solid-Tube Dobsonians
- Pros: Fewer parts, faster setup, and better protection of optics from dew and stray light. Often less expensive. Collimation tends to hold between sessions.
- Cons: Bulky beyond 10 inches aperture; tubes can be long and heavy. Transport and doorways can be challenging. Thermal equilibrium may take longer in large solid tubes due to limited airflow without fans.
Truss-Tube Dobsonians
- Pros: Breaks down into compact components; easier to transport large apertures (12–20+ inches). Quicker cooling because the mirror is more exposed to ambient air. Easy to add fans and shrouds.
- Cons: More parts to assemble; requires a shroud to control stray light and dew; collimation may need more frequent touch-ups. Typically more expensive per inch of aperture.
Artist: JamesStewart669
If you plan frequent travel to dark sites or desire a larger mirror, a truss design can be liberating. If you value simplicity for backyard observing, a solid tube up to 10 inches is often ideal. For handling and setup considerations, also see Setup, Transport, and Storage.
Mount Design, Balance, and Motions: The Dobsonian Way
The hallmark of a Dobsonian is its smooth, intuitive motion. The base uses altitude bearings on the sides of the tube, riding on low-friction surfaces, and an azimuth turntable that rotates on pads or rollers. Getting the “feel” right is central to the experience.
Bearings and Surfaces
- Altitude bearings: Large-radius bearings spread weight and reduce sensitivity to balance shifts, like when changing eyepieces. Smaller bearings may be more prone to stiction (stick-slip) and balance issues.
- Azimuth bearing: Many bases use three pads (often Teflon) riding on a laminate. Proper pad placement and tension deliver smooth, controllable motion.

Artist: Rob Teeter
Balance and Friction
Balance is the other half of the equation. Heavy eyepieces, finder scopes, and accessories shift the center of gravity. Solutions include:
- Adjustable altitude bearing positions or clutches.
- Counterweights (magnetic weights work well on steel tubes).
- Friction tweaks: adding or swapping bearing pads, or using felt shims.
When well-tuned, a Dob should allow one-finger tracking at moderate to high power without backlash. For automation options and digital aids that complement manual motion, see Push-to, GoTo, and Electronically Assisted Astronomy.
Essential Accessories for Dobsonian Owners
You don’t need a lot of gear to enjoy a Dobsonian, but a few items transform the experience.
- Finder: A unity 1× reflex sight (e.g., red dot) for initial pointing plus a right-angle, correct-image (RACI) finder for fine star hopping is a popular combination. For star-hopping methods, jump to Observing Techniques.
- Collimation tools: A simple collimation cap or Cheshire sight tube can get you started. A well-aligned laser (with a Barlow for the return beam) speeds things up. Details in Collimation and Thermal Management.
- Cooling fan: A small, quiet fan behind the primary mirror reduces thermal plumes. Even 6–8-inch scopes benefit on nights with large indoor–outdoor temperature deltas.
- Dew control: A dew shield or shroud, gentle heat for the secondary and eyepieces, and anti-dew caps for finders are valuable in humid climates.
- Filters: A neutral-density or variable polarizer for the Moon, color-neutral planetary filters (optional), and a good UHC or narrowband nebula filter for emission nebulae. See Light Pollution, Filters, and Target Selection.
- Observing chair: Adjustable-height chairs keep you steady and comfortable. Comfort translates into seeing more detail.
- Red light: A dimmable red flashlight preserves night vision while reading charts or notes.
- Star charts/planetarium app: Paper atlases provide context; mobile apps and digital setting circles aid navigation.
Eyepieces, Exit Pupil, and Magnification Planning
Eyepieces shape your experience as much as the telescope does. Rather than buying a big set, plan around three tiers: low-power sweeping, medium-power detail, and high-power resolution.
Exit Pupil and Brightness
The exit pupil is the diameter of the light beam leaving the eyepiece. It determines image brightness and affects perceived contrast. As noted in Aperture, Focal Length, and F-Ratio, the formula is:
exit_pupil (mm) = eyepiece_focal_length / f_ratio- Low power (4–6 mm exit pupil): Bright, wide-field views of open clusters and large nebulae. Example for f/6: 24–36 mm eyepieces.
- Medium power (2–3 mm exit pupil): Versatile for many deep-sky objects and lunar work. Example for f/6: 12–18 mm eyepieces.
- High power (0.8–1.5 mm exit pupil): Planetary, lunar detail, tight doubles, cores of globular clusters. Example for f/6: 5–9 mm eyepieces.

Artist: Morn
Apparent Field of View (AFOV) and Tracking
Eyepieces with wider AFOVs (e.g., 68–82–100°) show more sky at a given magnification. In a manual Dob, the extra drift time is a quality-of-life upgrade at high power. However, wider AFOV eyepieces can be heavier and more expensive.
Barlow Lenses and Coma Correctors
- Barlow: Multiplies magnification (commonly 2× or 3×) while retaining eye relief. A good Barlow turns a 12 mm into a 6 mm workhorse.
- Coma corrector: In fast scopes (f/5 and faster), it can substantially improve edge performance for wide-field viewing. Essential for perfectionists; optional for many casual observers. For a deeper dive, check Frequently Asked Questions.
Practical Starter Set
- Low power: 24–30 mm wide-angle for sweeping the Milky Way and framing large objects.
- Medium power: 12–15 mm for galaxies, nebulae, and lunar detail.
- High power: 5–7 mm for planets and tight double stars; a 2× Barlow extends the range.
Collimation and Thermal Management: Sharp Views Fast
Collimation ensures your mirrors and focuser align precisely; thermal management ensures your optics and tube are at or near ambient temperature. Together, they dominate image sharpness far more than mirror size on many nights.
Quick Collimation Roadmap
- Center-spot your primary mirror: Many mirrors have a donut sticker. If not, carefully add one (without removing coatings). This reference is critical for alignment tools.
- Secondary positioning: Use a sight tube to center the secondary under the focuser. Adjust the secondary fore–aft (spider vanes), rotation, and tilt to make the primary mirror appear centered.
- Secondary tilt: With a sight tube or laser, tilt the secondary so the beam hits the primary center spot.
- Primary tilt: Use the primary’s collimation knobs to return the beam (in a Barlowed laser) or center the Cheshire’s reflection.
A well-collimated Dob snaps to focus and shows airy disks on bright stars at moderate power. Re-check after transport or big temperature changes. For a reference on observing stability and comfortable posture while collimating, see Essential Accessories about an observing chair.
Thermal Control
- Cooldown (or warmup): When moving a scope from a warm house to a cool night, tube currents and mirror boundary layers degrade contrast. Use a rear fan to accelerate equilibrium. Large mirrors (10–12 inches) may require 30–90 minutes depending on temperature difference.
- Shrouds and ventilation: Truss dobs benefit from a light-tight shroud to block stray light; keep it breathable to avoid trapping warm air. Solid tubes can use fan baffles to guide airflow.
- Dew: Secondary mirrors and eyepieces dew first. Gentle heat strips or resistors, plus a dew shield, mitigate this. Avoid overheating which can introduce tube seeing.
Light Pollution, Filters, and Target Selection
Dobsonians excel under dark skies, but you can still enjoy rich observing from suburban yards with smart target selection and a few filters.
Light Pollution Realities
Skyglow washes out low-contrast features, especially in galaxies and reflection nebulae. Emission nebulae survive better because narrowband filters pass their bright lines while suppressing much of the background.
Filter Toolkit
- UHC (Ultra High Contrast): Narrowband; highlights H-beta and O III. Excellent for many emission nebulae (e.g., Orion Nebula, Lagoon Nebula).
- O III (Oxygen-III): Even narrower; spectacular on planetary nebulae and supernova remnants (e.g., Veil Nebula). Some objects become almost magical with O III.
- H-beta: Specialized; enhances certain nebulae like the Horsehead and California Nebula. Works best under very dark skies and larger apertures.
- Lunar/neutral density or variable polarizer: For comfortable Moon viewing and to control glare without color shift.
Target Strategy by Conditions
- Urban/suburban: Focus on the Moon, planets, double stars, bright open clusters, and planetary nebulae with an O III. Globular clusters can still be impressive in 8–12 inches.
- Dark-sky trips: Add galaxies, reflection nebulae, and faint emission nebulae. Use a UHC/O III to tease out structure in supernova remnants and H II regions.
- Transparency vs seeing: Nights with excellent transparency favor nebulae and faint galaxies; steady seeing favors planetary details and close double stars. Choose targets accordingly.
For techniques to find and frame these objects, explore Observing Techniques: Star Hopping, Sketching, and Logs.
Push-to, GoTo, and Electronically Assisted Astronomy
While the classic Dobsonian is manual, many modern variants add digital aids without sacrificing visual simplicity.
Push-to (Digital Setting Circles, DSC)
Push-to systems use encoders on the altitude and azimuth axes to track the telescope’s position. A handheld or app-based controller guides you with arrows or coordinates toward selected targets.
- Pros: No motors to drain batteries; preserves the tactile joy of manual motion; accelerates target acquisition under light-polluted skies.
- Cons: Requires initial alignment on one or two bright stars; accuracy depends on careful setup and balanced motion.
GoTo Dobsonians
GoTo mounts motorize both axes, automatically slewing to and tracking objects. Great for outreach and high-power work.
- Pros: Effortless object location and continuous tracking; useful for sharing views with groups.
- Cons: More expensive, heavier, and requires power. Manual motions may be limited unless a “clutch” design is provided.
Electronically Assisted Astronomy (EAA)
EAA uses sensitive cameras and short exposures to live-stack images on a screen, revealing color and detail that are hard to see visually. An alt-az Dobsonian has field rotation during longer integrations, but for short-exposure stacking, EAA can work surprisingly well. Fast focal ratios help. For a discussion of traditional imaging trade-offs, see Frequently Asked Questions.
Observing Techniques: Star Hopping, Sketching, and Logs
Mastering a few techniques dramatically improves what you can see through a Dob.
Star Hopping
Star hopping moves from bright, known stars to fainter targets via recognizable patterns. Use a wide-field eyepiece and a RACI finder to translate chart patterns to the sky.
- Plan the hop: On a chart or app, identify a bright anchor star and note a sequence of hops using asterisms and distances in degrees.
- Use motion and time: The field drifts west as Earth rotates. Learn your scope’s field of view at low power to measure angles on the sky.
- Averted vision: Look slightly off-target to engage rod cells for faint fuzzies; gently jiggle the scope to detect low-contrast edges.
Sketching and Observing Logs
Sketching improves your eye–brain coordination and leaves a record of your progress. Note sky conditions, magnifications, filters used, and features observed. Over time, you’ll learn how changes in seeing, transparency, and magnification reveal different structures.
Sharing Views
An adjustable chair, step stool for kids, and a tracking platform (if available) make outreach smooth. A GoTo Dob or equatorial platform can keep objects centered while people take turns, tying into Push-to, GoTo, and EAA considerations.
Buying Guide: New vs Used, 6-inch vs 8-inch vs 10–12-inch
Dobsonians come in sizes from compact 4–6 inches to observatory-class 20+ inches. Most beginners start with 6–10 inches. Let’s weigh common apertures and the new vs used market.
Size Comparisons

Artist: Wutthichai Charoenburi
- 6-inch (150 mm): Lightweight, affordable, fast cooldown. Excellent on the Moon and planets, many Messier objects, and double stars. Under dark skies, shows galaxies and nebulae, though with limited fine detail compared to larger apertures.
- 8-inch (200 mm): A sweet spot for many observers. Noticeable step up in light grasp and resolution over 6-inch, yet portable for most people. Solid-tube 8-inch f/6 is a classic all-rounder.
- 10-inch (250 mm): Substantial performance boost; globular clusters resolve more deeply; galaxies show structure more readily. Heavier tube and base; consider transport logistics.
- 12-inch (300 mm): Deep-sky powerhouse. Often benefits from a truss design for portability. Demands more careful thermal control and collimation. Under dark skies, galaxies and nebulae become richly textured.
New vs Used
- New: Warranty, known history, and current coatings. Good if you want a turnkey experience and support.
- Used: Excellent value. Inspect mirrors for coating condition (uniform, minimal pinholes), mechanics for smooth motion, and the focuser for slop. Ask about storage conditions and any upgrades or repairs.
Budget Allocation
- Scope and mount first, but reserve budget for at least two eyepieces and a Barlow.
- Prioritize a decent finder setup and a collimation tool.
- Consider a UHC filter for nebulae—it multiplies your deep-sky menu from suburban sites. For more on filter usage, jump to Light Pollution, Filters, and Target Selection.
When to Upgrade
Before chasing aperture fever, optimize what you have: nail collimation, manage temperature, and refine eyepiece choices. If you find yourself consistently wanting brighter, more detailed views and can manage the added size, moving from 6 to 8 inches or 8 to 10 inches is a tangible leap. For those eyeing large truss scopes, review Solid-Tube vs Truss-Tube Dobsonians and Setup, Transport, and Storage.
Setup, Transport, and Storage: Practical Tips
Practical handling matters as much as optics. A Dob that’s easy to deploy will get used more often.
Transport Tips
- Dolly or hand truck: For backyard moves, strap the base and tube to a dolly. For vehicles, use padding and secure straps to prevent jostling.
- Modular loading: Carry the tube and base separately. For truss scopes, pack the mirror box, rocker, truss poles, and upper cage methodically.
- Protect the optics: Keep caps on. For truss scopes, store the primary mirror box horizontal with a cover to minimize dust. Avoid leaving optics in hot cars.
Setup Flow
- Place the base on level ground with a clear view of the sky.
- Mount the tube, confirm smooth altitude motion.
- Attach finders, shroud (if applicable), and plug in the fan.
- Check collimation; small touch-ups take minutes. See Collimation and Thermal Management for steps.
- Set out eyepieces, charts, and a red light. Allow the scope to reach thermal equilibrium while you plan targets.
Storage
- Dry, temperature-stable spaces slow coating degradation and prevent mold or warping of the base.
- Cover the scope but allow some airflow; trap moisture and you risk corrosion or fungus.
- Loosen mirror cell clips slightly to avoid stress on the mirror if your scope uses them.
Safety, Care, and Mirror Coatings
Reflecting telescopes are robust, but a few best practices keep them performing for years.
Safety First
- Never point the telescope at or near the Sun without a proper, securely mounted solar filter that covers the objective. Concentrated sunlight can cause instant eye injury and damage equipment.
- Be mindful of cables and trip hazards in the dark. Use dim red lighting to preserve night vision while maintaining situational awareness.
Cleaning Optics
Only clean mirrors when genuinely needed (e.g., pollen, sticky residues). Dust alone has minimal impact on views.
- Mirror cleaning: If necessary, follow manufacturer guidance. Typically, remove the mirror cell, rinse with distilled water, use a few drops of mild detergent if needed, and gently float off contaminants. Rinse thoroughly with distilled water and let air-dry tilted. Avoid rubbing unless absolutely required and use high-purity cotton with the lightest touch.
- Eyepieces: Use a rocket blower first, then lens tissue or microfiber with optical cleaner sparingly. Keep solvents off painted or plastic parts.
Coatings and Longevity
- Aluminized coatings: Modern aluminum with protective overcoats can last many years if stored dry. Signs of aging include widespread pinholes, hazing, or peeling.
- Re-coating: When reflectivity loss is noticeable or corrosion advances, professional re-coating restores performance. Factor shipping and handling into cost.
Frequently Asked Questions
Can you do astrophotography with a Dobsonian?
Dobsonians are optimized for visual observing. For traditional long-exposure, deep-sky astrophotography, equatorial tracking is preferred to compensate for Earth’s rotation without field rotation. Alt-az Dob mounts inherently produce field rotation during long exposures. That said:
- Planetary imaging: Very feasible. Use a high frame rate planetary camera with short exposures and lucky imaging techniques. Large aperture helps with resolution.
- Lunar imaging: Also feasible with short exposures or video stacking.
- EAA/live stacking: Short sub-exposures can be stacked in real-time to mitigate rotation effects, especially at low focal lengths and with software that handles alignment.
- Equatorial platform: A motorized, tilting platform can provide equatorial tracking for 30–60 minutes or more, enabling longer exposures and easier high-power observation.
But for classic deep-sky imaging of many minutes per sub, a German equatorial mount with a tracking refractor or reflector remains the gold standard. If imaging is a priority, consider splitting budgets: keep the Dob for visual, and a small refractor on an equatorial mount for photography.
Do I need a coma corrector on an f/5 Dobsonian?
Coma is an off-axis aberration inherent to parabolic mirrors. It becomes more apparent at lower f/ratios and wide apparent fields. Whether you “need” a corrector depends on your tolerance and eyepiece choices:
- f/6 and slower: Many observers find coma acceptable or minor. A corrector is optional.
- f/5: Edge star shapes may be noticeably comet-like in wide-field eyepieces. Premium eyepieces reduce eyepiece-induced aberrations but don’t remove mirror coma. A corrector significantly tidies edges. Try before you buy if possible.
- f/4–f/4.5: A coma corrector is commonly considered standard equipment for wide fields.
If you primarily view at medium–high powers with narrower true fields, you may be satisfied without one. For planning eyepiece sets and exit pupils, revisit Eyepieces, Exit Pupil, and Magnification Planning.
Final Thoughts on Choosing the Right Dobsonian Telescope
A Dobsonian telescope offers one of the most direct, rewarding paths into visual astronomy. Decide first how you’ll observe: mostly at home or traveling to dark sites? Then choose the largest aperture you can comfortably transport, store, and cool. An 8-inch f/6 remains a versatile benchmark, while 10–12-inch instruments unlock rich deep-sky detail if you can manage the size. Build a thoughtful eyepiece kit around exit pupils (low, medium, high power), master basic collimation and thermal control, and learn to star-hop or adopt push-to aids as needed.
From lunar rilles to the spiral traces in distant galaxies, a well-tuned Dobsonian bridges capability and simplicity. If this guide helped clarify your choices, explore related topics in future installments. Consider subscribing to our newsletter to receive upcoming articles on visual techniques, gear tuning, and seasonal targets straight to your inbox.