All telescopes – and indeed, most optical devices – work by collecting light at the objective lens or primary mirror, and then converging these light rays into a spot called the focal plane. Particularly with eyepieces, it is basically inevitable that any telescope will have aberrations at the focal plane in some fashion, and they will always exist. The key to good telescope performance is compromising on what optical aberrations can be tolerated and making their effects negligible whenever possible.
There are essentially two methods of focusing light in any format: by refraction through lenses and by reflection from the surfaces of mirrors. Each inherently has its own aberrations essentially by default, which we’ll talk about in a bit.
Some optical aberrations can be seen during a star test, which is a process in which a bright star is examined out of focus at high magnification and the diffraction rings are examined. Others are visible as defects in focus either with an eyepiece or camera. Regardless, aberrations are annoying, and any telescope user wants to figure out what they are and how to eliminate them.
Optical Aberrations
Astigmatism
Visibility: In-focus stars look like crosses; out-of-focus stars look oval and rotate 90 degrees depending on which side of the focal plane you’re on
Affects: All telescope designs, but usually reflectors
Solution: Various
Astigmatism is an optical aberration you might already have heard of, as it’s a common defect in our eyeballs – indeed, roughly a third of the population suffers from it. It’s caused by light focusing differently on different axes, so one “side” focuses ahead or behind the other.
Astigmatism can manifest itself in two ways at the telescope.
The more complicated and harder of the two to solve is regular astigmatism at the focal plane, which is an issue that primarily affects Newtonian reflectors. Stars will look like crosses (not to be confused with the diffraction spikes in a Newtonian reflector) and at high magnifications become fuzzy and hard to focus at all. The center of the field of view shows equally astigmatic stars as the edge, and stars look like ovals when out of focus that change orientation if you are inside versus outside the focal plane. It can be caused by any of the following in a Newtonian reflector:
- Your own eyeball
- Poor quality primary mirror
- Poorly mounted primary mirror
- Poorly mounted secondary mirror
- Poorly figured secondary mirror
Finding the cause of regular astigmatism is pretty much a process of elimination. First, if you have any doubts, rotate your head/eyes and look through the eyepiece. If the orientation of astigmatism changes as you move, it’s not your telescope – you may just have very mild astigmatism in your eyes that hasn’t been noticed by a doctor. At higher magnifications, astigmatism in your eyeball becomes less of a problem – as opposed to astigmatism from the telescope, which becomes more of a problem at higher magnifications. If the problem is indeed your eyes, the solution might be as simple as wearing glasses when using lower magnifications or just ignoring the issue.
If you’re already sure you’ve got perfect vision and have determined it’s definitely not your eyes. You’re using a refractor or catadioptric scope and still see astigmatism, you can stop reading after this paragraph. You likely have a defect in your telescope’s optics that cannot be fixed and should sort out the issue with the telescope manufacturer or discuss it on a forum or a local astronomy club. If you’re using a Newtonian reflector, you might still be able to solve the problem yourself, so read on.
The most common reason Newtonians have astigmatism actually tends to be related to the secondary mirror. That being said, determining whether your primary mirror or either the secondary mirror or the primary mirror cell is at fault is fairly simple. Simply rotate the primary mirror in its mirror cell. If astigmatism rotates with it, you have an astigmatic primary mirror, which we’ll talk about next. Alternatively, it could be your mirror cell, particularly if your telescope is on the larger end.
If astigmatism does rotate with the primary mirror and is thus caused by an issue with it, there are two possibilities as to what’s wrong. Either your primary mirror is inherently astigmatic, or it has a strain in the glass. Strain can cause parts of the mirror to expand and contract differently with temperature, so although it might have no astigmatism and good performance at one temperature, it might function differently on a warmer or cooler night. Strain is caused by the glass not being annealed properly when it was cast and basically can’t be removed without re-annealing (which leads to needing to re-grind the mirror).
Inherently astigmatic mirrors tend to be some combination of old, thin, and large. They’re caused by inadequately supporting the mirror while polishing or by a polishing tool that isn’t properly conformed to the mirror. Mirrors from older Dobsonians are particularly suspect. The good news is that these mirrors can be re-figured – albeit at some cost – by various companies. They’ll also receive a boost in reflectivity from the fresh new coatings that must be applied after re-figuring.
The only way to actually test for strain is to strip the reflective coating off your primary mirror and test it with polarized light and a polarizing filter – this can be accomplished with a computer monitor and either sunglasses or a Moon filter from your telescope. Unfortunately, if your mirror lacks strain you’ll now need to re-coat the primary mirror, which costs a fair bit of money. However, in practice, strain almost always affects Chinese-made Dobsonians with BK7 primary mirrors, and usually at least 10 inches in aperture. Very few older telescopes have strained glass, and very few newer telescopes have inherently astigmatic mirrors. So if you’ve got an astigmatic primary in your Zhumell Z12, for instance, short of replacing the whole telescope you might just have to live with it. The telescope probably performs plenty well to be useful as-is.
Mirror support is a very complex topic, and whole papers have been written on the subject. However, with most newer reflecting telescopes, diagnosing issues with the mirror cell tends to be fairly simple:
- Make sure the mirror is not pinched tightly by any of the clips
- If your mirror is on a support with more than 3 points, make sure the triangles or bars are oriented correctly
- If your mirror sits on a sling, make sure the sling is properly adjusted
- If your mirror sits on some form of whiffletree edge support, make sure it’s in proper contact with the supports
If the problem persists, and your telescope is a commercial unit less than about 20 years old, it’s almost certainly not your mirror cell. If your scope is older or homemade, consult a forum like Cloudy Nights or your local astronomy club – it might be time for some modifications.
If you’ve ruled out the primary mirror or its cell – which you’ll likely be able to do in just a few minutes – the root cause is almost certainly either the secondary mirror or its support, which can be fixed, albeit with some work and expense involved.
If your secondary mirror is distorted out-of-flat by poor support or is simply not very flat, to begin with (i.e., slightly concave or convex), you’ll see astigmatism at the eyepiece. Most commercial Newtonians have their secondary mirrors attached with double-sided foam tape or some sort of epoxy, which can warp the secondary over time. You can slice this off and replace it with a few dabs of silicone fairly easily. The silicone won’t distort the secondary mirror as it has some “give” to it.
If the astigmatism still persists after re-mounting, likely, your secondary mirror is just not very good quality. This is fairly common. Thankfully, secondary mirrors are pretty standard in the industry, and you can order a new one from a company like Antares, AstroSystems, or Ostahowski, which will provide a quality guarantee with your new secondary mirror.
The second type of astigmatism is edge-of-field astigmatism, which tends to be confused with coma. Edge-of-field astigmatism manifests itself as elongated cross-shaped stars near the edge of the field of view. It typically shows up in fast focal ratio telescopes (below f/5-f/6) with inexpensive wide-angle eyepieces. It’s often masked by coma, which is usually a lot worse than any edge-of-field astigmatism, so you might notice it until you buy a coma corrector and find yourself still seeing out-of-round stars at the edge of the field of view. The cause is that an inexpensive and simple eyepiece simply has trouble correcting for the steep light cone of a fast telescope. The solution is as simple as buying a quality (albeit expensive!) wide-angle eyepiece from the likes of Tele-Vue, Explore Scientific, APM, Lunt, or Pentax. Alternatively, you can use narrow-angle eyepieces or simply choose to ignore the edge of the field of view, as you’re mostly going to be looking at objects in the center anyways.
Chromatic Aberration
Visibility: Blue, red, or purple halos around bright objects
Affects: Refractors, but also any telescope with certain eyepieces or Barlow lenses
Solution: Spend more money
Chromatic aberration is a type of optical aberration aused by a telescope – or eyepiece – that doesn’t focus all colors at precisely the same point. Achromatic refractors, particularly at fast focal ratios or large apertures, suffer from it the most – they focus green and yellow light to the same point, but red and blue light focus at slightly different points from each other, and the result is generally purple halos around bright objects. You can alleviate chromatic aberration in achromats somewhat by either stopping down the aperture or using a color filter, but these decrease the overall view quality most of the time. The only real solution is a longer focal ratio achromat, or getting an apochromatic refractor, which has extra-low dispersion glass and/or an extra lens element to alleviate chromatic aberration somewhat.
Funny enough, many apochromats – particularly those with only two lens elements or many of the less expensive triplets – still have chromatic aberration too, just less of it and usually in only red or blue, with perhaps a bit of yellow. The author’s Explore Scientific ED127 Essential, for instance, has some chromatic aberration that mostly shows up as a tiny blue halo and only on the Moon and Venus. However, it can be easily ignored and generally doesn’t show up in images.
Barlow lenses can often cause chromatic aberration. A lot of inexpensive “shorty” or “compact” Barlow lenses add chromatic aberration to the view, which is why we don’t strongly recommend them. Longer Barlows or dedicated short focal length eyepieces are preferable unless you are buying an expensive, high-quality Barlow.
Ironically, the eyepieces that add the most chromatic aberration tend to be expensive wide-angle designs. However, it’s usually present only on the Moon and at the edges of the field of view. Some very cheap and low-quality oculars such as the Huygenian, Kellner and plastic Plossl designs included with some sub-$200 telescopes can also add chromatic aberration, but of course, these are easily replaced.
Coma
Visibility: Comet, seagull, or comma-shaped stars that worsen towards the edges of the field of view
Affects: Newtonian reflectors with focal ratios below f/6
Solution: Coma corrector
Coma is inherent in parabolic mirrors because any light not directly at the center of the field of view is hitting them at an angle, which results in comet, seagull, or bullhorn-shaped stars. Coma is actually present in all Newtonian reflectors, but is smaller than the resolution limit of the telescope in anything slower than f/6.
With telescopes between f/4.5 and f/5.5, coma is often negligible enough to simply ignore if you’re using an eyepiece. It’s only present at the edge of the field of view anyway – unless your telescope is out of collimation, which you should always take care of. With scopes between f/4 and f/4.5, it’s quite bothersome. Below f/4, you absolutely need a coma corrector, even for visual use. For astrophotography, anything below f/6 needs a coma corrector by default. Otherwise, you’ll need to really crop your images for sharp stars.
A coma corrector is a nifty little device that goes in your focuser below the eyepiece or camera and corrects for coma. Most also act as a very weak Barlow lens due to the way in which they function. There are only a few on the market, all with their own advantages and disadvantages.
Keep in mind that coma correctors only work in a telescope with a 2” focuser, so many smaller fast tabletop Dobsonians can’t accept them. However, a coma corrector also costs more than one of those entire telescopes, so the prospect of one seems a bit silly in any case….
Diffraction spikes
Visibility: Bright stars and planets have +, x- or sometimes six-pointed spikes coming off them
Affects: Most reflectors, Ritchey-Chretiens, Classical Cassegrains, some refractors
Solutions: Ignore it (reflectors/etc.), stop down the lens (refractors and camera lenses)
Diffraction spikes aren’t an aberration per se, and are unavoidable on most reflecting telescopes, but can appear in refractors if there are clips or collimation screws intruding on the objective lens, and the spikes caused by these are generally uglier than the pretty, uniform spikes that reflectors have in their images. A camera lens’ iris can also produce ugly spikes. You can solve this by cutting a piece of paper or cardboard or 3D-printing an aperture mask that covers up the offending clips, screws, or iris.
Distortion
Visibility: Field of view appears like a fishbowl and/or objects become stretched as they approach the edge of the field of view. Mostly noticeable on the Moon or when moving the telescope manually at low power
Affects: All telescopes with an eyepiece
Solutions: Use a narrow-field eyepiece or ignore it
Distortion is similar to field curvature in many cases, but only affects eyepieces and generally doesn’t lead to stars being out of focus. It is a concession that many wide-angle eyepieces have to make to deliver an otherwise-sharp view. The good news is that unless you pan your telescope very quickly around the Moon or star clusters, or like to look at terrestrial objects with wide-angle eyepieces, you’ll probably never notice it.
Field Curvature
Visibility: Field of view appears like a fishbowl, stars near the edge appear out of focus
Affects: Refractors, Ritchey-Chretien telescopes, some eyepieces
Solutions: Field flattener, better eyepiece
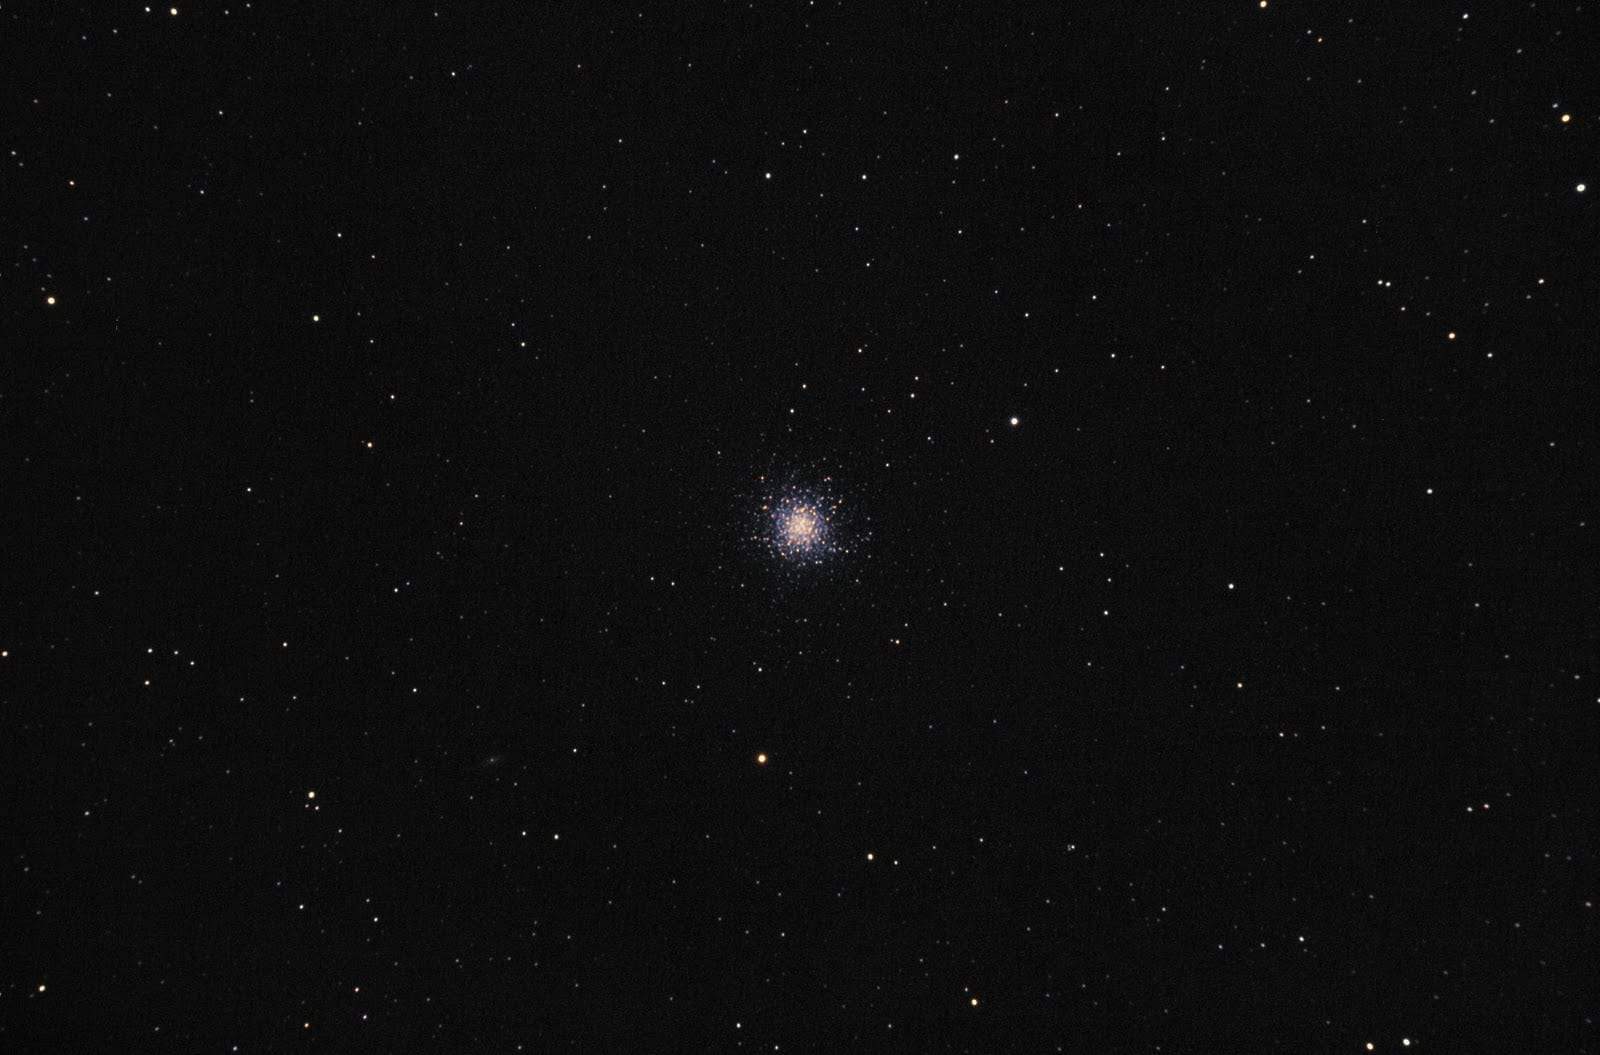
Field curvature appears like a “fishbowl” distortion of the field of view or photographic frame, with stars becoming increasingly elongated, blurry, and out-of-focus as you approach the edge. Some might remark that it looks like you’re flying toward the center at warp speed. You can see a hint of it in the image below – look at the corners and zoom in on the stars.
Field curvature typically occurs in cheap eyepieces with fast telescopes for the same reasons as edge-of-field astigmatism, and is usually mingled with it. With refractors and Ritchey-Chretien telescopes coupled to cameras, the problem is caused by the focal plane being inherently curved. You can solve this with an aftermarket field flattener that attaches to the telescope ahead of your camera.
Pinched Optics
Visibility: Funny-shaped stars
Affects: Refractors and reflectors, occasionally some catadioptrics
Solution: Loosen clips/retaining rings
Pinched optics is, as the name implies, caused by either the primary mirror, objective lens, or occasionally corrector lens being pinched by either its retaining ring. It’s typically extremely obvious and results in trefoil-shaped stars both inside and outside focus. All you have to do to solve it is loosen your mirror cell clips or lens/corrector cell’s retaining ring – enough that the optic cannot wobble or spin, but enough that it can be rotated with some force. Pinched optics aren’t just a nuisance but are actually a hazard to your telescope – tight retaining rings or clips can crack your optics over time and make them more prone to breaking if they are dropped or impacted.
Spherical aberration
Visibility: Fuzzy images, non-matching diffraction rings outside of focus
Affects: All telescopes
Solution: Replace/refigure optics or buy a new telescope
Spherical aberration is caused by your telescope focusing light at different points across the mirror, resulting in some rays bundling ahead of and some past the focal plane. It manifests itself as fuzzy images, and in stars inside or outside focus having brighter diffraction rings on one side of focus than the other. If your telescope is a reflector, you might also notice that the secondary mirror doesn’t appear the same size on one side of focus from the other. Even if your telescope is “in focus” you’ll see some fuzzy, out-of-focus light around a star.
Spherical aberration generally occurs in reflectors and catadioptrics to some degree, but in a good telescope it’s negligible. In reflectors, it’s caused by an inadequately parabolized primary mirror that is either hyperbolic or ellipsoidal (sometimes even spherical), while in catadioptrics it’s caused by the primary mirror, corrector lens, or secondary mirror deviating from the ideal shape. In refractors, it’s caused by the objective lens being either too flat or too convex in some fashion.
If your catadioptric or refractor suffers from spherical aberration, there’s unfortunately very little you can do besides ignore it or replace it. If you have a Newtonian reflector, many firms will refigure your primary mirror – or you can refigure it yourself or ask a fellow amateur in your astronomy club to do it.
Turned-down Edge
Visibility: Fuzzy stars, “hairy” out-of-focus halo, unusual glare problems in astrophotos
Affects: Reflectors, some refractors
Solution: Replace/refigure objective, or stop it down
Turned-down edge is essentially spherical aberration that only occurs at the edge of the primary mirror or objective lens, caused by it being too “flat”. Turned-down edge is very common in most telescopes, as it’s essentially caused by the polishing tool getting “caught” on the edge of the mirror or lens during manufacture and flattening it a little more than the rest of the optic. It’s also extremely difficult to eliminate once it’s been created, as you essentially have to polish down the entire rest of the optical surface to level it out with the turned-down edge. The author spent more time eliminating the turned-down edge on his handmade 6” primary mirror than he did on the entire grinding, polishing, and parabolizing process. It’s also hard to see at first glance when testing optics in the shop and might be missed at a quick glance. As a result, many telescope manufacturers simply ignore or miss the problem entirely and ship their optics out with turned-down edges. Severe TDE that extends more than a couple millimeters inward from the edge is generally referred to as a “rolled” edge, but is basically the same thing over a wider area.
TDE makes images fuzzy in a similar manner to spherical aberration – it essentially is spherical aberration, after all – but is much easier to detect in the star test as a “hairy” appearance as opposed to a sharp edge of the out-of-focus disk. Unlike spherical aberration, when it occurs in reflectors it also results in odd glare problems in some astro-images – stars far outside the telescope’s field of view can have their light “bounce” off the “flat” edge of the mirror and contaminate the image with glare, despite seemingly being too far away to do so under regular circumstances.
While it feels a little painful, the easiest fix for TDE is simply to stop down the telescope by making a cardboard or paper ring. This can be done in a few minutes. It may also alleviate the diffraction spikes in refractors caused by intruding clips or screws as mentioned above.
Vignetting
Visibility: Edge of field gradually gets darker
Affects: All telescopes, generally only a problem with either improperly-designed homemade telescopes or in astrophotos
Solution: Get a larger secondary mirror or focuser, or process it out of your images
Vignetting is rare in most telescopes with eyepieces these days, but can happen more commonly in astrophotos. It’s caused by the secondary mirror in a reflector not being large enough to illuminate a camera chip (often when a telescope not intended for astrophotography is used for such), or the focuser clips some of the light cone. You can solve the former by installing a larger secondary mirror or getting a reflector designed for imaging. Focuser vignetting generally occurs in refractors and can be solved by replacing the focuser.
Often, even with a properly-sized secondary or focuser, some minor vignetting can occur in astro-images anyway, usually due to something like a field flattener or coma corrector clipping the light path just a tiny bit. You can alleviate it by taking good flat flames, cropping the image (often necessary anyway) and/or using background-normalization tools in most image-processing tools such as the background extraction tools in PixInsight.
Zones
Visibility: Fuzzy images, non-matching diffraction rings outside of focus
Affects: All telescopes
Solution: Replace/refigure optics or buy a new telescope
Zones are essentially another form of spherical aberration, caused by areas of a primary mirror or lens having “higher” or “lower” spots. They’re created in the optical shop when part of the polishing tool has a flat or high spot that “digs” or doesn’t adequately flatten out a section of the optic, and digs it evenly as it spins around on the machine. Where spherical aberration affects all of the diffraction “rings” inside and outside focus, a zone might just appear as a single ring that looks brighter on one side of focus and dimmer on the other. Zones typically don’t impact the image nearly as badly as spherical aberration across the entire surface nor turned-down edge, and you might struggle to notice them at all.
Wrapping it up
That might’ve seemed scary. Of the optical aberrations we’ve gone over, it’s important to remember that a good chunk of them can be easily remedied or ignored. It’s very possible that you’ve simply looked right past several aberrations with your telescope on a regular basis and not even noticed them until now. While we certainly recommend scrutinizing your telescope to learn about any possible issues, it’s important to not get caught up in them too much – fix the ones that you can, and learn to work around the ones that you can’t. Above all, remember that even a relatively lousy telescope can be a lot of fun if you learn to recognize its limitations.