
When looking into a microscope, having the best magnification is only one part of getting the most precise picture. You also need accurate lighting that can adjust to accommodate your ability to see your specimen. That is where the rheostat microscope function comes into play.
Do you know what the rheostat is or why it is such an important part of the microscope’s overall performance? Let’s take a look.
What Is a Rheostat on a Microscope?
To get the most use of your microscope, it is crucial that you understand each working part, no matter how big or small.
While some pieces are less important than others, the rheostat microscope function is one of the key parts in keeping the specimen illuminated to the proper intensity. This makes it easier to see and focus while conducting your research.
The rheostat doesn’t work alone when controlling the level of lighting coming through the microscope lens; it goes hand in hand with the light produced by the condenser.
In simplest terms, the condenser produces the lighting. At the same time, the rheostat controls the current applied to the lamp, changing its intensity as you turn the knob clockwise (increase lighting) or counterclockwise (decrease lighting).
To change the intensity of the lighting, the rheostat works in the electric circuit to change the resistance of the current.
Parts of a Rheostat
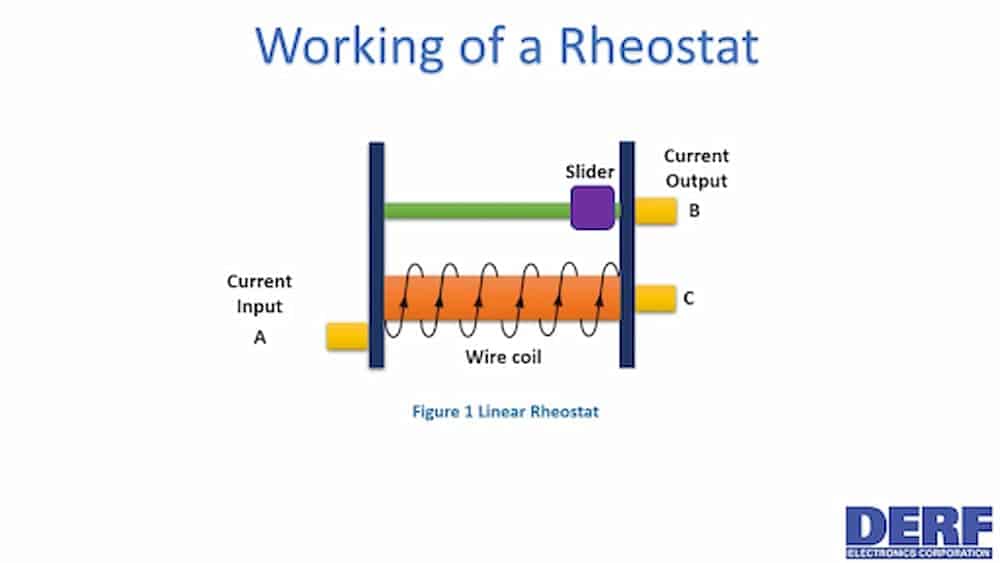
The rheostat is made up of three terminals with two connections. These terminals are labeled A, B, and C. Terminals A and B or B and C can be used together. The pair of terminals are connected along the track of the dial. The third is off-center, unconnected to the other two, but connected (in the middle) to the dial.
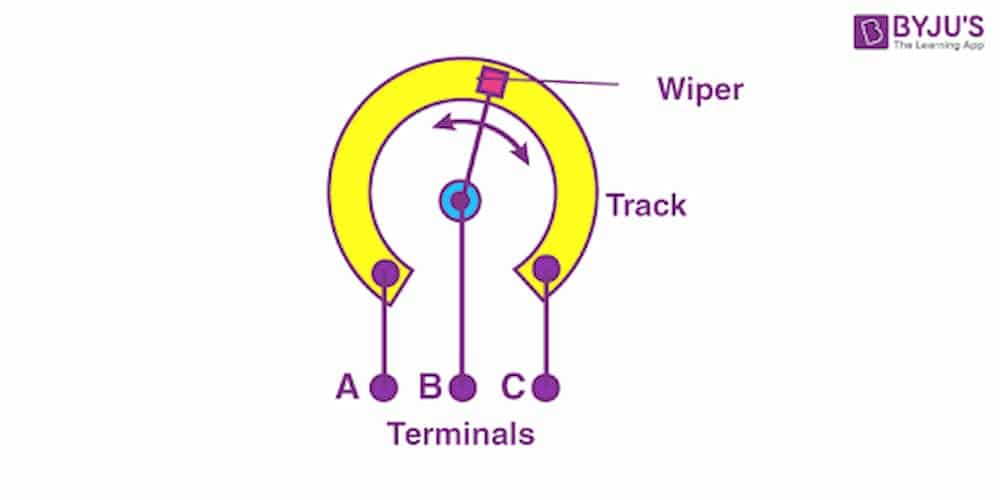
When the wiper moves in either direction, it changes the resistance of the microscope rheostat. The resistance is controlled with a coiled wire made from a copper-nickel alloy.
The parts of a rheostat are:
- 3 terminals – ABC
- Moving wiper (or slider)
- Copper-nickel alloy wire coil
- Track
Where Can You Locate a Microscope’s Rheostat?
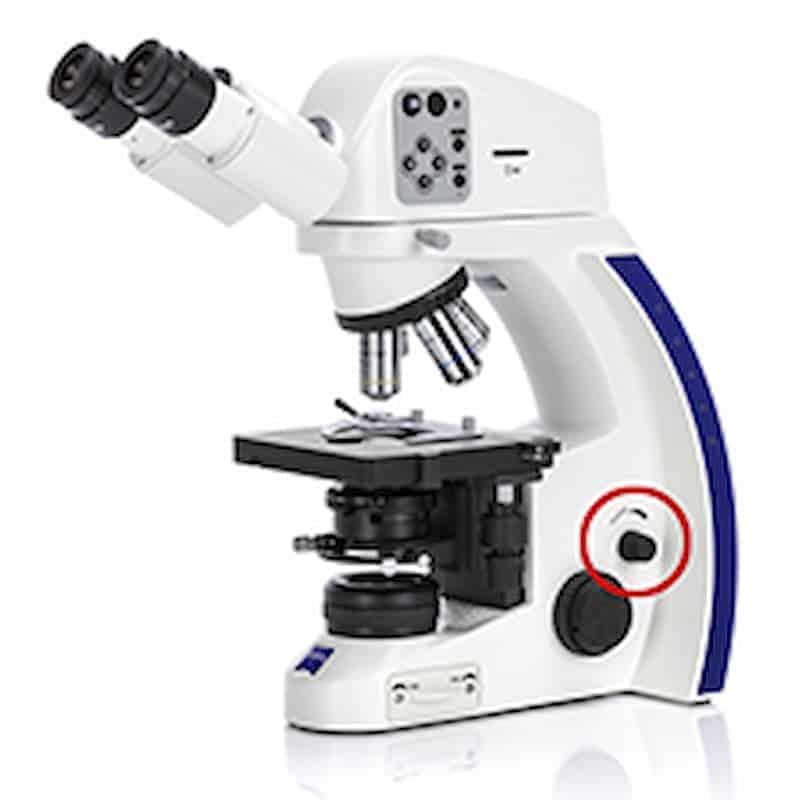
Although this part of a microscope is significant, it is one of the smallest parts of the instrument. You can find the rheostat on the microscope’s side, typically near the bottom.
The rheostat is a small black knob, sometimes a dial, that can be turned by hand in a clockwise or counterclockwise direction.
Keep in mind that the rheostat knob will be the smallest on the microscope. Do not confuse it with the large (double knob) above it. The set of knobs (located in the same place, but turned separately) towards the middle of the instrument is for focusing, with the larger one used for coarse focusing and the smaller one for fine focus.
The Different Types of Microscope Rheostats
While the main function of the rheostat is the same in every microscope, there are three different types you might see depending on the instrument you use.
- Rotary Rheostat: The rotary rheostat is frequently used in power applications and includes a rotating resistive lane. It is also referred to as a circular rheostat since the resistive element can resemble a circle.
- Linear Rheostat: The linear rheostat is often found in laboratories for teaching and research projects. This model has a resistive lane that moves in a linear or straight-line direction. While rotary rheostats provide a circular view, linear rheostats provide a cylindrical view.
- Preset Rheostat: Preset rheostats, also called trimmers, are commonly found in printed circuit boards. These trimmers are simply smaller rheostats mainly used in calibration circuits.
How Does the Rheostat Work?
The rheostat is not a recent addition to microscopes; it has been around for quite some time. It was developed by a British inventor from the 19th century, Charles Wheatstone. It was around 1845 when Wheatstone came up with the idea, joining the two Greek words rheas (stream) and states (to cause to stand.)
A rheostat is just one type of potentiometer, a term used for a more comprehensive selection of electrical resistors.
This device is used in microscopes and is commonly found in some motors’ volume controls, lighting fixture dimmers, or speed controls.
But how does it work? The rheostat is made with conductive plates. Insulating materials like plastic or glass separate the plates. They are connected to a power source and the circuit to the lighting, which controls the current’s flow, allowing you to change the resistance of the circuit (limiting the flow of energy) and controlling the lighting of the microscope.
A Rheostat Does Not Produce Light (or Control Magnification)
A common misconception about the rheostat is that it controls the light on a microscope. The rheostat does not control the light bulb directly. It only restricts the current to the light fixture, causing it to lower the power source behind the bulb.
A rheostat doesn’t control the total magnification of the microscope either. When you turn the dial, it will only put the specimen into clearer focus because it will be easier to see.
Do All Microscopes Have Rheostats?
For the most part, the answer is yes. Any microscope with an adjustable light source has a rheostat, whether it’s a compound microscope, binocular microscope, or electron microscope. The type of rheostat and its function may differ depending on the microscope model, but it is there to help adjust the brightness of your light source.
If your microscope does not have a quality rheostat or no rheostat, you will be limited on the specimens you can examine and how well you can see each one.
Summing Things Up
The rheostat microscope function is just one of many parts that provide a detailed and clear view of even the smallest specimens when looking through the lens of a microscope. It works as a communicator between the electrical current from a power source to the lighting of your instrument, giving you the necessary lighting for every task.

