Table of Contents
- What Is a Star Tracker in Astrophotography?
- When to Use a Star Tracker vs Tripod-Only Shots
- Planning a Night: Targets, Seasons, and Sky Position
- Mastering Polar Alignment: Accurate Tracking in Minutes
- Exposure Settings: Guidelines for ISO, Aperture, and Shutter
- Calibration Frames: Darks, Flats, and Bias Explained
- Field Workflow: From Setup to Pack-Down
- Stacking and Post-Processing: From RAWs to Final Image
- Troubleshooting: Star Trails, Elongation, and Gradients
- Frequently Asked Questions
- Final Thoughts on Choosing the Right Star Tracker
What Is a Star Tracker in Astrophotography?
A star tracker is a compact, motorized mount that rotates your camera at the same rate as Earth’s rotation, compensating for the apparent motion of the night sky. By tracking along the sky’s right ascension axis, a tracker lets you use longer exposures without star trails, dramatically improving the signal-to-noise ratio in images of nebulae, galaxies, and the Milky Way. Unlike full-size equatorial mounts, star trackers are small enough to fit in a backpack, making them a popular first step from nightscape photography into deep-sky imaging.
At its core, the device contains a motor and gear train that turn the camera at sidereal rate (approximately one rotation per 23h 56m). You typically mount the tracker on a sturdy photo tripod, attach a ball head or declination bracket, and then mount your camera and lens or a light telescope. The most crucial step for accurate tracking is polar alignment—aiming the tracker’s rotation axis at the celestial pole. We’ll cover that in depth in Mastering Polar Alignment.
Trackers vary by payload, accuracy, and features:
- Entry-level travel trackers: Very light, suitable for wide-angle lenses (14–35 mm) and moderate telephotos (up to ~135 mm) with careful technique.
- Mid-range trackers: Heavier payload, fine for 85–200 mm lenses and small refractors (e.g., 60–72 mm aperture) with short focal lengths, especially if you balance well.
- Advanced portable trackers: Higher precision, sometimes support guiding, counterweights, and declination brackets for better balance at longer focal lengths (200–300 mm+).
There are trade-offs. Small trackers are light but have more limited payload capacity and typically higher periodic error (the recurring tracking error due to the gear train). Larger portable trackers stay accurate longer, but they’re heavier and costlier. Your lens choice, target size, and travel plans will determine the best fit—a decision we’ll touch on again in Final Thoughts on Choosing the Right Star Tracker.
When to Use a Star Tracker vs Tripod-Only Shots
Tripod-only “nightscapes” rely on short exposures to freeze stars. Many astrophotographers start here because it’s fast, simple, and you can include foregrounds. But the 15–25 second exposures typical for static tripods limit how much faint detail you can capture in nebulae and galaxies. Enter the star tracker: It extends individual exposure time from seconds to minutes, boosting total signal per frame and letting you stack fewer subexposures for a cleaner, deeper image.

Use a tripod-only setup when you want:
- Foreground-landscape integration with the Milky Way or constellations.
- Fast setup and minimal gear—great for hiking or casual sessions.
- Panoramas where star movement during individual frames is acceptable.
Use a star tracker when you want:
- Deep-sky targets such as the Andromeda Galaxy (M31), Orion Nebula (M42), North America Nebula (NGC 7000), or the Rho Ophiuchi region.
- Faint dust and emission regions along the galactic plane that require longer exposures.
- Lower ISO and cleaner data, enabling smoother backgrounds and finer color detail after stacking.
A blended approach is also popular: shoot a tracked, sky-only exposure for the Milky Way core, then a separate untracked, lower-ISO exposure for the foreground and blend them in post. This hybrid method demands careful planning and is easier when you’ve mastered planning and know your camera’s exposure settings.
Planning a Night: Targets, Seasons, and Sky Position
Good data starts with good planning. Deep-sky subjects are seasonal and rise at specific times. Light pollution, Moon phase, weather, and your lens focal length all influence what you can capture.
Target selection by season and latitude
Not all targets are visible year-round, and visibility also depends on hemisphere. Here are general guidelines for mid-latitudes:
- Late winter to spring: Galaxy season in the Northern Hemisphere—Virgo Cluster, Leo Triplet, M81/M82. These targets tend to be smaller; a 135–200 mm lens brings them into better framing than a wide-angle.
- Late spring to summer: Milky Way core (Sagittarius/Scorpius) dominates. Wide-angle lenses (14–35 mm) capture sweeping dust lanes. At 50–135 mm you can isolate Lagoon and Trifid Nebulae (M8/M20), Eagle Nebula (M16), or the Rho Ophiuchi region.
- Autumn: Large nebulae in Cygnus (North America Nebula, Sadr region) are well placed earlier; later brings Andromeda (M31) and Triangulum (M33) higher in the evening sky.

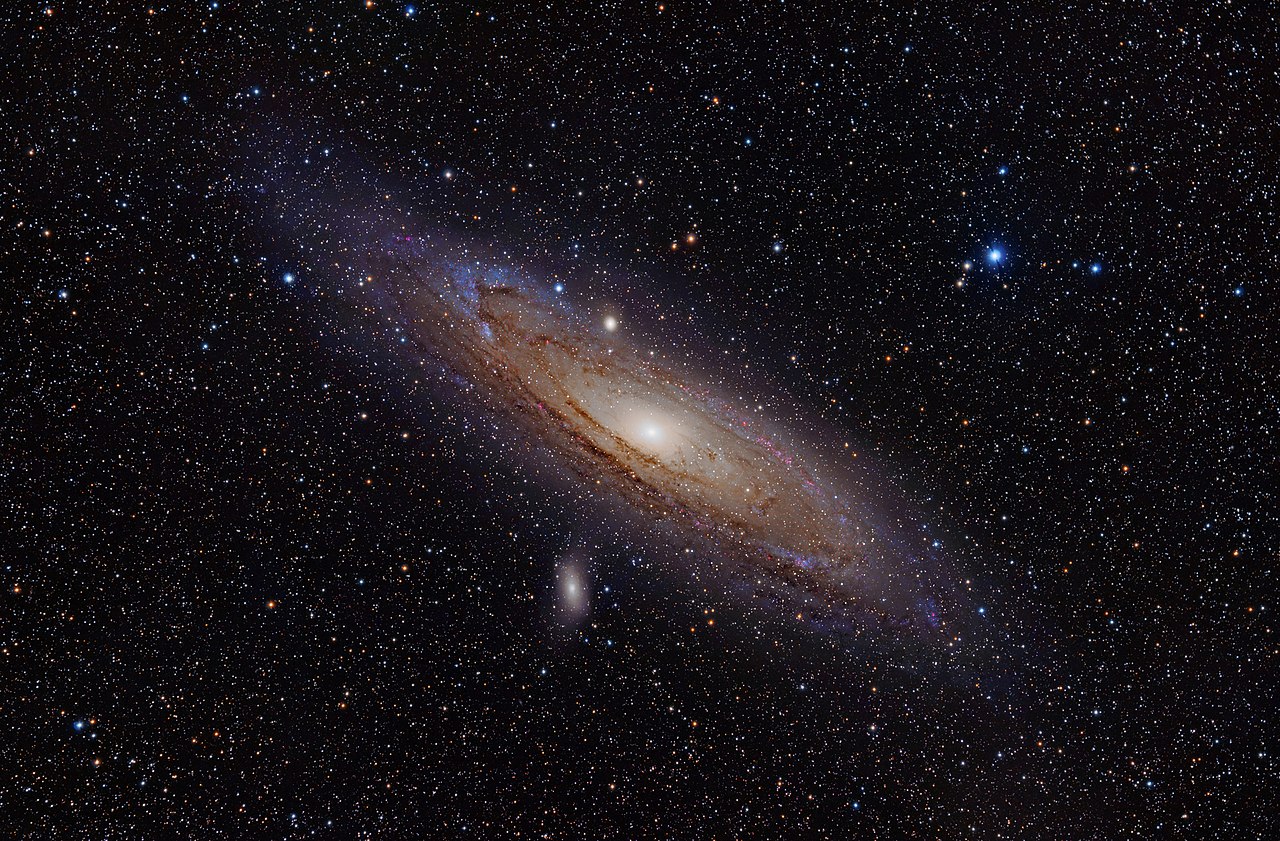
The Andromeda galaxy. Attribution: Lviatour. - Winter: Orion, Barnard’s Loop, Horsehead Nebula region. Andromeda remains visible in early evening. The Pleiades (M45) make a great target for 85–135 mm lenses.
In the Southern Hemisphere, different highlights include the Magellanic Clouds, Carina Nebula (Eta Carinae region), and the Southern Cross region.
Moon phase and sky darkness
The Moon is both friend and foe. For faint broadband targets (galaxies, reflection nebulae, dark dust), aim for new Moon or low Moonlight. A bright Moon raises the background, reducing contrast and washing out faint detail. For emission nebulae using a multi-band filter on a color camera, you can sometimes shoot with moderate Moonlight, but it’s still better when the Moon is below the horizon. Plan around the lunar cycle and observe the Moon’s rise and set times in your location.
Light pollution and filters
Dark skies make everything easier. Bortle 2–3 skies offer stunning depth, but many photographers work from suburban locations (Bortle 5–7) using a tracker to stack lots of shorter exposures. Broadband targets like galaxies are more sensitive to light pollution. For emission nebulae, multi-bandpass filters (e.g., dual narrowband for H-alpha and OIII) help under urban skies with color cameras. Be mindful that filters can lengthen exposure time and affect star color and white balance—good calibration and careful post-processing help.
Framing and field of view
Field of view depends on your focal length and sensor size. It’s helpful to preview framing with planetarium and planning apps. A few common pairings:
- 24–35 mm: Wide Milky Way scenes, constellations, large nebula complexes (Cygnus region).
- 50–85 mm: Milky Way dust structures, Orion belt region, Rho Ophiuchi, larger galaxies (M31 fits at 50–85 mm on APS-C).
- 100–135 mm: Andromeda with space around it, Heart and Soul nebulae pair, North America + Pelican nebulae.
- 200 mm: Lagoon + Trifid, Carina region, Rosette Nebula, details in the Cygnus wall.
Choose targets whose angular size matches your lens and sensor. Evaluate how your tracking duration and exposure settings will interact with the scene’s brightness—galaxies often need longer total integration than bright emission nebulae.
Weather, transparency, and seeing
For wide-field tracked imaging, transparency (a measure of sky clarity and dust/haze) is usually more important than seeing (atmospheric steadiness). Haze, smoke, or high humidity will scatter light, raising the background and muting color. Clear, dry nights with low aerosols are best. Wind matters because trackers are lightweight; bring a tripod with a low center of gravity, use leg spikes if possible, and hang a weight from the tripod apex to minimize vibration.
Mastering Polar Alignment: Accurate Tracking in Minutes
Polar alignment is the process of aligning the tracker’s rotation axis with the sky’s rotation axis. In the North, that axis is near Polaris; in the South, it’s near Sigma Octantis and other fainter stars. Even small misalignments cause drift or field rotation, especially at longer focal lengths. Fortunately, modern tools make precise alignment practical in a few minutes.

Rough alignment and leveling
Set up your tripod level on firm ground. A level base simplifies adjustments. If your tracker has a wedge, set your latitude angle with its scale, then roughly point the tracker north (or south) using a compass and adjust for your local magnetic declination if needed. Keep ferrous metal objects away from the compass to reduce error.
Optical polar scopes and app overlays
Most trackers ship with a built-in or attachable polar scope etched with a reticle. You use a smartphone app or a planetarium app to determine the current position of the pole star relative to the true celestial pole. Then:
- Rotate the tracker so the reticle is oriented properly (often aligning 0/6/12 markers with hour angles).
- Adjust altitude and azimuth knobs to place Polaris (or the appropriate asterism in the South) at the correct position on the reticle.
- Re-check after locking down the knobs—locking can shift alignment slightly.
In the Southern Hemisphere, the polar scope usually shows an asterism pattern to align near the faint pole. It’s more challenging visually, so software overlays and electronic polar alignment aids help. If your tracker supports plate-solving polar alignment via an auxiliary device or camera, it can reach high accuracy quickly.
How accurate do you need to be?
Accuracy needs scale with focal length and exposure length. As a rough guide for unguided tracking:
- 24–50 mm lenses: A quick polar alignment is usually sufficient for 1–3 minute exposures.
- 85–135 mm: Take care with alignment; 1–2 minutes are achievable on many trackers when well balanced.
- 200–300 mm: Aim for fine alignment; exposures of 60–120 seconds may be possible depending on tracker periodic error and balance.
Periodic error, wind, balance, and tripod stability also limit the practical exposure length. To compensate, take many shorter subs and stack them. If you push focal length, consider a declination bracket and counterweight to balance the system, reducing strain on the RA motor and improving tracking smoothness. We’ll discuss diagnosing issues like star elongation and drift in Troubleshooting.
Exposure Settings: Guidelines for ISO, Aperture, and Shutter
Choosing exposure settings for a tracker differs from tripod-only shooting. Because you can track, you can use longer shutter speeds at lower ISO, preserving dynamic range. But you still need to avoid overexposing stars, keep the histogram off the left wall, and manage sky glow.
Shutter speed and the NPF rule
On a static tripod, many use the 500-rule or the more precise NPF rule to limit star trailing. With a tracker, the NPF rule becomes less constraining, but it remains informative because polar misalignment and periodic error introduce residual motion. As a starting point:
- At 24–35 mm: 60–180 seconds per sub is common.
- At 50–85 mm: 60–120 seconds often works well.
- At 100–135 mm: 60–120 seconds—test and adjust.
- At 200–300 mm: 30–90 seconds depending on your tracker’s precision and wind.
Shorter subs reduce the impact of wind bursts and guiding errors. More subs mean more overhead in stacking but can improve rejection of bad frames.
Tip: If your stars show elongation, cut shutter speed in half and see if the problem improves. Then reassess polar alignment and balance before increasing exposure length again.
ISO and camera dynamic range
ISO choice depends on your camera’s sensor. Many modern cameras have “ISO-invariant” behavior over a broad range; raising ISO primarily brightens the image preview rather than adding real signal. Practical guidelines:
- Start around ISO 800–1600 for many APS-C and full-frame cameras.
- In very dark skies, ISO 1600–3200 can pull the histogram off the left without saturating bright stars.
- In bright skies, ISO 400–800 may preserve highlights and keep the background under control during long exposures.
Check the back-of-camera histogram. Aim for the peak to sit roughly 1/4 to 1/3 from the left edge for deep-sky imaging. Avoid clipping highlights on bright stars and nebular cores. After a few test frames, lock in ISO and shutter and focus on gathering lots of subexposures.
Aperture, vignetting, and star quality
Most lenses improve stopped down one or two stops from maximum aperture. Stopping down reduces aberrations such as coma and astigmatism, improves star shapes, and tames vignetting—making flat-frame calibration easier and more effective.
- For fast primes like f/1.4–f/1.8, try shooting at f/2–f/2.8.
- For f/2.8 zooms and telephotos, try f/3.5–f/4.
Make small test exposures at different apertures early in the night. Inspect star corners at 100% zoom. Choose the tightest star shapes with manageable vignetting rather than absolute speed. Faster isn’t always better if stars are bloated and corners are distorted.
Example exposure recipe
Target: Andromeda Galaxy (M31)
Lens: 135 mm at f/2.8
Camera: full-frame
Sky: Bortle 4, no Moon
Tracker: mid-range, balanced with declination bracket

Settings:
- Shutter: 90 s
- ISO: 800
- Aperture: f/2.8 (tested f/2.0, f/2.8 sharper corners)
- Frames: 120 light frames (total integration: 3 hours)
- Calibration: 30 darks, 30 flats, 100 bias or 30 dark-flats (optional)
Calibration Frames: Darks, Flats, and Bias Explained
Calibration frames are the secret sauce that transforms a good dataset into a great image. They correct for sensor noise, fixed-pattern artifacts, dust, and vignetting so your stacker can combine data cleanly and your background subtraction works reliably.
Darks
Dark frames are exposures taken with the lens cap on at the same temperature, ISO, and exposure time as your lights. They capture thermal noise and hot pixels so the stacking software can subtract them from your lights. For DSLR and mirrorless cameras, the sensor temperature drifts during the night, but a dark library near the session temperature still helps.
- Match exposure time and ISO to your lights.
- Take 20–30 darks; more reduces noise in the master dark.
- Keep the camera in similar conditions to retain temperature similarity.
Flats
Flat frames correct for vignetting and dust shadows. They must be taken without changing focus or orientation relative to your lights. Options for flats include a flat-field panel, sky flats at dawn/dusk, or a bright, evenly lit surface with a diffuser over the lens.
- Use aperture priority or manual mode to place the histogram around mid-scale without clipping.
- Take 20–30 flats for a high-quality master flat.
- Don’t change focus, zoom, or filter between lights and flats.
Bias and dark-flats
Bias frames are the shortest possible exposures at the same ISO, lens cap on. They capture read noise and electronic offset. Some workflows prefer dark-flats (darks matched to the flat exposure time) instead of bias frames, especially with certain camera models and stacking software. If in doubt, try both and choose the cleaner result in your processing pipeline.
Organizing calibration data
Good file organization prevents headaches later. Create labeled folders for lights, darks, flats, and bias/dark-flats. Include metadata in filenames: target, date, ISO, exposure, lens, f-number. Correct calibration makes everything in Stacking and Post-Processing more predictable.
Field Workflow: From Setup to Pack-Down
A consistent field workflow reduces errors and maximizes your imaging time. Here’s a step-by-step sequence that ties together planning, alignment, focusing, and data acquisition.
1) Site setup and rough alignment
- Arrive before astronomical twilight ends so you can set up in the light.
- Position the tripod on solid ground, spread legs wide, and keep the center column down for stability.
- Level the tripod, mount the tracker, set the wedge to your latitude, and point roughly north/south.
2) Balance and cable management
- Mount your camera and lens (or small scope) and add a declination bracket/counterweight if needed. Balance around the right ascension axis so the system is slightly east-heavy (counterweight side slightly heavier than camera side) to keep the gears engaged.
- Route cables safely to avoid snagging; use short, flexible cables and secure them to the mount so they move with the camera.
3) Polar alignment
- Perform the polar alignment as in Mastering Polar Alignment. Double-check after tightening locks.
- If you’re planning long exposures at 135–200 mm, refine alignment after a few test frames by checking drift in the corners.
4) Focus
- Use live view magnification on a bright star. Focus until the star is as small as possible; use a Bahtinov mask if available.
- Re-check focus whenever the temperature drops significantly or after slewing a large angle.
5) Test exposures and composition
- Take short test exposures at high ISO to dial in framing without waiting.
- Check for field rotation or drift that could indicate polar misalignment or sag. Tighten clamps, adjust alignment, and repeat.
6) Lights acquisition
- Switch to your planned exposure settings.
- Use an intervalometer with a 1–3 second gap to let the camera write files and to avoid thermal buildup in back-to-back frames.
- Consider dithering if your control setup allows it (some trackers support external dithering via a guiding solution). Dithering shifts the frame slightly between exposures to reduce fixed-pattern noise and walking noise in stacks.
7) Calibration frames
- Capture flats before adjusting focus or zoom. If using sky flats, do this at dawn; otherwise use a flat panel on-site.
- Capture darks and bias/dark-flats after the session or maintain a library organized by exposure and ISO.
8) Pack-down
- Power down the tracker and camera. Secure caps on lenses/scopes.
- Log notes: target, exposure count, issues, next steps. Field notes help you debug in Troubleshooting.
Stacking and Post-Processing: From RAWs to Final Image
Processing is where your careful field work pays off. The goals: align and combine your calibrated subs to increase signal-to-noise, correct gradients and color, and bring out faint structures without clipping shadows or highlights.
Organize and calibrate
In your stacking software, group images into lights, darks, flats, and bias/dark-flats. Calibrate lights using the masters produced from your calibration frames to remove fixed pattern noise and vignetting, as explained in Calibration Frames. Inspect frames and reject any with:
- Clouds, airplane/satellite streaks (unless you plan to rely on rejection algorithms).
- Wind blur or elongated stars.
- Focus shifts or dew/frost hazards.
Register and stack
Frame registration aligns stars across all subs. Most tools can handle rotation and slight scale changes. Use robust star detection and choose a high-quality reference frame with tight, round stars. For stacking:
- Use a sigma-clipping or Winsorized sigma algorithm to reject outliers.
- Output a 16-bit or 32-bit linear master for flexible post-processing.
- If your software supports drizzle, consider drizzling for under-sampled data (e.g., wide-field shots with small stars) to recover detail at the cost of more noise; drizzle benefits from many dithered subs.

Gradient reduction
Light pollution, airglow, and Moonlight create gradients that obscure faint detail. Apply gradient removal early, while the image is still roughly linear or just after a mild stretch. Use multiple sample points away from bright nebulae and the galaxy core. If vignetting remains despite flats, gradient tools can help, but ensure you’re not removing real nebulosity.
Color calibration and star management
Color balance is easier if you kept ISO and exposure consistent. With galaxies, neutral white balance often reveals natural star and galaxy colors. With emission nebulae and multi-band filters, you may need to blend channels or adjust color mapping for a pleasing but informative palette.
- Photometric color calibration (if your software offers it) uses cataloged star colors to set accurate color balance.
- Star reduction can help prevent stars from overwhelming nebulae. Apply conservatively to maintain a natural look.
Noise reduction and sharpening
Apply noise reduction selectively, targeting the background while protecting structure. Use masks to preserve faint filaments. Gentle, multi-scale sharpening on nebular edges can enhance perceived detail. Avoid over-sharpening which creates halos.
Stretching the image
Move from a linear stack to a visible image via histogram and curves adjustments. Stretch in small steps, alternating with color and background refinements. Watch for clipped blacks and blown highlights in bright star cores or nebular regions.
Final touches
- Crop minimally to remove registration edges.
- Annotate targets if desired, but keep the processing non-destructive.
- Export in a wide-gamut format for archiving and an sRGB JPEG for web sharing.
Troubleshooting: Star Trails, Elongation, and Gradients
Even with careful technique, issues arise. Here’s how to diagnose and fix common problems in tracked wide-field and telephoto imaging.
Elongated stars
Elongation can come from polar misalignment, periodic error, wind, or focus. Diagnose by direction and symmetry:
- Drift in declination (up/down in the frame) often suggests polar alignment error. Re-check alignment and tripod stability. See Mastering Polar Alignment.
- Periodic error typically produces back-and-forth elongation along right ascension. Shorten exposure time and increase sub count. Balancing slightly east-heavy can help.
- Wind-induced motion causes random, inconsistent elongation. Shield the setup and lower the tripod.
- Focus softening enlarges stars but keeps them round. Re-focus with live view or a Bahtinov mask.
Field rotation
If stars appear to rotate around a point in the frame between exposures, polar alignment is off. This is more apparent farther from the celestial pole and with longer exposures. Improve polar alignment and avoid over-tightening one axis more than the other.
Banding and walking noise
Fixed-pattern noise that “walks” across the stack can result from no dithering and subtle drift. Mitigations:
- Dither between frames if your control setup allows it.
- Use sigma-clipping stacking and include a sufficient number of subs.
- Calibrate with high-quality darks and bias/dark-flats as described in Calibration Frames.
Gradients and color casts
Strong gradients may appear in light-polluted skies or with the Moon up. A multi-band filter on emission targets can help, but post-processing is key. Use gradient removal and careful color calibration. Check that your flats were taken without changing focus or rotation; mismatched flats can create uneven backgrounds.
Star bloat and halos
Very fast apertures, dew, or aggressive sharpening cause large, soft stars. Stop down the lens slightly, use a dew heater or shield, and apply gentle deconvolution or star reduction with masks. Some filters introduce halos around bright stars—try different tilt or spacing, or reduce the effect in post.
Trails in some frames but not others
Intermittent trails often indicate wind, cable snagging, or tripod bumping. Secure cables and shelter the setup. Add a small interval between subs to let vibrations settle. If you see a periodic pattern in trailing, it may be tied to the tracker’s gear period; shorten exposures so that subs sample different parts of the error curve.
Frequently Asked Questions
Can a star tracker replace a full equatorial mount?
A star tracker is a portable, simplified form of an equatorial mount. It excels with camera lenses and small, short focal length telescopes because it’s light and easy to set up. However, trackers typically lack features like motorized declination, robust payload capacity, and low periodic error necessary for long focal lengths or heavy imaging trains. For lenses up to ~200 mm and lightweight refractors, a tracker can deliver excellent results. For larger optics, auto-guiding, and more demanding imaging, a full equatorial mount is the better choice.
How many total hours should I shoot on a target?
More integration time nearly always improves signal-to-noise. For bright targets (Orion Nebula, Andromeda), two to four hours can yield strong results from moderately dark skies. Fainter nebulae or galaxies benefit from 5–10+ hours, especially under light pollution. If your schedule is limited, prioritize nights with good transparency and revisit the same target over multiple sessions, keeping framing and rotation consistent so you can combine data later in your stacking workflow.
Final Thoughts on Choosing the Right Star Tracker
Star trackers open the door to deep-sky astrophotography without the bulk and complexity of a full observatory setup. By mastering the basics—solid planning, precise polar alignment, smart exposure choices, thorough calibration, and careful post-processing—you can produce images with rich color and detail that stand up to scrutiny.
When choosing a tracker, match the payload and accuracy to your lens or small telescope, and consider how portable you want the system to be. If you primarily shoot 24–85 mm, a compact tracker is ideal. If you plan to grow into 135–200 mm and beyond, look for a unit with a stable wedge, good periodic error performance, and support for counterweights and possibly guiding. Whatever you choose, focus on repeatable technique: balance, alignment, focus, and clean calibration—these matter more than incremental hardware differences.
Most importantly, enjoy the process. Each session offers a chance to learn and refine, and the night sky rewards persistence. If this guide helped you, explore more of our in-depth astrophotography articles, and subscribe to our newsletter to get future field tutorials, processing walkthroughs, and gear guides delivered straight to your inbox.