
Table of Contents
- What Is a Dobsonian Telescope?
- Why Choose a Dobsonian: Advantages and Trade-offs
- Aperture, Focal Ratio, and Optical Quality in Dobsonians
- Collimation, Cooling, and Thermal Management
- Rocker Boxes, Bearings, and Ergonomics
- Essential Eyepieces, Finders, and Accessories
- Setup Workflow and Observing Techniques
- Urban Observing: Light Pollution, Filters, and Exit Pupil
- Transport, Storage, and Maintenance
- Buying Guide: New vs Used, Brands, and Upgrades
- Can You Do Astrophotography with a Dobsonian?
- Frequently Asked Questions
- Final Thoughts on Choosing the Right Dobsonian
What Is a Dobsonian Telescope?
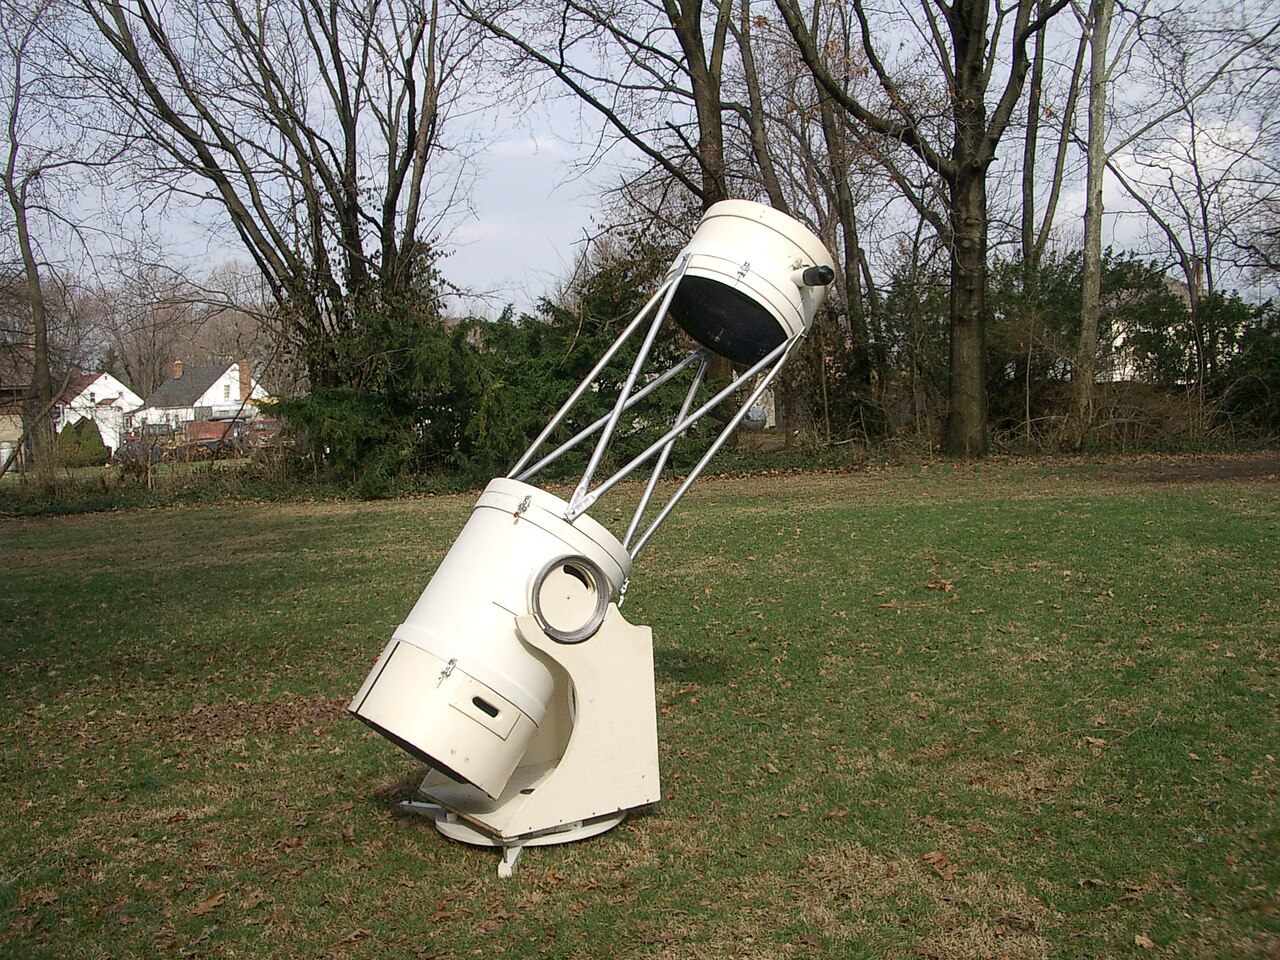
A Dobsonian telescope is a Newtonian reflector optical tube mounted on a simple, alt-azimuth wooden base. The concept, popularized by John Dobson in the 1960s–1970s, emphasized large aperture, low cost, and ease of use. By simplifying the mount and using mass-produced mirrors, Dobsonians brought deep-sky observing within reach of countless backyard astronomers.
At its core, a Dobsonian is a Newtonian: light enters the open tube, reflects off a concave primary mirror, bounces to a flat secondary mirror at 45°, and exits the side of the tube into the focuser. What makes it distinctly “Dobsonian” is the mount — a low, stable rocker box that moves up-down (altitude) and left-right (azimuth) with smooth, hand-guided motion.

Artist: The original uploader was Tmoore at English Wikipedia.
Dobsonians are often described by their aperture — the diameter of the primary mirror. Common sizes include 6-inch (150 mm), 8-inch (203 mm), 10-inch (254 mm), and 12-inch (305 mm). Larger “truss” designs can reach 16 inches (406 mm) or more. The simplicity of the mount means your budget mainly buys aperture, which is the single most important variable for gathering light and seeing faint galaxies, nebulae, and star clusters.
If you are deciding between telescope types, the Dobsonian’s mission is clear: provide the most light-gathering area, per dollar, in a user-friendly format that is quick to set up and intuitive to operate. In this guide, we will expand from the fundamentals into practical choices, performance expectations, and observing techniques. For a high-level pros-and-cons discussion, see Why Choose a Dobsonian. If you already own one and want fast improvement, skip to Collimation, Cooling, and Thermal Management and Setup Workflow and Observing Techniques.
Why Choose a Dobsonian: Advantages and Trade-offs
Dobsonians are the default recommendation for a reason. Here are the major advantages and realistic trade-offs to consider before you buy.
Advantages
- Aperture per dollar: You get more mirror for less money compared with refractors or catadioptric scopes of similar size. This unlocks fainter deep-sky objects and more detail in extended nebulae.
- Ease of use: The alt-az base is intuitive. You nudge the scope to follow targets. With a well-balanced setup, motion is smooth and responsive.
- Quick setup: A solid-tube 6–10 inch Dobsonian can be carried out in two pieces and be observing in minutes. There are no electronics or polar alignment steps required.
- Low maintenance cost: Collimation tools, a couple of eyepieces, and maybe a cooling fan are typically all you need. The base and tube are mechanically simple.
- Observing comfort: Eyepiece height stays relatively friendly; many 6–10 inch models are comfortable while seated. This matters for long sessions and steady views.

Artist: NathanScientific
Trade-offs
- Manual tracking: Planets and high magnifications drift quickly. You must nudge the scope to keep objects centered. Practice helps; equatorial platforms are an optional upgrade if you need tracking.
- Bulk and weight: While cheap per inch, a 10–12 inch solid-tube Dob is big. Truss designs improve portability but add assembly steps.
- Collimation required: Newtonians need periodic optical alignment. It’s not hard with the right tools, but it’s an extra step compared with small refractors.
- Open tube sensitivity: Mirrors need time to cool to ambient temperature for best performance. Open tubes also require dust covers and occasional cleaning.
- Astrophotography limitations: The alt-az mount is not designed for long-exposure imaging. Electronically Assisted Astronomy (EAA) is possible, but traditional deep-sky astrophotography favors equatorial mounts. See Astrophotography with a Dobsonian.
Most beginners and visual observers find the benefits outweigh the trade-offs. If your goal is visual observing of deep-sky objects with occasional looks at the Moon and planets, a Dobsonian is an outstanding choice. If your primary goal is long-exposure astrophotography, look at equatorially mounted systems instead.
Aperture, Focal Ratio, and Optical Quality in Dobsonians
Choosing the right size and optical configuration determines what you will see, how portable your setup is, and how demanding collimation and eyepieces become. This section explains the key parameters and how they interact.
Aperture and what it buys you
Aperture (mirror diameter) sets the light-gathering area. Area scales as the square of the diameter. For example, compared to a 6-inch scope, an 8-inch collects (8/6)^2 ≈ 1.78× more light; a 10-inch collects (10/6)^2 ≈ 2.78×; a 12-inch collects (12/6)^2 ≈ 4×. This translates into fainter limiting magnitudes and brighter, more detailed views of nebulae and galaxies under dark skies.
A common rule of thumb for the visual limiting magnitude (VLM) of a telescope under dark skies is:
VLM ≈ 2 + 5 log10(D in cm) + observer/sky term
Where the observer/sky term depends on factors like sky brightness and eye sensitivity. The key takeaway: every increase in aperture significantly boosts the number of targets and the brightness of extended deep-sky objects. Under light pollution, aperture still helps, but sky brightness becomes a dominant factor. We address this in Urban Observing and Filters.
Resolution and the Dawes limit
Angular resolution for double stars is often estimated using the Dawes limit:
Dawes limit ≈ 116 / D(mm) arcseconds
Bigger mirrors can resolve finer details in theory, but the atmosphere (seeing) typically sets the real limit on most nights. Even so, larger apertures show subtler contrast differences on planets and finer star clusters when the seeing cooperates.
Focal ratio (f/number) and its consequences
The focal ratio is the telescope’s focal length divided by its aperture. A 200 mm (8-inch) f/6 has a 1200 mm focal length. In Dobsonians, f/5–f/6 is common for 8–10 inch, f/4–f/5 for larger truss designs. Faster (lower f/number) systems yield wider fields and shorter tubes, but demand better collimation and eyepieces that handle off-axis aberrations.
- f/4–f/5: Wide fields and compact tubes, but more coma visible at the edge. Collimation is more critical. A coma corrector can improve edge performance.
- f/5–f/6: A sweet spot for many users. Manageable tube length, tolerates a wider range of eyepieces, and coma is less bothersome.
- f/6–f/8: Longer tubes and narrower fields, but forgiving of eyepieces and collimation. Good for lunar/planetary contrast and simpler accessory needs.
Artist: JamesStewart669
Primary mirror quality
Modern mass-produced mirrors are often quite good. Optical quality is usually specified by peak-to-valley (P–V) wavefront error and Strehl ratio. High Strehl (e.g., 0.8 or better) suggests a well-figured optic. In practice, proper collimation, thermal equilibrium, and good seeing dominate what you experience at the eyepiece. A well-cooled, average mirror can outperform a premium mirror that is out of collimation or thermally unstable.
Secondary mirror size and contrast
The secondary mirror causes a central obstruction, which slightly reduces contrast and can introduce diffraction spikes. Typical obstruction ratios (secondary diameter divided by primary diameter) for Dobsonians are around 20–25%. For visual use, this is a reasonable compromise between full-field illumination and contrast. Planetary observers sometimes prefer designs with smaller obstructions (longer focal ratios), while deep-sky fans prefer faster systems with larger secondaries that fully illuminate wide fields.
Magnification, exit pupil, and field of view
- Magnification (M): Telescope focal length / eyepiece focal length.
- Exit pupil (EP): Eyepiece focal length / telescope f-ratio. Typical useful range is ~0.5–7 mm depending on target and sky brightness.
- True field of view (TFOV): Approximately eyepiece apparent field (AFOV) divided by magnification. A more precise estimate uses the eyepiece field stop diameter: TFOV ≈ 57.3° × (field stop / telescope focal length).
Balancing these parameters lets you optimize for target type and observing conditions. For example, with an 8-inch f/6 (1200 mm focal length), a 30 mm eyepiece yields 40×, ~5 mm exit pupil, and a wide TFOV; a 10 mm gives 120× and a ~1.7 mm exit pupil good for galaxies and planetary nebulae; a 5 mm gives 240× for lunar/planetary when the seeing supports it.
Collimation, Cooling, and Thermal Management
To see the best your Dobsonian can deliver, you must align the optics (collimation) and control thermal effects. This is where many beginners gain their biggest performance leap.
Why collimation matters
In a Newtonian, the primary mirror, secondary mirror, and focuser must share a common optical axis. Misalignment smears detail and reduces contrast. Fast focal ratios (f/5 and faster) are more sensitive to collimation error; at high magnification, even small misalignments show up. Fortunately, with a simple set of tools and a repeatable process, collimation is reliable and quick.
Tools you can use
- Collimation cap: A simple, low-cost peep cap. Good enough for f/6 or slower.
- Cheshire/sight tube: A classic tool that helps set secondary position and primary tilt.
- Laser collimator: Speeds up alignment. Must be itself collimated. Useful for primary and secondary adjustments, especially in the dark.
- Barlowed laser: Excellent for primary mirror tilt because it samples the center spot return broadly, reducing sensitivity to laser misalignment.
A step-by-step, repeatable workflow
Here is a concise process that works well from f/4.5 to f/6 Dobsonians. Do this in daylight the first few times:
- Center the secondary under the focuser: Use a sight tube or remove the eyepiece and eyeball. Adjust secondary placement (fore-aft and rotation) so the primary mirror appears centered and fully visible.
- Square the secondary (tilt): Using a laser, adjust the secondary’s tilt so the laser dot lands on the primary mirror’s center spot. Alternatively, use the crosshairs of a sight tube.
- Adjust the primary (tilt): With a Cheshire or barlowed laser, adjust the primary screws so the return pattern centers on the reference ring or center marker shadow. Tighten evenly; do not over-tighten.
- Star test at high power: On a steady star, defocus slightly inside and outside of focus. Concentric diffraction rings suggest good collimation. Tweak primary if needed.
You can turn this into a printable checklist for the eyepiece case. For example:
1) Secondary centered? (yes/no)
2) Laser on primary center? (yes/no)
3) Barlowed return centered? (yes/no)
4) Star test tweak? (yes/no)
Cooling and thermal management
Thermal equilibrium is crucial. A warm mirror and tube set up internal convection (“tube currents”) that blur fine detail. Here’s how to manage it:
- Allow time: Set the scope outside early. A 6–8 inch mirror often benefits from 20–45 minutes; 10–12 inch mirrors may need 45–90 minutes depending on temperature drop.
- Use a fan: A small rear-mounted fan accelerates cooling and improves boundary layer behavior at the mirror surface. Run it at low speed even while observing to maintain equilibrium.
- Shrouds and insulation: Truss scopes benefit from a light shroud to block stray light and moderate tube currents. Solid tubes can benefit from a simple internal baffle or flocking to reduce reflections.
- Acclimate optics and eyepieces: Keep eyepieces in the ambient air before use. Avoid breathing into the focuser in cold weather to prevent fogging.
When seeing is mediocre, you can still enjoy lower-power deep-sky observations. For planets and double stars, wait patiently for moments of steadiness and keep magnification modest. Cooling and collimation together deliver most of the planetary performance a Dobsonian can offer.
Rocker Boxes, Bearings, and Ergonomics
Artist: Unknown
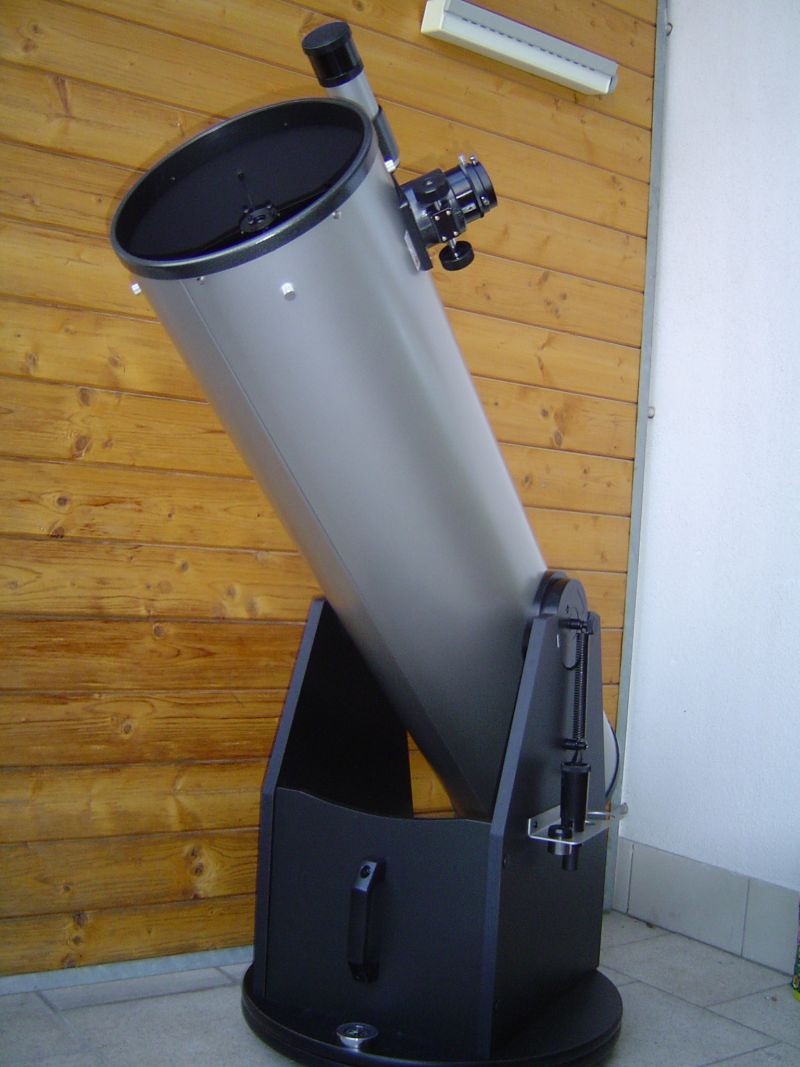
The Dobsonian base is a marvel of simplicity. The goal is to achieve smooth, predictable motion with enough friction to hold position without lock knobs. Understanding how bases work helps you diagnose stiction, backlash, and balance issues.
Bearings and materials
- Altitude (up/down): Typically uses semicircular side bearings riding on Teflon (PTFE) pads. Larger diameter bearings spread load and improve smoothness.
- Azimuth (left/right): The base usually uses a central pivot and Teflon-on-laminate pads. Textured laminate surfaces (e.g., FRP) paired with PTFE can feel buttery smooth when correctly loaded.
- Balance: A well-balanced OTA (optical tube assembly) stays put when you swap eyepieces. Adjustable bearing positions, counterweights, or spring tensioners help if heavy accessories cause nose-diving.
Friction tuning
Many commercial bases have either too much stiction (hard to start motion) or too little friction (scope won’t hold position). Small changes can help:
- Replace plastic pads with PTFE of appropriate area.
- Add or remove washers around the azimuth pivot to fine-tune preload.
- Use a high-friction laminate on bearing surfaces; avoid waxes that make things too slippery.
- Mind the base’s flatness. Warped particleboard affects motion; keep bases dry and supported.
Ergonomics and observing comfort
Comfort equals performance. To see faint details, you must be relaxed and steady. A few simple changes can transform your sessions:
- Observing chair: An adjustable-height chair keeps your head steady and eyes relaxed. It’s arguably the best accessory you can buy after eyepieces.
- Finder placement: Rotate the tube so the finder is easy to reach from your usual stance. Keep cables and shrouds clear.
- Standing vs seated: Most mid-sized Dobs allow seated observing above 45° altitude. For low targets, add a small platform or adjust chair height.
Good ergonomics also improve star-hopping efficiency. See Setup and Observing Techniques for an efficient workflow.
Essential Eyepieces, Finders, and Accessories
A small set of well-chosen accessories dramatically expands what you can see and how easily you find it. Below are practical recommendations grounded in optical basics.
Eyepiece strategy: three focal lengths plus a Barlow
For an 8-inch f/6 (1200 mm), a versatile trio might be:
- Low power/wide field: 28–32 mm, 65–82° AFOV. Framing large nebulae and open clusters; bright finder field. Exit pupil ~4.7–5.3 mm.
- Medium power: 12–14 mm, 65–82° AFOV. Most-used range for galaxies and globular clusters. Exit pupil ~2–2.3 mm.
- High power: 5–7 mm, 60–82° AFOV. Lunar/planetary and small planetaries. Exit pupil ~0.8–1.2 mm.
A quality 2× Barlow or telecentric amplifier doubles your set efficiently. Keep eye relief and weight in mind; very heavy eyepieces may require balance tweaks on the Dobsonian base.
Coma correctors and field edges
At f/5 and faster, off-axis coma elongates star images at the edge of wide fields. A coma corrector reduces this, especially noticeable with 82–100° AFOV eyepieces. It adds complexity (spacing and focus) and weight but can transform the view in fast scopes. At f/6, many observers are satisfied without one.
Finders and alignment
- Zero-power finders (red dot, Telrad): Project a reticle on the sky to match what you see with your naked eye. Excellent for initial pointing and star-hopping.
- Optical finders (8×50, 9×50): Magnify the sky, show fainter stars, and help with precise hops. Many observers use both a Telrad and a right-angle, correct-image (RACI) finder.
- Align in twilight: Align your finder on a distant terrestrial object or bright star near dusk. This saves time and frustration later.
Filters: broadband, narrowband, and specialty
- UHC (ultra-high contrast) filters: Narrowband filters that emphasize emission nebulae like the Lagoon (M8) and Orion (M42) by passing O III and H-beta lines while rejecting much of the continuum. Very effective in light pollution.
- O III filters: Even narrower, excellent for planetary nebulae (e.g., the Dumbbell, M27) and supernova remnants (e.g., the Veil). They dim the stars more but can dramatically improve nebular contrast.
- H-beta filters: Specialized for a few targets like the Horsehead and California Nebula. Consider only after UHC/O III.
- Neutral density & polarizing filters: Useful for lunar brightness control. Subtle; personal preference varies.
Other helpful accessories
- Dew control: Secondary heaters or simple dew shields reduce fogging. Keep a soft cloth handy.
- Cooling fan and battery: A quiet 12 V fan runs for hours from a small battery pack.
- Flocking material: For solid tubes, flocking opposite the focuser reduces internal reflections and improves contrast.
- Digital setting circles (DSC): Encoders with a handheld or app-based controller let you push-to objects using a catalog. They preserve the Dobsonian simplicity while boosting productivity.
Setup Workflow and Observing Techniques
A practiced workflow saves time and yields better views. This section consolidates the entire process into a sequence you can adapt to your site.
Before you leave home
- Plan targets: Use a planetarium app to list objects by altitude and transit time. Group targets by constellation to minimize slewing.
- Check conditions: Separate transparency (clarity) from seeing (steadiness). Galaxy hunting favors transparency; planets and double stars favor steady seeing.
- Pack methodically: Eyepieces, finder, collimation tools, red flashlight, chair, filters, fan battery, charts, warm clothing, snacks, and water.
On site: a repeatable setup
- Place the base: Levelish ground. Orient azimuth so sweeping along declination lines feels natural to you.
- Seat the OTA: Engage altitude bearings securely. Check balance with a mid-weight eyepiece installed.
- Power the fan: Start cooling immediately. Attach shroud (truss scopes) and dew control if needed.
- Align the finder: On a bright star or distant terrestrial object. Confirm with both zero-power and optical finders.
- Collimate: Quick laser/Cheshire touch-up. Then enjoy a brief star test on first target once the mirror cools.
Star-hopping and framing
With a Telrad or red-dot finder, use bright asterisms as stepping stones. Switch to the RACI finder for the final hop. In the low-power eyepiece, use a sweep pattern to search the expected area. Once you spot the target, refine centering and change eyepieces to match target size and surface brightness.
Here is a compact “hop and observe” routine you can keep in your notes:
1) Telrad to asterism
2) RACI: confirm field stars
3) Low power: sweep 1–2 FOVs
4) Center and switch eyepiece
5) Breathe, avert vision, nudge gently
Techniques for faint details
- Averted vision: Look slightly to the side of the object to engage more sensitive retinal regions.
- Field motion: Let the object drift slowly to stimulate detection of low-contrast details.
- Filter toggling: Compare views with and without the UHC/O III to isolate emission features.
- Notebook sketches: Sketching forces you to look harder and often reveals details you might miss.
Planetary observing rhythm
For the Moon and planets, patience and timing are everything. Begin with moderate power (e.g., 150–200× on an 8-inch) and step up when moments of steady air appear. Wait for the planet to climb higher (less atmospheric dispersion). Keep both eyes open or use an eye patch to reduce fatigue. If the view shimmers, back off the magnification. Good seeing can arrive unexpectedly — revisit targets throughout the night.
Urban Observing: Light Pollution, Filters, and Exit Pupil
Dobsonians excel under dark skies, but many observers live in cities. You can still see a great deal with the right techniques and optical choices.
Targets well-suited to bright skies
- Moon and planets: Unaffected by sky glow; planetary detail depends more on seeing than darkness.
- Double stars: High contrast point sources. Try classic pairs and color contrasts.
- Bright clusters and planetaries: Open clusters like the Pleiades and compact planetary nebulae remain satisfying.
Using filters to fight glare
Broadband “light pollution” filters have limited effect on galaxies. Narrowband filters (UHC, O III) remain useful because they isolate specific emission lines. On emission nebulae, these can produce an immediate improvement, even from suburban sites.
Exit pupil control
In bright skies, a smaller exit pupil reduces background brightness and increases perceived contrast. Practically, this means avoiding very low power on faint galaxies from the city. For an f/6 scope, try eyepieces that yield a 2–3 mm exit pupil (e.g., 12–18 mm) for many deep-sky objects under light pollution. For extended nebulae with a filter, a 4–5 mm exit pupil can still work well because the filter suppresses the background.
Stray light and shielding
- Use a shroud (truss designs) and flocking to cut internal reflections.
- Add a simple light shield opposite the focuser to block neighborhood lamps.
- Choose observing spots with nearby structures or trees that block direct lights while preserving sky view.
For a deeper discussion of filters and optical parameters, revisit Essential Eyepieces, Finders, and Accessories and Aperture and Optics.
Transport, Storage, and Maintenance
Taking care of a Dobsonian is straightforward but important. A few habits protect optical performance and extend service life.
Transporting your Dobsonian
- Two-piece carry: Most solid-tube Dobs are moved as base and tube separately. Use hand-truck dollies for longer hauls. Protect the mirror end with the cover on.
- Truss designs: Break down into mirror box, rocker, trusses, and upper cage. Use padding to prevent rub marks. Label your truss poles for fast assembly.
- Vehicle fit: Measure before buying. An 8–10 inch solid tube often fits across a backseat. Bases can be bulky; consider knock-down kits or truss designs if space is tight.
Storage and care
- Dry, temperature-stable location: Avoid damp basements and unventilated sheds. Particleboard bases dislike humidity.
- Dust control: Keep mirror covers on. Use a shower cap or fitted dust cover over the focuser end.
- Periodic cleaning: Mirrors do not need frequent cleaning — dust has little optical effect. When cleaning becomes necessary, use gentle methods: distilled water, mild detergent, and minimal touching. Let the mirror air dry on edge.
Maintenance checklist
- Check collimation bolts and mirror cell clips for snugness (not tight on the mirror).
- Inspect bearings and pads for wear. Keep surfaces clean.
- Verify fan mounts and wiring. Quiet vibration-free operation is the goal.
- Refresh base hardware if exposed to moisture.
Buying Guide: New vs Used, Brands, and Upgrades
Deciding what to buy involves budget, storage, and observing goals. Here is a pragmatic approach to choosing aperture and features without overspending.
Start with what you can move and store
![Celestron FirstScope 76 tabletop Dobsonian telescope. Its aperture is 3" and the focal length is 300 mm, so its focal ratio is approximately f/4. (The photo was taken in a lightbox, see Flickr album at [1], so it almost looks like an official Celestron product shot, but it's not.)](https://upload.wikimedia.org/wikipedia/commons/thumb/3/3c/Celestron_FirstScope_76.jpg/1280px-Celestron_FirstScope_76.jpg)
Artist: Wutthichai Charoenburi
As a rule, a scope that is too big to use often is worse than a smaller one that you use weekly. Many observers find 6–8 inch Dobsonians hit a sweet spot of performance and portability. If you can manage more, 10 inches shows noticeably more on galaxies and globular clusters, while 12 inches brings another obvious step up under dark skies.
Feature checklist
- Focal ratio: f/5–f/6 is versatile. Faster scopes are more compact but demand better accessories.
- Focuser: A 2-inch dual-speed Crayford or rack-and-pinion makes high- and low-power focusing easier.
- Finder package: Ideally, a zero-power finder plus a RACI optical finder.
- Cooling fan: Useful on mirrors 8 inches and larger. Quiet operation preferred.
- Base material: Sturdy construction and smooth bearings matter; avoid flimsy pivots and rough motions.
New vs used market
Dobsonians hold value reasonably well, but used deals are common. Inspect mirrors for coating condition (look for hazing or pinholes), check the base for water damage, and ensure smooth motion. Accessories like eyepieces and filters can add significant value in a bundle.
Common upgrade paths
- Secondary heater or dew shield: Keeps the view clear on humid nights.
- Coma corrector (fast scopes): Improves edge sharpness with wide-field eyepieces.
- Digital setting circles: Push-to object locating without giving up manual simplicity.
- Better bearings or laminate: Smoother motion often yields a bigger performance jump than a marginally better eyepiece.
If you are still undecided about aperture, circle back to Aperture and Optics and match the numbers to your observing goals and vehicle/storage limits.
Can You Do Astrophotography with a Dobsonian?
Dobsonians are designed for visual observing. Their alt-az mount introduces field rotation during long exposures, and manual tracking is not ideal for long-exposure deep-sky imaging. Still, there are legitimate imaging paths worth understanding.
Lunar and planetary imaging
This is the strong suit for Dobsonians. Using a high-speed planetary camera and short exposures (videos), you can capture thousands of frames and use software to stack the best ones. Manual tracking is manageable at high frame rates, and large apertures excel at resolving fine detail when the seeing stabilizes. A Barlow helps reach the recommended sampling scale for your camera’s pixel size.
Electronically Assisted Astronomy (EAA)
EAA uses sensitive cameras and short exposures (seconds) to live-stack images, revealing nebulae and galaxies in near real time. Many observers use small cameras and software to perform live stacking on alt-az mounts. While not the same as long-exposure astrophotography, EAA can be rewarding and compatible with the Dobsonian’s simplicity.
Equatorial platforms
An equatorial platform is a motorized, tilting base that provides tracking for a period (often 30–60 minutes) by approximating Earth’s rotation. This enables higher magnifications without constant nudging and expands imaging options. While still not a substitute for a full equatorial mount for long exposures, platforms are a proven way to add tracking to a Dobsonian.
Prime focus and backfocus considerations
Many Newtonians are designed primarily for visual use, so focus travel may be limited for cameras. Low-profile focusers, moving the primary mirror slightly forward, or using a coma corrector that acts as a focal extender can help reach focus. Always verify your particular OTA’s backfocus before committing to a camera plan.
If your long-term goal is deep-sky imaging, it is more efficient to start with a small refractor on a capable equatorial mount. For visual-first observers who may dabble in imaging, planetary work and EAA represent realistic, enjoyable options with a Dobsonian. For quick setup and visual excellence, revisit the benefits in Why Choose a Dobsonian.
Frequently Asked Questions
How big of a Dobsonian should I buy as a first scope?
Buy the largest scope you can regularly transport, set up, and store comfortably. For many, that is 6–8 inches. If you can manage the size and weight, 10 inches reveals more galaxies and globulars and is still a practical instrument for many observers. Beyond 12 inches, consider a truss design for portability.
Do I need a premium mirror to see great views?
Not necessarily. Proper collimation, cooling, and good seeing dominate visual performance. Many mass-produced mirrors deliver excellent views when the system is well-tuned. A premium optic can offer subtle improvements in contrast and scatter, but the gains are fully realized only when the rest of the system — especially thermal equilibrium and eyepiece quality — supports it. Start by mastering collimation and cooling.
Final Thoughts on Choosing the Right Dobsonian

Artist: James Stewart 669
A Dobsonian telescope embodies a practical philosophy: spend your resources on aperture and usability. For visual astronomy, that combination is powerful. By understanding how aperture, focal ratio, and optical quality interact; by developing a fast, repeatable setup routine; and by optimizing ergonomics and accessories, you can turn a simple instrument into a deep-sky powerhouse. Whether you observe from a city balcony or a rural dark site, the fundamentals remain the same: collimate carefully, cool thoroughly, choose eyepieces for the task at hand, and refine your technique with practice.
If you are starting out, a well-equipped 6–8 inch Dobsonian with a good finder and two or three eyepieces is a reliable path to success. If you want more light, a 10–12 inch scope brings a meaningful step up while staying manageable. Add a comfortable observing chair, consider a UHC or O III filter for nebulae, and you will be well on your way to observing the Messier catalog, bright NGC showpieces, and fine lunar and planetary detail.
As you refine your setup, explore complementary topics like matching eyepieces to focal ratio, fine-tuning collimation, and efficient star-hopping. If you enjoyed this guide, consider subscribing to our newsletter to receive future articles on practical observing, equipment tips, and seasonal target lists right in your inbox.