Table of Contents
- What Is a Dobsonian Telescope and Who Is It For?
- Aperture, Focal Ratio, and Optical Performance in Dobsonians
- Solid-Tube vs Truss-Tube Dobsonian Designs
- Mount Mechanics: Alt-Azimuth Simplicity and Motion
- Collimation, Cooling, and Maintenance Best Practices
- Push-To and Go-To Options for Dobsonian Telescopes
- Eyepiece Selection, Exit Pupil, and Field of View
- Portability, Storage, and Ergonomics for Backyard and Travel
- Observing Targets: What You Can See with 6–12 Inch Dobsonians
- Budgeting and Upgrade Paths Without Regret
- Frequently Asked Questions
- Final Thoughts on Choosing the Right Dobsonian Telescope
What Is a Dobsonian Telescope and Who Is It For?
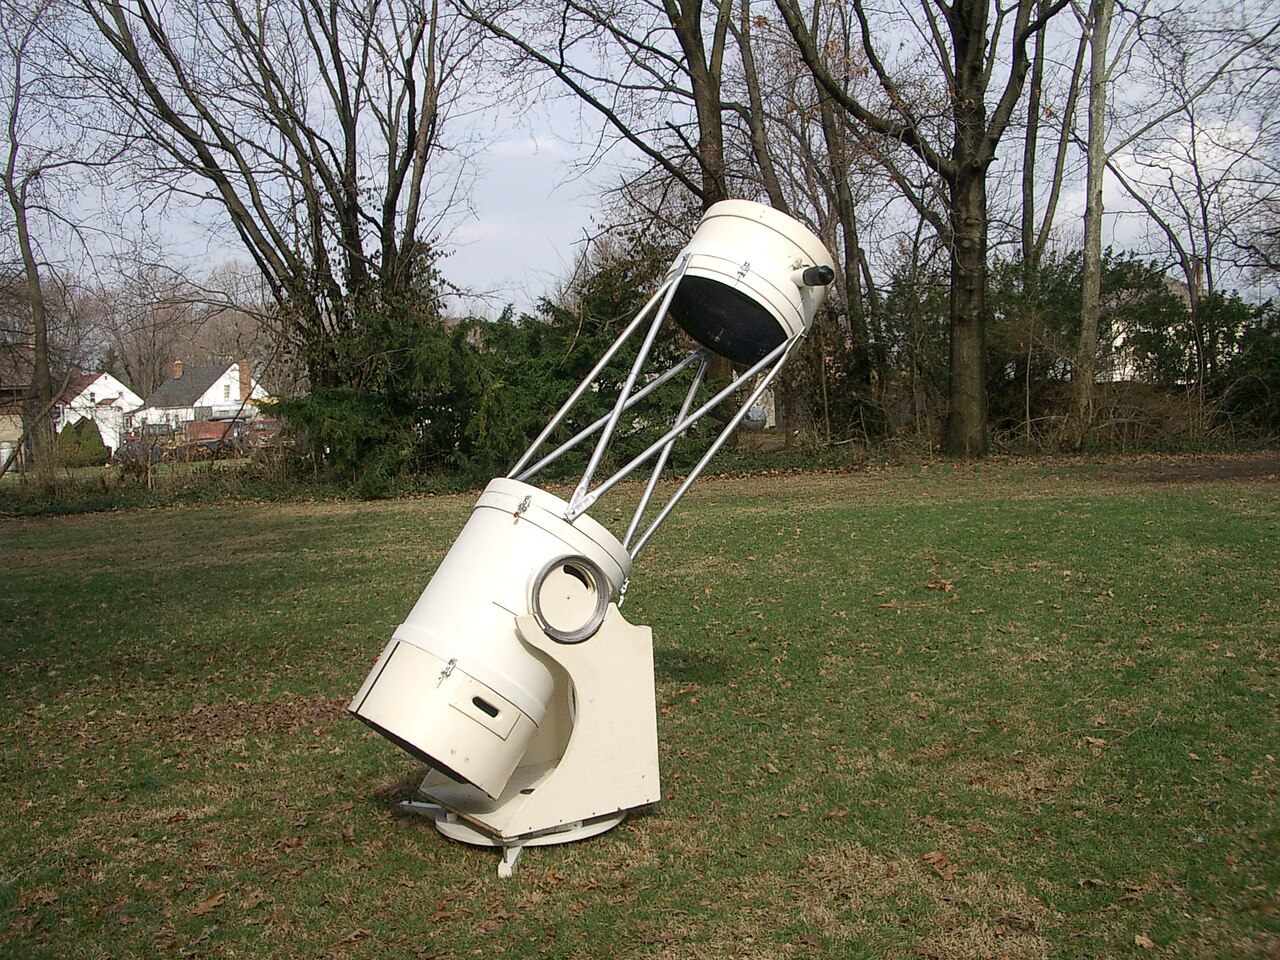
A Dobsonian telescope is a Newtonian reflector optical tube mounted on a simple, ground-based, alt-azimuth mount. It was popularized by John Dobson in the 1970s to make large-aperture observing affordable and accessible to the public. The essential idea: maximize aperture per dollar, minimize mechanical complexity, and keep setup straightforward so you can spend more time actually observing the night sky.

Attribution: James Stewart 669
Dobsonians are geared primarily toward visual astronomy. The design’s strengths include substantial light-gathering power for deep-sky objects, intuitive point-and-look motion, and a compact, stable base that requires no polar alignment. They are favorites for backyard observers, star party hosts, and families who want to see galaxies, nebulae, clusters, the Moon, and the planets without navigating a steep learning curve.
While some observers do dabble in planetary and lunar imaging with webcams or planetary cameras on Dobsonians, the design is not built for long-exposure deep-sky astrophotography because the mount is not equatorial and lacks continuous field rotation correction. If your primary interest is deep-sky imaging, a different setup is advisable. But if you want the best views per dollar under the stars, a Dobsonian is hard to beat.
In this guide we’ll explore the key decisions you’ll make when choosing a Dobsonian between 6–12 inches of aperture. We’ll cover optical basics in Aperture, Focal Ratio, and Optical Performance, mount behavior and smoothness in Mount Mechanics, essential user operations in Collimation, Cooling, and Maintenance, accessory choices in Eyepiece Selection, Exit Pupil, and Field of View, and what you can expect to see at the eyepiece in Observing Targets.
Aperture, Focal Ratio, and Optical Performance in Dobsonians
When choosing a Dobsonian, two core specifications shape the experience: aperture (the mirror diameter) and focal ratio (f-number). These influence light-gathering power, resolution, field of view, image brightness at low powers, collimation tolerance, and the need for corrective optics.
How Aperture Changes What You Can See
Aperture, typically 6–12 inches (150–300 mm) for hobbyist Dobsonians, is the single most important factor for visual performance. Larger apertures collect more light, rendering fainter galaxies and nebulosity and improving the resolution of fine planetary and lunar details under steady seeing. A simple rule of thumb: light-gathering power scales with the area of the mirror, so going from 6 inches to 12 inches increases area by a factor of four. That translates to distinctly brighter views of deep-sky objects and finer resolution potential when the atmosphere cooperates.
Rule of thumb: theoretical angular resolution (Dawes limit) in arcseconds ≈ 116 / D(mm). For an 8-inch (203 mm) mirror, that’s about 0.57 arcseconds in ideal conditions—something the atmosphere often won’t allow but a helpful benchmark.
Focal Ratio and Why It Matters
The focal ratio (f/number) is focal length divided by aperture. In Dobsonians, common focal ratios range from f/4 to f/8. Shorter focal ratios (f/4–f/5) yield wider true fields and a more compact tube but are more demanding on eyepieces, collimation, and off-axis image quality (coma shows more readily). Longer focal ratios (f/6–f/8) offer easier collimation tolerance, reduced coma, and are gentler on budget eyepieces, but produce narrower fields and longer tubes.
- f/4–f/5: wide fields, compact tubes; benefits from a coma corrector for best edge performance; stricter collimation.
- f/5–f/6: a balanced middle ground; still fairly portable; many eyepieces perform well; collimation manageable.
- f/6–f/8: easier on eyepieces and collimation; typically narrower fields and longer tubes; stable high-power performance.
The choice often comes down to use case. If you value ultrawide fields and compact transport, a faster Dobsonian can shine—just budget for better eyepieces or a coma corrector. If you prioritize simplicity and tight star images across more of the field with modest eyepieces, a slower scope can be rewarding.
Aperture Steps: 6″ vs 8″ vs 10″ vs 12″
- 6-inch: Nimble and forgiving. It’s easy to carry, cools relatively quickly, and introduces you to hundreds of deep-sky objects while showcasing lunar/planetary detail. Ideal as a first serious telescope.
- 8-inch: A sweet spot for many. Noticeably more light than a 6-inch with manageable size and weight. Often the best balance of portability and deep-sky reach for a first and lasting scope.
- 10-inch: Brighter deep-sky views and improved resolution. Slightly heavier, often pushing some users to consider a truss tube or hand-truck for easier movement.
- 12-inch: A significant jump in deep-sky capability. Truss designs become attractive as tubes grow longer and heavier. Rewards dark sites with richer galaxy detail and nebula structure.
Before committing to a larger aperture, read Portability, Storage, and Ergonomics—the best telescope is the one you’ll actually use. A 12-inch you rarely take outside shows less than a 6-inch that sees starlight three nights a week.
Solid-Tube vs Truss-Tube Dobsonian Designs
Dobsonians generally come in two structural flavors: solid-tube and truss-tube. Each has practical implications for transport, setup time, and stray light control.
Solid-Tube Dobsonians
Solid-tube Dobs use a single rigid tube holding primary and secondary mirrors in alignment. Benefits include simpler setup, inherent stray-light suppression, and often lower cost. Solid tubes are common up to 10 inches; beyond that, length and weight become more challenging for some users.
- Pros: Fast setup, good light control, fewer parts, often less expensive.
- Cons: Bulky at larger apertures; can be awkward through doorways and into cars; potential for longer cooldown (large mass in a closed tube).
Truss-Tube Dobsonians
Truss designs break the optical tube into a lower mirror box, an upper cage for the secondary and focuser, and connecting truss poles. This modularity eases transport for large apertures and can make a 12-inch (or larger) much more practical for one person. Truss scopes require assembly at the site and benefit from a light shroud to block stray light and dew.
Attribution: JamesStewart669
- Pros: Highly portable for their aperture; easier to load into small cars; lighter components.
- Cons: More setup time; requires shrouds for light control; collimation check recommended each session; potentially higher cost.
Your observing style will guide the choice. If most sessions are at home and you can store the scope near your observing spot, a solid tube is beautifully uncomplicated. If you travel to dark skies or stairs and cars are routine obstacles, a truss tube can transform a big scope from a chore into a habit. Cross-reference with Portability, Storage, and Ergonomics for a reality check on sizes and weights.
Mount Mechanics: Alt-Azimuth Simplicity and Motion
The Dobsonian mount is an alt-azimuth platform that pivots up-and-down (altitude) and left-right (azimuth). It uses large bearing surfaces to distribute weight and provide smooth, controlled motion. The mount’s elegance is its minimalism: no counterweights, no polar alignment, and no extensive electronics necessary.

Bearings, Materials, and Smoothness
High-quality feel and stable tracking at high magnification depend on bearing design. Many Dobsonians use polytetrafluoroethylene (PTFE) pads riding on textured laminate to achieve a balance of low stiction and controlled friction. Larger altitude bearings help maintain balance across various eyepiece weights.
- Altitude bearings: Larger diameter bearings provide smoother motion and more forgiving balance when swapping heavy eyepieces or adding a finder. Some designs use adjustable tension or springs to help maintain balance.
- Azimuth bearings: A wide base with PTFE pads against laminate offers smooth 360° rotation. Too little friction causes overshoot; too much creates jerky motion. Some mounts include adjustable center bolts or damping washers to tune feel.
- Stability: A low center of gravity and rigid base materials (plywood or engineered composite) help keep vibrations down when focusing at high power.
Balance and Accessory Load
As you add a finder scope, Telrad, or a heavy 2-inch widefield eyepiece, your balance point changes. Larger altitude bearings help, but counterweights or magnetic weights can restore neutral balance. Alternatively, adjustable altitude clutch systems let you dial friction up or down.
If you plan on frequent high-power planetary observing, prioritize a mount with smooth motions that resists stick-slip behavior. Smoothness lets you nudge the field gently and keep objects centered without frustration—especially important if you’re not using tracking. See Eyepiece Selection, Exit Pupil, and Field of View for choosing magnifications that make manual tracking easier.
Tracking and Manual Nudge
Dobsonians rely on the “Dob nudge”—a gentle push to keep your target in view as the sky drifts. With practice, you can track planets at high power comfortably. If you crave tracking for sharing views or sketching, consider the options in Push-To and Go-To Options, including add-on platforms that provide equatorial tracking or full motorized Go-To systems.
Collimation, Cooling, and Maintenance Best Practices
A Newtonian’s mirrors are adjustable to ensure the optical axis is perfectly aligned. This alignment is called collimation. Proper collimation preserves contrast, sharpness, and accurate star images across the field—especially at faster focal ratios and higher magnifications. Cooling, or thermal equilibrium, ensures the mirror and tube aren’t producing heat plumes that soften the view.
Collimation Tools and Workflow
Several tools help you collimate quickly and accurately: a peep-hole collimation cap, a sight tube, a Cheshire eyepiece, and laser collimators are common. Many observers use a combination: the sight tube for centering the secondary under the focuser, the Cheshire for adjusting primary tilt, and a calibrated laser for fine-tuning (with a barlowed laser method for reliable primary alignment).
- Center the secondary mirror in the focuser’s view (rotation and position).
- Adjust the secondary tilt to aim the focuser axis at the primary mirror center mark.
- Adjust the primary mirror tilt so the return beam or Cheshire reflection centers on the primary’s center mark.

Attribution: Morn
Fast scopes (f/5 and below) benefit from careful collimation each session. Slower scopes (f/6–f/8) are more forgiving and hold collimation longer. For more on how focal ratio influences tolerance, see Aperture, Focal Ratio, and Optical Performance.
Cooling the Primary Mirror
A Dobsonian’s primary mirror is a thick piece of glass. When taken from a warm house into cooler night air, it stores heat that can leak into the optical path as rising plumes. A small fan behind the mirror cell helps the mirror reach ambient temperature faster, improving contrast and star sharpness.
- Plan ahead: Set the telescope outside 30–60 minutes before high-resolution observing. Larger mirrors need more time.
- Use gentle airflow: A rear fan pulling or pushing air across the mirror back accelerates equilibrium without introducing vibration.
- Shrouds and dew: Truss scopes benefit from a shroud to minimize stray light and dew formation on the secondary. In humid climates, secondary dew heaters can help.
Maintenance and Cleaning
Mirrors do not need frequent cleaning. Dust has surprisingly little effect on visual performance compared to miscollimation or poor seeing. When necessary, follow conservative cleaning practices recommended by your telescope or mirror manufacturer. Keep collimation screws snug and recheck mechanical fittings each season.
Push-To and Go-To Options for Dobsonian Telescopes
Classic Dobsonians are fully manual, but modern options include digital setting circles (DSC, often called push-to) and full motorized Go-To with tracking. Both approaches help you find and hold targets more easily, especially under light-polluted skies where star-hopping is more difficult.
Push-To (Digital Setting Circles)
Push-to systems use position encoders on altitude and azimuth to track where the telescope is pointing. A handheld controller or smartphone app displays coordinates and arrows showing where to nudge the scope to reach the selected object. You still move the scope manually, but the system greatly streamlines locating targets.
- Pros: Light weight; retains the Dob’s simplicity; no heavy motors; often lower power consumption; still encourages manual observing skills.
- Cons: Does not provide tracking; requires a two-star (or more) alignment; performance depends on base geometry and encoder precision.
Go-To with Tracking
Go-To Dobsonians add motors on both axes and typically include sidereal tracking. After alignment, the system slews automatically to selected objects and then keeps them centered. This is useful for public outreach, sharing the eyepiece with groups, sketching, or high-power planetary work where nudging becomes tedious.
- Pros: Automated finding and tracking; excellent for outreach; reduces fatigue at high magnification.
- Cons: Heavier and more complex; requires power; higher cost; added setup steps and cabling.
If you prefer the simplest experience and a lower budget, a manual or push-to Dobsonian is compelling. If you want to maximize time on target and minimize navigation effort, Go-To is attractive. Tie this decision back to your ergonomics in Portability, Storage, and Ergonomics.
Eyepiece Selection, Exit Pupil, and Field of View
Eyepieces and a few simple formulas shape every visual experience. Understanding magnification, exit pupil, and true field of view lets you build a small but effective eyepiece kit tailored to your Dobsonian’s focal ratio and your targets.
Core Formulas
Magnification (M) = F_scope / F_eyepiece
Exit pupil (P, mm) = F_eyepiece / f_ratio = D_objective / M
True field of view (TFOV, degrees) ≈ AFOV / M
Where F_scope is the telescope focal length, F_eyepiece is the eyepiece focal length, AFOV is the eyepiece’s apparent field of view, and D_objective is the mirror diameter in millimeters. Exit pupil relates directly to image brightness at low power; for extended objects, surface brightness at the eyepiece depends largely on exit pupil up to the observer’s eye pupil limit.
Exit Pupil Guidelines
- Low-power sweeping: exit pupil ~4–6 mm for bright, wide-field views (Milky Way, large nebulae with filters). Choose an eyepiece focal length approximately exit_pupil × f_ratio.
- General-purpose medium power: exit pupil ~2–3 mm for many galaxies, clusters, and nebulae.
- High-power detail: exit pupil ~1 mm or less for planetary, lunar, and small planetary nebulae when seeing allows.
As a practical kit for a typical f/6 Dobsonian, consider three eyepieces: one near 30–35 mm for low power (5–6 mm exit pupil), one near 14–18 mm for medium power (2–3 mm), and one near 6–9 mm for high power (1–1.5 mm). Add a quality 2× Barlow to double the effective focal length coverage.
Eyepiece Designs and Edge Performance
Fast Dobsonians (f/5 and below) stress eyepieces, revealing off-axis aberrations. Wide-angle eyepieces designed for fast optics maintain sharper stars toward the edge and can reduce edge astigmatism. A coma corrector addresses the Newtonian mirror’s coma, improving star images across a wider field. Slower f/6–f/8 scopes are kinder to basic Plössls and simpler designs, though the true field will be narrower for a given eyepiece focal length and barrel size.
2-Inch vs 1.25-Inch Focusers
Many Dobsonians include 2-inch focusers, enabling 2-inch widefield eyepieces that maximize low-power views. If sweeping star fields and large nebulae is a priority, a 2-inch focuser with a well-corrected widefield eyepiece is a joy. A 1.25-inch focuser is fine for a smaller, lighter kit and tends to be standard on smaller apertures.
Finally, pair your eyepieces with an observing chair of adjustable height. Comfort stabilizes your vision, making faint details easier to see. We revisit ergonomics in Portability, Storage, and Ergonomics.
Portability, Storage, and Ergonomics for Backyard and Travel
The best Dobsonian is one you enjoy using often. That means it fits your storage, your vehicle, your stairs, and your preferred observing routine. It also means you can reach the eyepiece comfortably from horizon to zenith.
Assess Your Real-World Constraints
- Storage: Measure your doorways, hallways, and vehicle trunk openings. A solid 8-inch tube can be long and unwieldy in tight spaces. Truss designs break down into smaller pieces.
- Weight: Consider your ability to lift and carry the base and the optical tube separately. Some observers roll larger scopes on a hand truck from garage to yard.
- Setup time: If you have 30 minutes on a weeknight, will you set up a 12-inch truss, or would an 8-inch solid tube see more use? Honest answers make for happy observing.
- Observer height: Ensure standing or seated eyepiece height is comfortable at high altitudes. Shorter observers might prefer a chair or a step for larger scopes.

Attribution: Wutthichai Charoenburi
Transport and Field Setup
For travel to dark skies, pack a small toolkit: collimation tools, a red flashlight, battery power for fans or electronics, and a dew mitigation plan. Truss scopes need a shroud and sometimes light baffles; solid tubes benefit from a front cap and dust covers to keep optics clean.
Comfort and Observing Efficiency
Use an adjustable observing chair to steady your posture. Keep frequently used eyepieces and a notebook within easy reach. For manual scopes, consider a unity-finder (e.g., reflex finder) plus a magnifying finder for easy star-hopping. If you collect a set of heavy eyepieces, plan for balance management so the altitude motion remains smooth.
Observing Targets: What You Can See with 6–12 Inch Dobsonians
What you see depends on sky conditions, experience, and aperture. Dark skies lift deep-sky observing to a different level, while steady seeing brings out planetary detail. Here’s a practical, qualitative overview of what various apertures commonly reveal when the telescope is well collimated and thermally settled. Use this as a guide rather than a strict promise—local conditions matter.
Planets and the Moon
- 6-inch: Crisp lunar craters and rilles at high power; planets show main features—Jupiter’s two primary belts and equatorial detail, Saturn’s ring system with Cassini Division under good seeing, and Mars’ dark albedo features and polar cap near opposition.
- 8-inch: Improved resolution and brightness support higher magnifications; enhanced contrast bands on Jupiter, finer Cassini Division visibility on Saturn across more of the ring ansae, and more albedo contrast on Mars when conditions allow.
- 10–12-inch: More subtle planetary details become accessible under steady skies—festoons and smaller belts on Jupiter, ring shading and globe details on Saturn, and finer features on Mars near opposition. Lunar observing becomes spectacular, revealing delicate rilles, domes, and terracing in crater walls.
Planetary observing favors steady seeing and accurate collimation. Picking magnifications that yield an exit pupil around 1 mm or smaller often offers the best detail. See Eyepiece Selection for guidance.
Bright Nebulae and Emission Regions
Bright nebulae such as the Orion Nebula (M42), Lagoon Nebula (M8), and Swan Nebula (M17) respond well to aperture and to nebula filters (UHC or O-III type). A 6-inch shows shape and internal structure in M42 with the Trapezium stars split cleanly. An 8-inch adds more nebulosity and contrast, while 10–12 inches reveal fainter streamers and extended outer regions more readily, especially at dark sites. Filters help cut urban skyglow and enhance these emission regions by passing their strongest spectral lines.

Attribution: NASA, ESA, M. Robberto (Space Telescope Science Institute/ESA) and the Hubble Space Telescope Orion Treasury Project Team
Planetary Nebulae
Compact planetary nebulae are bright and respond to magnification. Even a 6-inch Dobsonian can reveal the ring-like structure of M57 (the Ring Nebula) and the disk of M27 (the Dumbbell Nebula). Larger apertures let you push power and tease out central stars and subtle features. O-III filters often heighten visibility and contrast.
Galaxies
Galaxies are sensitive to sky darkness. Under suburban skies, a 6-inch will find brighter Messier galaxies (M31, M81, M82), showing cores and elongation. An 8-inch shows more halo and can hint at dust lanes in favorable targets. With 10–12 inches from dark sites, spiral structure and dust features become more frequent sights in bright galaxies such as M51, M33, and M101. Larger apertures don’t eliminate light pollution, but they give you a better chance of detecting faint extensions and structural nuance.
Globular and Open Clusters
Globular clusters are joyous in Dobsonians. A 6-inch begins resolving stars across the brighter globulars, while 8-inch and larger apertures break them into countless pinpoints with sparkling contrast at moderate to high magnifications. Open clusters benefit from wide fields; pair your Dob with a 2-inch wide-angle eyepiece to frame large clusters attractively.
Double Stars and Asterisms
Dobsonians excel at splitting doubles thanks to their ample aperture and hence resolution. Thermal equilibrium and collimation are key. Stars like Epsilon Lyrae benefit from steady air and appropriate magnification. For vivid color contrasts, seek out classic pairs under good seeing.
For a sense of what magnifications suit different targets, revisit the exit pupil discussion in Eyepiece Selection, Exit Pupil, and Field of View.
Budgeting and Upgrade Paths Without Regret
A Dobsonian’s charm is strong baseline performance without mandatory upgrades. Yet thoughtful accessories can increase comfort, efficiency, and image quality over time. Plan your budget around the telescope first; then grow into accessories as you gain experience.
Start with Essentials
- Collimation tools: A simple collimation cap or Cheshire is affordable and effective. Accurate alignment protects your investment every night.
- Finder system: A unity-finder for quick aiming plus a right-angle, correct-image (RACI) finder fosters easy star-hopping.
- Observing chair: Ergonomic stability often reveals more detail than chasing more aperture you won’t set up as often.
- Red light: Maintain dark adaptation while reading charts or notes.
- Basic eyepiece trio: Low-, medium-, and high-power coverage tailored to your focal ratio (see Eyepiece Selection).
Value-Add Upgrades
- Widefield 2-inch eyepiece: Transforms low-power sweeping for large nebulae, star clouds, and open clusters.
- Nebula filter (UHC/O-III): Boosts contrast on emission and planetary nebulae, especially helpful under light-polluted skies.
- Coma corrector (for fast scopes): Improves edge-of-field star shapes at f/5 and faster.
- Cooling fan: Brings the primary mirror to ambient temperature faster for sharper views.
- Digital setting circles or Go-To: If finding and tracking objects is your bottleneck, these can significantly increase observing throughput (see Push-To and Go-To Options).
When to Step Up in Aperture
If you’re using your current Dobsonian regularly and have optimized collimation, cooling, and eyepieces, stepping up in aperture can make sense—particularly if you’re traveling to dark sites and are comfortable with the additional weight and setup. Before upgrading, revisit Portability, Storage, and Ergonomics to ensure the larger instrument will still see frequent use.
Buy Once, Cry Once? Not Always
The “buy once, cry once” mantra (spend more now to avoid future upgrades) can be wise for durable accessories like focusers or premium eyepieces that outlast a particular telescope. But for the telescope itself, the best choice is one that matches today’s constraints—home, car, time, and experience. Many observers keep an 8-inch Dob as a forever-scope even after acquiring larger instruments, precisely because it sees so much use.
Frequently Asked Questions
Do I need a coma corrector for my Dobsonian?
It depends on your focal ratio and standards for edge performance. At f/5 and faster, coma becomes more noticeable toward the field edges, especially with wide apparent field eyepieces. A coma corrector can markedly improve off-axis star shapes. At f/6 and slower, coma is milder and many observers are satisfied without one. If you prefer pinpoint stars to the edge with ultrawide eyepieces, a corrector is a strong consideration regardless of focal ratio.
How often should I collimate my Dobsonian?
Check collimation every observing session, especially with faster scopes (f/5 or below) that are more sensitive. In practice, small touch-ups are quick once you’re familiar with the tools. Slower scopes (f/6–f/8) often hold collimation longer and may only need occasional adjustment. Transport, temperature changes, and handling can all nudge alignment, so a quick check before high-power observing pays dividends.
Final Thoughts on Choosing the Right Dobsonian Telescope
A Dobsonian telescope offers one of the most direct paths to inspiring, high-impact visual astronomy. For many observers, the sweet spot begins around 8 inches of aperture for a compelling balance of deep-sky reach, portability, and price. Six inches makes a superb, easy-to-use first instrument, while 10–12 inches reveal ever more subtle structure in galaxies and nebulae—provided you accommodate the increased size and setup needs.
Let your observing reality lead the decision. If weeknights mean quick sessions from the yard, pick a scope that rolls out easily and cools fast. If you road-trip to dark sites, consider truss designs and an accessory set that speeds finding and framing objects. Wherever you land, master collimation and cooling, choose eyepieces by exit pupil and field of view, and tune your mount’s motion and balance so the instrument disappears and the sky takes over.
We hope this buyer’s guide helps you match a Dobsonian to your observing style. If you found it useful, explore our other in-depth guides and consider subscribing to our newsletter for future articles on practical observing, equipment tips, and targets for every season. Clear skies and happy hunting!