Table of Contents
- What Is Narrowband Astrophotography and Why It Works Under Light Pollution?
- Essential Gear for Urban Narrowband Imaging: Filters, Cameras, Scopes
- Planning Targets and Framing in Emission Lines
- Capture Workflow: Exposure Time, Gain, and Subframe Strategy
- Calibration and Preprocessing: Master Frames and Gradient Control
- Post-Processing Recipes: HOO, SHO, and Natural Color Blends
- Troubleshooting Common Issues in Narrowband Imaging
- Frequently Asked Questions
- Final Thoughts on Choosing the Right Narrowband Astrophotography Setup
What Is Narrowband Astrophotography and Why It Works Under Light Pollution?
Artist: Mikael Svalgaard
Narrowband astrophotography isolates light from specific ionized gases—most commonly hydrogen-alpha (Hα at 656.3 nm), oxygen-III (OIII at 500.7 nm), and sulfur-II (SII at 672.4 nm). By using filters that pass only a very small slice of the spectrum (for example, 3–10 nm wide), it becomes possible to image faint emission nebulae even from intensely light-polluted urban skies. Streetlights, LED signage, and skyglow span broad wavelengths; narrowband filters block almost all of that background and admit only the nebular emission lines. The result: a dramatically improved signal-to-noise ratio (SNR) in the lines of interest.
From a physics perspective, narrowband imaging leverages the quantum transitions of atoms and ions in nebulae. For instance, Hα is emitted by hydrogen atoms when electrons drop from the n=3 to n=2 energy level; OIII traces doubly ionized oxygen in regions excited by hot, young stars. Because these emissions are concentrated at precise wavelengths, narrowband filters can target them with exceptional specificity. This makes narrowband imaging a compelling technique for urban astrophotographers who cannot easily access dark sites.
Key benefits of narrowband imaging from the city:
- Light pollution rejection: By admitting only a few nanometers of bandwidth, the background sky appears much darker relative to nebular signal.
- Moon tolerance: Narrowband filters constrain lunar glow considerably, allowing productive imaging throughout much of the lunar cycle.
- Contrast enhancement: Emission structure becomes more prominent, revealing filaments and shock fronts that can be difficult to capture in broadband RGB.
- Flexible color mapping: With multiple lines (Hα, OIII, SII), you can combine channels into various palettes such as HOO and SHO to highlight different physics.
While narrowband excels in urban settings, it is not a universal solution. Reflection nebulae and galaxies are largely continuum emitters and benefit from broadband luminance and RGB imaging, which narrowband filters will suppress. If your primary interest is emission nebulae, though, narrowband is a powerful option to overcome light pollution.
In the sections on gear, capture workflow, and post-processing, we will explore how to choose filters and cameras, how to plan exposures under bright skies, and how to combine channels into visually compelling and scientifically meaningful color maps.
Essential Gear for Urban Narrowband Imaging: Filters, Cameras, Scopes

Artist: Dylan O’Donnell, deography.com
Urban narrowband imaging does not require exotic equipment, but your choices affect both image quality and workflow. Below is a practical guide to key components and what to consider for each.
Filters: Single-Line, Dual-Band, and Tri-Band Options
Narrowband filters come in several forms:
- Monochrome single-line filters: Designed for dedicated mono cameras, these filters isolate a single emission line such as Hα, OIII, or SII with bandwidths often in the 3–7 nm range. Narrower filters (e.g., 3 nm) offer stronger light pollution rejection and better separation from nearby lines (and star continuum), at the expense of longer exposures and higher cost. Wider filters (e.g., 7 nm) are more forgiving and less expensive.
- Dual-band filters for one-shot color (OSC) cameras: These pass Hα and OIII simultaneously to allow OSC users to capture both lines in one integration. Bandwidths commonly range 5–10 nm per band. Dual-band filters are ideal for city-based astrophotographers seeking simplicity and efficiency, especially with longer exposure strategies.
- Tri-band filters for OSC: Some filters add a third band (sometimes ~SII or a second OIII profile) to augment flexibility. Color separation is more complex but can yield rich data in a single session.
General guidance:
- For heavy light pollution, consider narrower passbands (e.g., ≤ 5 nm) to better reject skyglow. Ensure your optics have compatible f/ratio because very fast systems can shift effective bandpass, clipping transmission.
- For OSC imaging, dual-band filters are a great balance of cost, simplicity, and throughput. They excel on bright HII regions and planetary nebulae.
- For maximum control and the highest possible SNR, a mono camera with separate Hα, OIII, and SII filters remains the gold standard.
Cameras: OSC vs. Mono
Both one-shot color and monochrome cameras can produce excellent narrowband images; the trade-offs are mostly workflow, efficiency, and flexibility.
- OSC cameras: When paired with dual-band filters, OSC cameras capture Hα and OIII together. This is efficient, reduces filter changes, and simplifies acquisition. However, the Bayer matrix reduces per-channel sensitivity compared to mono, and separating the bands in processing requires careful techniques.
- Mono cameras: Offer the highest efficiency per wavelength and give you full control over exposure ratios for Hα, OIII, and SII. This makes color mapping like SHO more straightforward and often yields cleaner data for faint structures.
No matter which you choose, consult your camera’s documentation for recommended gain and offset settings. Manufacturers typically provide a setting that balances read noise and dynamic range. Under bright skies, a lower read-noise mode with sufficient well depth is usually advantageous.
Optics: Refractors, Newtonians, and Catadioptrics
Short focal length refractors (e.g., 250–600 mm) make forgiving, versatile narrowband platforms. Fast focal ratios increase photon collection, which is helpful for narrowband’s reduced throughput. Coma correctors or field flatteners may be required to control star shapes. Newtonians and astrographs offer fast focal ratios and large apertures, but may demand careful collimation and backfocus control. Catadioptrics can produce excellent results at longer focal lengths for small planetary nebulae and supernova remnants, but tracking and seeing become more critical.
- Field correction: Ensure the corrector/flattener spacing matches manufacturer specs to avoid tilted or elongated stars, especially when using narrowband filters that highlight star shapes.
- Backfocus and tilt: Mechanical tilt is more visible with narrow star profiles. Use tilt adapters and shims if necessary to equalize corner stars.
- Filter size: Make sure your filter format (1.25″, 2″, clip-in, unmounted) accommodates sensor size without vignetting.
Mounts and Guiding
Stable tracking is essential for long narrowband exposures. If your mount supports guiding, an off-axis guider (OAG) minimizes differential flexure at long focal lengths. For short refractors, a guidescope is typically sufficient. Polar alignment and periodic error correction (if available) will improve star quality and reduce the need to discard subs.
Ancillary Essentials
- Dew control: Narrowband sessions run long; dew heaters and shields prevent loss of data.
- Power management: Urban sites often rely on extension cords or battery stations. Plan cable runs and strain relief.
- Software: Choose capture tools that support dithering, autofocus, filter changes, and integrated plate solving. Plate solving accelerates framing and mosaics for large nebulae.
If you are assembling a first urban narrowband kit, start simple: a small refractor, a reliable equatorial mount, an OSC camera with a dual-band filter, and software that automates guiding and framing. You can always add a mono camera and individual filters later. For a deeper look at calibration and processing, jump to calibration and preprocessing and post-processing.
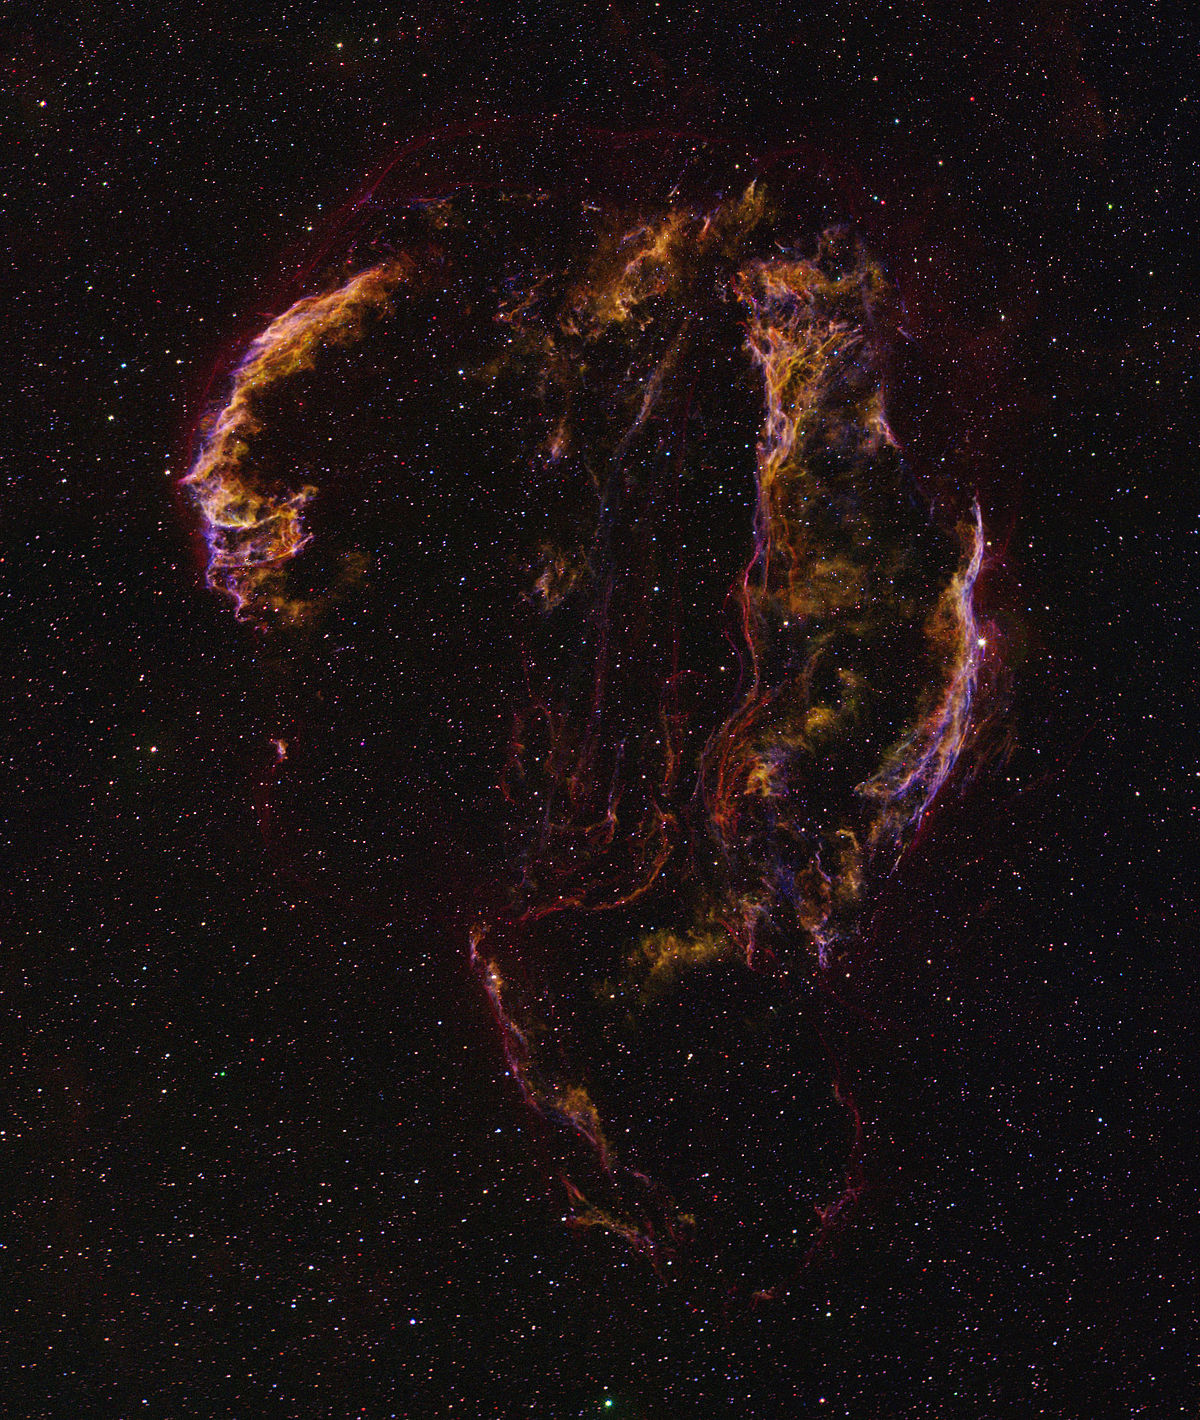
Planning Targets and Framing in Emission Lines

Artist: George Jacoby, WIYN/NSF
Because narrowband imaging highlights emission structures, target selection matters. Emission nebulae and many planetary nebulae are ideal. Superb examples include bright HII regions, supernova remnants, and Wolf–Rayet shells. Unlike broadband imaging, narrowband composition can emphasize different gas components depending on the palette you choose. A region rich in OIII will pop in teal/cyan in an HOO blend, while SII-rich shock fronts come alive in SHO.
Choosing Targets for Urban Skies
- Seasonal availability: Use planetarium software to see what’s high in your sky each month. High altitude reduces airmass and extinction, improving SNR.
- Surface brightness: Favor bright, extended emission nebulae at first. Planetary nebulae can also be rewarding; many are strong in OIII.
- Moon phase: With narrowband, you can shoot even around full Moon, but keep angular separation in mind. If the Moon is near your target, gradients and reflections can still increase.
Framing and Rotation
Narrowband’s strength is emphasizing structures. Consider:
- Orientation: Rotate the camera to align shock fronts or filaments along diagonals for dynamic compositions.
- Off-center placement: Place bright knots or star clusters on thirds to balance composition.
- Star fields: Narrowband reduces star intensity. Use that to your advantage—nebula structure can dominate without field stars overwhelming the frame.
Mosaics and Large Targets
For very large nebulae, plan a mosaic. Plate solving and a consistent rotation angle are critical. A mosaic grid, overlap of 10–20%, and consistent exposure strategies across the panels will ease stitching later. Keep in mind that each panel needs sufficient integration time in each line you plan to use in your final palette.
Before you head out, confirm the exposure plan, verify framing via plate solve, and pre-build processing recipes for your intended palette. The more you pre-plan, the more efficient your precious clear hours will be.
Capture Workflow: Exposure Time, Gain, and Subframe Strategy

Artist: Jose A Mtanous
Urban narrowband exposure strategy balances sky brightness, filter bandwidth, camera characteristics, and mount performance. The goal is to make each subexposure long enough that read noise is a small fraction of total noise, but short enough to avoid saturating stars or clipping highlights.
Setting Gain and Offset
- Gain: Use the manufacturer’s recommended setting that reduces read noise while preserving dynamic range. This is often referred to as a “unity” or “low read noise” mode. For OSC or mono, the principle is the same—choose a mode suitable for long-exposure deep-sky imaging.
- Offset (black level): Set to avoid clipping the black point. Many capture programs provide defaults that work well; verify with a short test exposure that your histogram’s left edge is above zero.
Choosing Exposure Length
As a rule of thumb under bright skies with narrowband filters:
- Dual-band with OSC: 120–300 seconds per sub is common. If your sky is very bright, 180 seconds may balance gradient control and dynamic range.
- Mono with 3–5 nm filters: 180–600 seconds per sub depending on mount performance, target brightness, and f/ratio.
There is no single correct duration. Perform short test exposures and inspect the histogram. You want the sky background peak to be clearly separated from the left edge, without pushing many stars to saturation. On nights with worse transparency, shorten subs to preserve star cores while relying on total integration time for SNR.
Integration Time Targets
Narrowband images benefit enormously from total integration time. Even in cities, 6–12 hours per target in a dual-band filter can produce strong results. With mono and separate filters, consider allocating:
- Hα: 40–60% of time (often the strongest signal)
- OIII: 20–40% (varies by target; planetary nebulae may need more OIII)
- SII: 10–30% (frequently the faintest; requires patience)
These are starting points. For each target, examine preliminary stacks and redistribute time to balance noise across channels for your intended palette.
Dithering and Drizzle
- Dithering: Enable random dithers every 1–3 frames to combat fixed-pattern noise and hot pixels. Ensure your guiding recovers quickly after each dither.
- Drizzle: If your imaging scale undersamples the seeing, consider drizzle integration. It can recover some resolution at the cost of larger files and longer processing time. Dithering is a prerequisite for effective drizzle.
Autofocus and Temperature Control
Narrowband filters can slightly shift focus compared to broadband due to different central wavelengths and glass thickness. If you change filters (e.g., Hα to OIII), refocus or use filter offsets. Temperature swings change focal position and can bloat stars; an automated focus routine every set interval (or temperature delta) helps maintain sharpness.
File Organization
Organized data are easier to calibrate. Use folder structures by date, target, filter, and subexposure length. Record metadata: gain, offset, binning (if used), and sky conditions. This will matter when you build master calibration frames and compare results across sessions.
Once you’ve captured enough data, move on to calibration and preprocessing, where your signal transforms from noisy subs into a clean, aligned stack.
Calibration and Preprocessing: Master Frames and Gradient Control
Even the best data suffer from sensor artifacts and gradients—particularly in cities. Calibration and preprocessing remove or reduce these issues to reveal your underlying signal.
Calibration Frames: Darks, Bias, and Flats
- Darks: Subtract thermal signal and hot pixels. Create darks that match your light frames in exposure time, temperature, gain, and offset. For dual-band OSC imaging, you can often reuse a library of darks if your camera temperature and exposure length are consistent.
- Bias (or dark flats): Bias frames capture read noise structure; some workflows replace bias with dark flats that match flat exposure times, especially for cameras where traditional bias frames are less stable at very short exposures.
- Flats: Essential for correcting vignetting and dust motes. Shoot flats for each filter and configuration. Keep your optical train unchanged between lights and flats.
Carefully calibrated data save hours of heartache later. Always calibrate flats with matching bias or dark flats, then calibrate lights with the appropriate masters. If your software supports it, enable cosmetic correction to catch residual hot and cold pixels.
Registration and Integration
- Star alignment: Align all subs to a high-quality reference frame. Use distortion correction if available, particularly helpful with wide fields.
- Quality weighting: Employ weighting by FWHM, eccentricity, and SNR so that sharper, cleaner frames contribute more strongly.
- Rejection algorithms: Sigma clipping and winsorized sigma are common to remove satellites, planes, and transient gradients.
Separating Channels from Dual-Band Data
For OSC plus dual-band filter data, extract Hα and OIII from the color stack. Methods vary by software, but the basic idea is to isolate the red channel (for Hα) and the green/blue channels (for OIII), then refine with line extraction tools or custom matrices that account for the filter’s spectral response. Some applications provide dedicated dual-band extraction tools. After extraction, treat the Hα and OIII masters like mono images, align them precisely, and match their histograms before combination.
Gradient Removal in Cities
Even with narrowband, gradients can creep in from the Moon, city lights, or reflections. Use dynamic or automatic background extraction tools on each mono channel before color combination. Be careful to place sample points on true background, avoiding the nebula. For large emission nebulae, a range mask or star mask can help protect signal during background modeling. If your target fills the frame, consider using a carefully crafted background model built from the corners and off-target frames.
Linear Noise Reduction
While your data remain linear (unstretched), apply gentle noise reduction using multiscale algorithms. Create masks that protect stars and high-SNR nebula structures while targeting dim background regions. Avoid over-smoothing, which can erase faint filaments you worked hard to collect. You’ll refine noise later after stretching.
With clean, registered, and gradient-controlled masters, you are ready to build color in post-processing.
Post-Processing Recipes: HOO, SHO, and Natural Color Blends

Artist: Ken Crawford
Narrowband post-processing can be both scientific and artistic. The process generally proceeds from channel combination to color calibration, nonlinear stretching, contrast enhancement, and star management. Below are practical recipes for common palettes and techniques that work for both mono and dual-band workflows.
Creating HOO (Hα-OIII-OIII)
HOO maps Hα to red and OIII to green and blue. This yields a natural-looking teal/cyan-and-red aesthetic that emphasizes OIII regions distinctly from hydrogen. A typical mapping:
R = Hα
G = 0.85 × OIII + 0.15 × Hα
B = OIII
The small Hα component in green can help balance magenta star cores. Adjust the coefficients to taste. Before combination, normalize Hα and OIII so their histograms align; otherwise, one channel may dominate the result. After combining, perform color balance to set the background near neutral.
Creating SHO (SII-Hα-OIII)
SHO assigns SII to red, Hα to green, and OIII to blue, a “Hubble palette” that can reveal shock fronts and ionization gradients. Basic mapping:
R = SII
G = Hα
B = OIII
Because SII is often noisy, allocate more integration time or apply targeted noise reduction on the SII channel before combination. After mapping, use a color calibration approach—such as adjusting the green dominance often present in SHO—by redistributing green into red and blue via channel mixing. Many imagers use a small amount of “green removal” to create pleasing gold-and-teal tones while preserving detail.
Dual-Band to HOO Workflow
- Extract Hα (primarily red) and OIII (derived from green/blue) from the OSC dual-band stack.
- Match their histograms and lightly denoise each channel while linear.
- Combine into HOO using the mapping above.
- Stretch carefully with a mid-tone transfer function; avoid clipping blacks.
- Enhance contrast locally in the nebula with multiscale tools and masks.
- Control stars via star-reduction techniques or star removal/recombination.
Star Management
Narrowband data often yield small, tight stars—an advantage for showcasing nebulae. If stars still dominate, consider:
- Star masks: Use to protect stars during sharpening and saturation boosts.
- Morphological operations: Apply gentle star reduction to reduce halos or bloat.
- Starless processing: Some workflows remove stars, process the nebula, then add the stars back at reduced intensity. Use this judiciously to maintain a natural appearance.
Color Balance and Saturation
In HOO, aim for a neutral background with balanced teal and red. In SHO, balancing green dominance is key. Apply selective saturation using range masks so that dim noise does not become colorful speckle. Revisit channel weights if the palette feels unbalanced.
Sharpening and Detail
Apply multiscale sharpening to accentuate filaments and shock fronts. Protect noise-prone regions with masks. Avoid heavy deconvolution unless your data support it; narrowband signal can be thin in the outer faint regions, which may artifact under aggressive deconvolution.
Finishing Touches
- Background: Verify that your black point is not clipped; a slight lift preserves faint nebulosity.
- Stars: Moderate star color and brightness to avoid drawing the eye away from the nebula.
- Composition: A small rotation or crop can enhance balance.
Save your processing workflow as a repeatable recipe. Urban nights are precious; repeatable, consistent workflows help you iterate quickly across targets and seasons.
Troubleshooting Common Issues in Narrowband Imaging
Narrowband imaging reveals optical and processing imperfections that broadband may hide. Here’s how to diagnose and fix frequent issues encountered under city skies.
Halos Around Bright Stars
Symptoms: Colored or neutral rings around bright stars, often more pronounced in OIII.
Causes: Internal reflections within filters, sensor windows, or optics; slight filter tilt; spectral leakage around strong lines.
Fixes:
- Ensure proper filter orientation per manufacturer recommendation.
- Minimize off-axis light sources; use a dew shield or baffles.
- Try a different filter if halos are severe; designs vary in anti-reflection performance.
- In processing, use star halos masks and gentle pixel math to reduce ring intensity without creating artifacts.
Star Bloat
Symptoms: Stars appear large and soft, reducing nebular contrast.
Causes: Focus drift, poor seeing, excessive stretching, or mismatched channel PSF sizes in combinations.
Fixes:
- Refocus periodically and when changing filters; use autofocus and temperature compensation.
- Keep stretches moderate; perform noise reduction before heavy stretching.
- Match channel PSFs prior to combination, or convolve the sharper channel slightly to match the softer one.
Tilt and Corner Issues
Symptoms: Comet-shaped stars in corners or one side of the frame.
Causes: Sensor tilt, incorrect backfocus, or misaligned corrector spacing.
Fixes:
- Verify backfocus spacing to the field flattener or corrector.
- Use a tilt adapter to fine-tune sensor orthogonality.
- Inspect mechanical connections for sag; add support if heavy accessories are cantilevered.
Residual Gradients
Symptoms: Uneven background after calibration, especially with the Moon nearby.
Causes: Scattered light, reflections, or imperfect background modeling.
Fixes:
- Increase the number of background samples and refine placement away from nebulosity.
- Use masks to protect signal during background extraction.
- Add integration time; stronger signal makes gradients easier to model.
Color Casts in Dual-Band Data
Symptoms: Overly green or magenta tones after HOO combination.
Causes: Imbalanced extraction of Hα vs. OIII, or channel mismatch.
Fixes:
- Normalize channel histograms before combination.
- Adjust channel coefficients in the HOO matrix.
- Perform a neutral background calibration and selective color tweaks with masks.
Limited Dynamic Range
Symptoms: Bright cores of nebulae saturate, losing structure.
Causes: Subexposures too long for the target’s bright regions, especially in Hα.
Fixes:
- Mix in shorter subs and perform high dynamic range (HDR) combination.
- Reduce individual exposure length and increase the number of subs to maintain total integration time.
As you refine your approach, revisit earlier sections—particularly capture workflow and preprocessing—to tune exposure length, dithering cadence, and background modeling.
Frequently Asked Questions
Can I do narrowband astrophotography with a DSLR or mirrorless camera?
Yes. DSLRs and mirrorless cameras can capture narrowband with appropriate filters, but there are caveats. Stock cameras often have strong internal IR-cut filters that suppress Hα transmission, reducing sensitivity to hydrogen emission. An astro-modified camera increases Hα response considerably. Clip-in dual-band filters work well with many DSLR/mirrorless systems and are a practical way to start urban narrowband imaging. For best results, use long total integration times, calibrate thoroughly, and manage gradients with careful background extraction. Dedicated cooled astro cameras provide thermal control and lower noise, but many imagers produce excellent dual-band results with modified DSLRs.
How long should I expose under heavy light pollution when using a dual-band filter?
There is no one-size-fits-all answer, but a common starting point is 120–300 seconds per sub. The optimum depends on your sky brightness, camera, and f/ratio. Perform test exposures and inspect your histogram: the sky background peak should be clearly separated from the left edge without pushing many stars into saturation. If bright stars are clipping, shorten subs; if the background is too close to black, lengthen them. Maintain a healthy total integration time—many urban targets benefit from 6–12 hours or more across multiple nights.
Final Thoughts on Choosing the Right Narrowband Astrophotography Setup

Artist: Dylan O’Donnell, deography.com
Narrowband astrophotography is one of the most effective ways to overcome city light pollution. By isolating Hα, OIII, and SII, you can reveal intricate nebular structures that remain hidden in broadband data under the same conditions. The best path depends on your goals and constraints:
- If simplicity and speed matter: An OSC camera plus a quality dual-band filter is a compelling, efficient solution for bright emission nebulae.
- If ultimate control is your aim: A mono camera with separate Hα, OIII, and SII filters allows precise exposure balancing and classic palettes like SHO, albeit with more complexity.
- If you are budget-conscious: Start with a small refractor, robust mount, and a single dual-band filter. Add components—motorized focus, additional filters, or a mono camera—as your skills and needs grow.
Regardless of configuration, success in the city hinges on careful planning, disciplined capture, and thoughtful processing. Embrace long integration times, meticulous calibration, and deliberate color mapping. With practice, you’ll produce high-contrast, detailed images that rival dark-sky results.
If you enjoyed this deep dive into urban narrowband techniques, explore our other guides on target planning, processing workflows, and equipment optimization. Consider subscribing to our newsletter to get future articles on astrophotography tips, filter innovations, and processing tutorials delivered to your inbox.