The very word ‘astrophotography’ sounds like something difficult and complicated. And sure, it can be; there is virtually no upper limit to how much time and money you can spend on capturing the night sky on camera. But that smartphone in your pocket – already carrying out dozens of functions other than making phone calls – has another trick up its sleeve. And chances are that you are seeing the results of this on social media feeds every day. We’re talking, of course, about phone astrophotography.
Yes, the not-so-humble modern smartphone camera can do more than just take holiday snaps and photos of your food, cats and dogs. It can also do a pretty respectable astrophotography job. It can take photos of the star fields, the moon, the planets, and even galaxies and nebulae.
But as smart as the cameras in phones now are, there’s a little more to it than just pointing and shooting. A few years ago, you would’ve needed expensive professional equipment, lots of time, and shed-loads of film or computers.
Read on to find out three ways to use the mini-computer in your hand to start capturing quality images of the night sky in a matter of minutes and at virtually no cost!
What Type of Phone Do I Need for Phone Astrophotography?
This is a fairly straightforward question to answer. It could be summarised as ‘any fairly recent smartphone.’ However, certain phones are better suited to astrophotography than others. Some even have dedicated astrophotography modes. Others just happen to have features which are astrophotography-friendly, such as easy access to long-exposure modes, which more commonly may be used for creating effects such as traffic light trails.
The list below is by no means exhaustive, nor is it ranked in any particular order. They are simply a few models or ranges that are known to be astrophotography-friendly.
Long Exposure Times and ISO
Before we go any further, one term you will see mentioned a lot throughout this, and any guide to astrophotography, is ‘long-exposure’. So it’s worth briefly explaining what this is and why it’s important in astrophotography. If you know this or don’t care about knowing this, please skip onto methods to learn how to use your phone for phone astrophotography.
Exposure time is the amount of time that a camera shutter (either physical or electronic) stays open. The longer it stays open, the more light gets into the sensor to record an image. Think of a bucket collecting raindrops. If left uncovered, and the rain continues, there is nothing to stop the raindrops from filling the bucket continuously. However, if you only want to collect a certain amount of rain, then you will cover the bucket after a certain amount of time.
Think now of the light that is coming from the stars, galaxies and anything else you want to photograph in the night sky; the bucket is your camera’s sensor (or the film in ye olden days), and the rain is photons of light which will continue to arrive as long as the clouds stay away and it’s still nighttime.
A camera shutter is simply a device for keeping the bucket open long enough to collect the right amount of light and then closing the bucket /covering the sensor after a certain amount of time.
Exposure time is the length of time that you keep the bucket/sensor/film exposed to the light. The longer it is exposed, the fainter the objects you can record. Fainter objects are made up of fewer photons of light, so it takes longer for that bucket to fill your camera’s sensor to record a recognizable image, so you need longer exposure times.
Typically then, exposure times for faint astronomical objects can be anything from several tens of seconds to minutes, or even many hours; but you need dedicated cameras for such long exposure times.
If you are trying to photograph very bright objects like the Moon or planets like Jupiter or Venus, exposure times are often similar to daylight settings and depending on how good the sensitivity and image stabilization is on your phone camera, you can just about get away with photographing these objects holding your phone in your hand. But anything else will require support of some kind, probably a mini-tripod or a phone support.
I won’t go into detail here about ISO, beyond explaining that the ISO setting controls how sensitive the camera is to light. Think of how little light it takes to hurt your eyes in the middle of the night compared to how much you can handle on a sunny day. If your eyes were a camera sensor, you might say that your eyes have a high ISO setting at night and low one on a sunny day.
Higher ISO settings reduce the amount of time you need to keep the shutter open for, which is good, but can come at the expense of ‘noise’; or grain on the image- there’s a price to pay for everything!
Phones Astrophotography: Which Phones?
Apple iPhone 12 and higher
Using Apple’s Camera+2 app is the way to find the manual settings you’ll need on an iPhone. As well as the required manual settings for shutter speed, ISO and focus, the app can also shoot in RAW format. RAW is necessary if you want to take your imaging to the next level and use software to stack exposures.
Don’t use RAW unless you plan on editing or stacking your photos, though, because they create much larger files that’ll soon fill up your phone’s memory.
In long-exposure mode, the iPhone exposes for up to 30 seconds, automatically adjusting ISO. Best, however, to switch off all such automatic features if you can.
Despite iPhones regularly topping the leaderboard on tests of phone camera image quality, at the time of writing, a dedicated astrophotography mode is still absent from Apple’s phones. However, there is nothing to stop you from using the manual settings to achieve high-quality celestial photos on the iPhone.
Google Pixel 4 and later
Pixel’s astro mode is rather oddly specific about how it wants to stack your frames. It takes 16 exposures, of 15 seconds each, so 240 seconds, or 4 minutes in total. Apart from that, similar Android camera functions are available in manual mode, as per Samsung and the Oppo.
Anecdotal reports (we did not test this phone) from various places online suggest the Pixel series produces excellent results, despite the rather limited pre-set exposure time regime. These phones are well worth considering if you want to try phone astrophotography and are also in the market for a new phone.
There’s also the added bonus that this range is at somewhat less of a premium price point than the other models mentioned here!
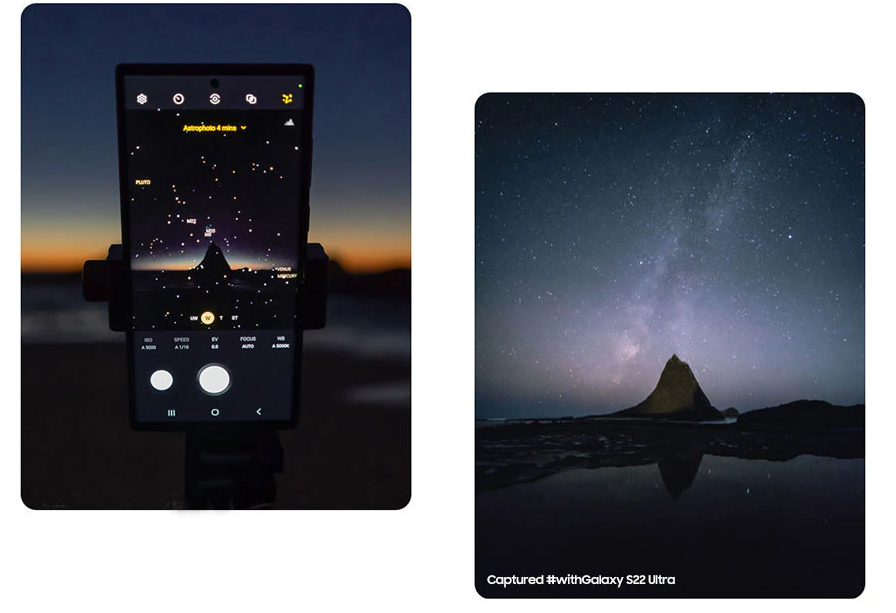
Premium Samsung Galaxy phones, such as S21 and S22
These phones now include a specific astrophotography mode, which, in addition to Android’s stock manual settings for exposure, focus and more, excitingly also comes with an auto-frame-stacking mode.
Stacking is a method used in astrophotography to increase the detail of the object you want to see while reducing the noise and other artifacts that you don’t. For example, you get a better quality and brighter image, with a darker, smoother background taking 30x 1 minute exposures and stacking them together, than you get with just one 30 minute exposure.
Yes, you read that right. From the S22 and later, the camera will take continuous shots at your chosen exposure time, stack them together, and also do some post-processing! The Samsung app you have to use to achieve this is called Expert RAW. It also includes a feature called Astrophoto- which basically does the same as apps like Stellarium and Sky Safari– it overlays the real sky with star maps so you can see exactly where the phone is pointing.
Astrophoto takes this one stage further than these apps though, and then takes the photos where you are pointing, rather than just showing you what you are looking at.
Oppo Find X-5 Pro
In Oppo’s ‘Pro’ mode, you will find the ‘long exposure’ option. There you are further presented with options for the length of long exposure you are after up to a maximum of 12 seconds. In most cases, however, you are going to want longer than this, so you would select the infinity ৪.
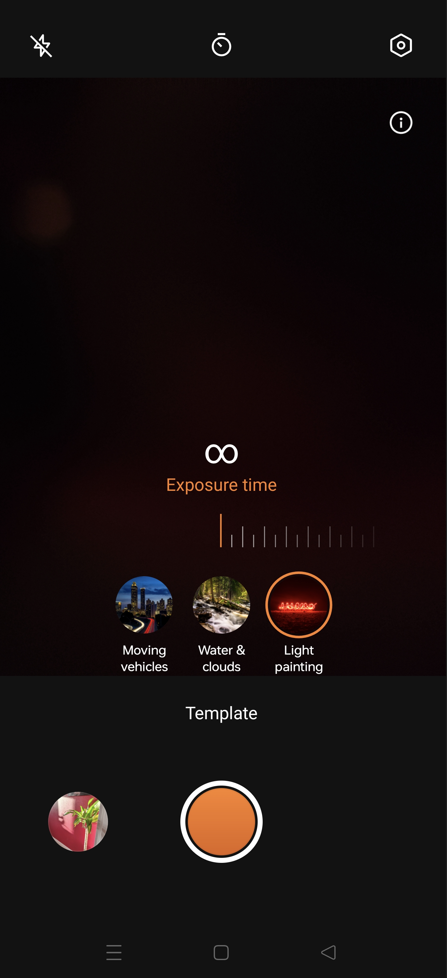
The only problem with this is that you have to touch the phone screen to end the recording physically. This introduces camera shake (unless your phone is mounted on an extremely solid support).
You do, however, have the option to start and end exposures by presenting the palm of your hand to the front-facing camera. I could not, however, get this to work.
Or you can go to the ‘Pro’ mode, and in the fully manual settings area, under exposure you can select up to 30 seconds. No infinity option is presented here.
The Find X5 Pro does not have any built-in stacking options – perhaps this will be added to future models. However, as Oppo does give you the option to record in RAW mode, you can take a sequence of a few dozen photos and stack them yourself. As long as you don’t mind getting to grips with astrophotography software. I have found that the simplest and easiest to learn to use is Sequator. Free stacking software for Windows. This is great software for phone photo stacking.
Top Three Phone Astrophotography Methods
So, now onto the ‘meat’ of this guide; what are the best ways you can get started taking and sharing awesome images of the night sky with your phone? Whether your preference is deep sky – nebulae, galaxies and other ‘faint fuzzies’ as they are often known, or the sun (only with a suitable filter!), moon and planets, your Android or iPhone can handle it. Let’s take a look at our top three methods.
Method 1 – Using your phone on its own, handheld or with a support.
The built-in cameras on smartphones have come a very long way since the first sub-megapixel efforts, which struggled to take a well-balanced photo if it wasn’t outside on a sunny day.
Nowadays, to compensate for the technical limitations of the small sensors and lenses found in phones, modern phone cameras employ lots of computer processing which happens automatically and seamlessly in the background.
Phone cameras can therefore be very sensitive to low light levels, with ISO’s of 6400 and higher not uncommon. Built-in noise-reduction algorithms, meanwhile, means that these high ISO’s do not result in the noisy speckled images you might otherwise expect.
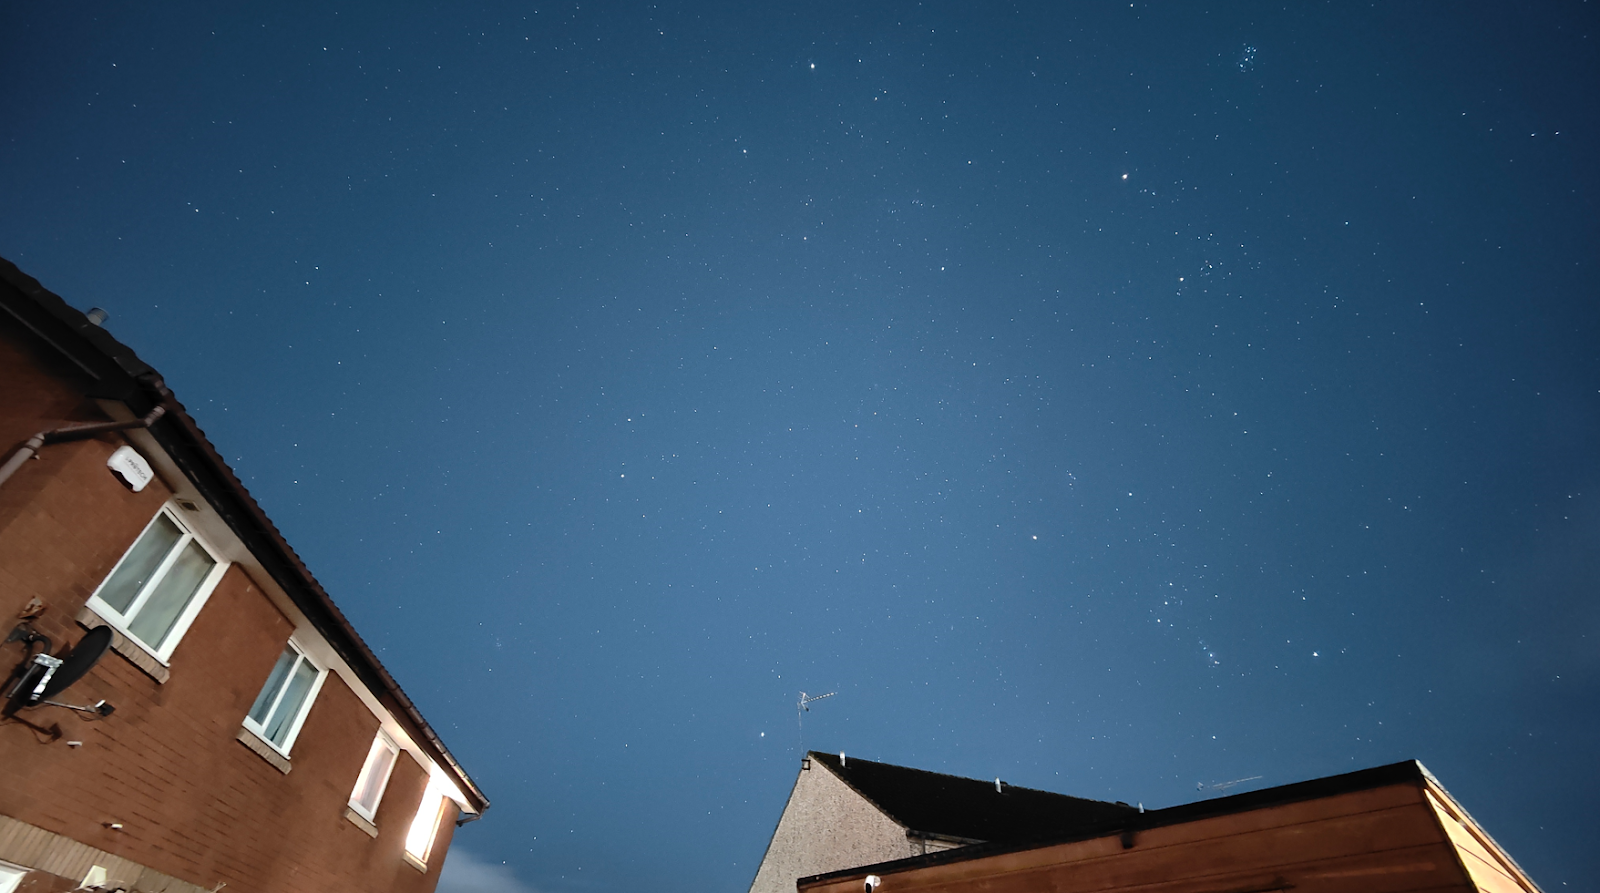
All this means that a range of wide-angle, star-field astrophotography is feasible with just your phone and a way to hold it steady for up to a few minutes at a time.
So here is a basic sequence of how you may take a photo of the Milky Way, one of the most popular things to photograph if you only have your phone with you.
- Choose the correct exposure time and ISO. So in the case of the Milky Way, start with 10-second exposures and then try longer- up to a minute or more. You’ll know that you have gone too far when you start to see star trails (no longer pin-points of light), the sky looks washed out (especially if light-polluted), or noise levels are getting unacceptable. This will result in a grainy, spotty image where the unwanted noise becomes hard to separate from the wanted stars!
- Switch off all unnecessary or auto features on your phone, specifically auto-focus and auto-exposure. I also suggest airplane mode to cut out distracting notifications and potentially intrusive/show-stopping updates while you work.
- If using a support, set that up now. This may take the form of a phone holder that attaches to a standard camera tripod or just a convenient wall. Otherwise, for shorter exposure times, a steady hand may suffice.
- Set your phone’s timer delay – 10 seconds should be sufficient for any wobbles to stop. Now, start snapping! Your first few or even many shots may not be great, but photos are free (except for battery life), so keep going until you get the results you are after. You will soon learn what works and what does not so that future sessions will have quicker set-up times and fewer duds.
Method 2 – Pointing your phone at a telescope eyepiece (Afocal)
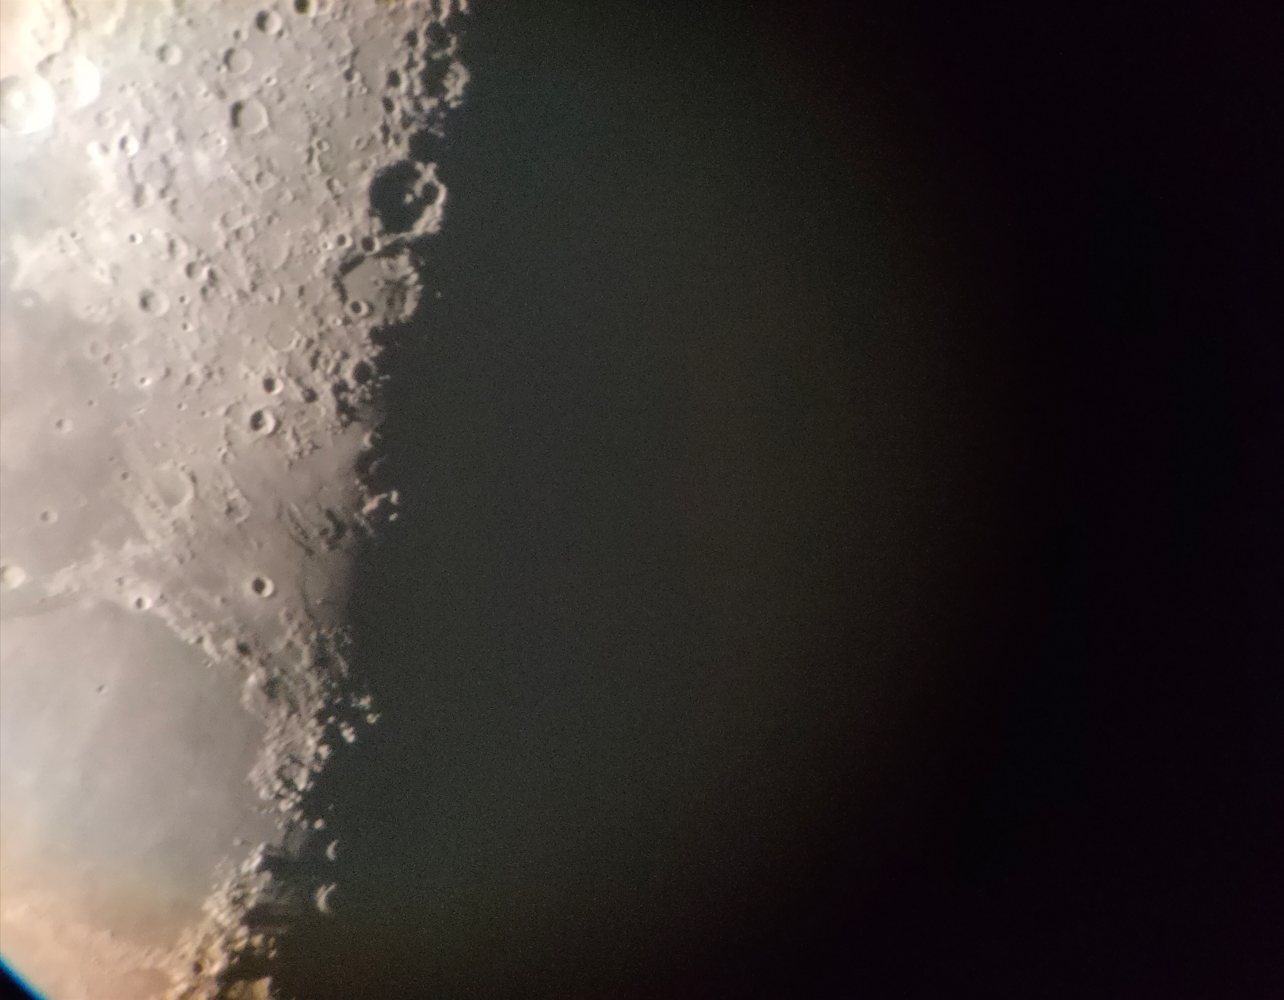
Sometimes there’s no need to overcomplicate things. If you just want to share how awesome the moon currently looks through your telescope, then quite often, holding your phone against the eyepiece and taking a photo will do the job.
The trouble with doing this is if you hold the phone too far, or too close, at an angle, or off to the side of the eyepiece, you get an uneven illumination of the frame. Parts of the frame will be in focus, parts out of focus, one edge over-exposed, one edge in shadow, or at worst, no image at all!
This is the most likely outcome of holding a phone by hand to the eyepiece, though it can work if you have patience, a steady hand, and good coordination.
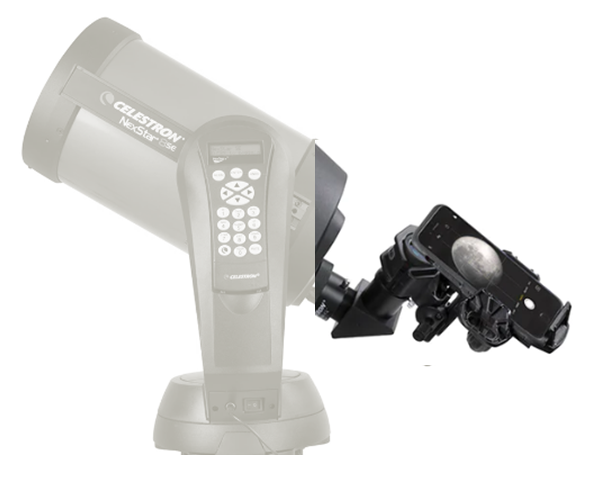
Fortunately, however, there are gadgets out there that hold the phone for you, so you can adjust everything much more precisely. One such example is the DX Smartphone adapter from Celestron.
It’s essentially a more sophisticated version of these phone holders that you stick onto your car windshield. Unlike these devices, however, the Celestron (and similar products) allow you to carefully position your phone within the holder so that the camera lens sits at the best distance and position from the eyepiece. This model also boasts a Bluetooth shutter control so that you never have to introduce camera shake by touching the phone when starting/stopping your exposures.
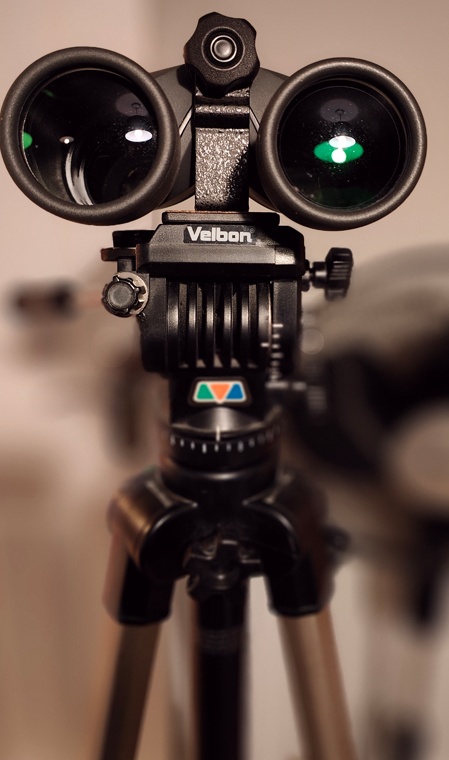
Method 3 – Wide-field astrophotography with binoculars
If you’re just getting into astrophotography, there’s a good chance you may not have a telescope yet. Or you may be on your travels; if you’re anything like me, a key factor in holiday destination choice is the quality/darkness of the skies! Again, chances are that you are without a telescope because you had to choose between that or taking your suitcase with less important things like clothes and toiletries.
Either way, binoculars are a much handier optical instrument; they are smaller, lighter and far more commonplace. And here’s the thing. Binocular astrophotography does not have to be a poor substitute. In many ways, it’s better than using a telescope, or just using your phone on its own. How so?
Well for one thing, the typical magnification of a good pair of astro-friendly bino’s is 7×50 or 10×50 (where the first number is the magnification and the second the objective lens size), and it just so happens that this is about the highest magnification that can be held steady by anyone who isn’t a brain surgeon.
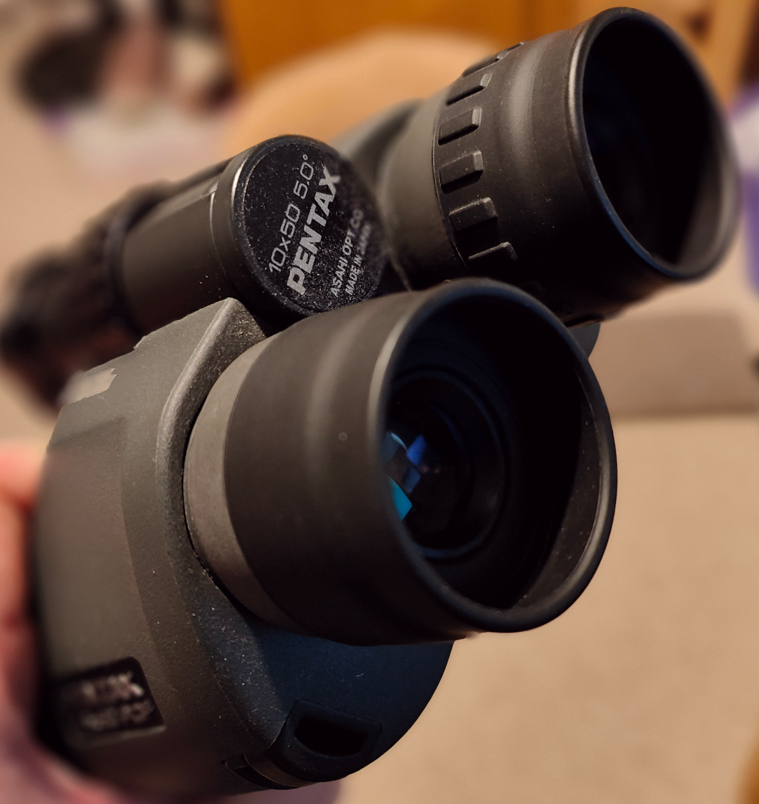
Remember that 10x magnification = 10x your hand tremors! So you want to keep that number low while still magnifying enough to bring out detail that you can’t see with the naked eye. Just as an aside, there is a class of binocular called ‘star-field binoculars’.
Although not much use for bird-spotting, typical star-field binos are only 2 or 3 times magnification with relatively huge 40 or 50mm objective lenses– basically a light-gathering monster, which even the most caffeine-addicted astrophotographer can hold steady enough to take sharp photos. One such example is the Helios 2×40, or the Vixen 2.1×42
Another advantage of binoculars over telescopes is their field of view. Binoculars’ comparative wide-field will show stunning detail over large swathes of the night sky, making binoculars ideal for taking Milky Way or general starfield photos. You can also take much longer exposures than with a telescope because the rotation of the earth and resultant trailing of the stars is much less at lower power.
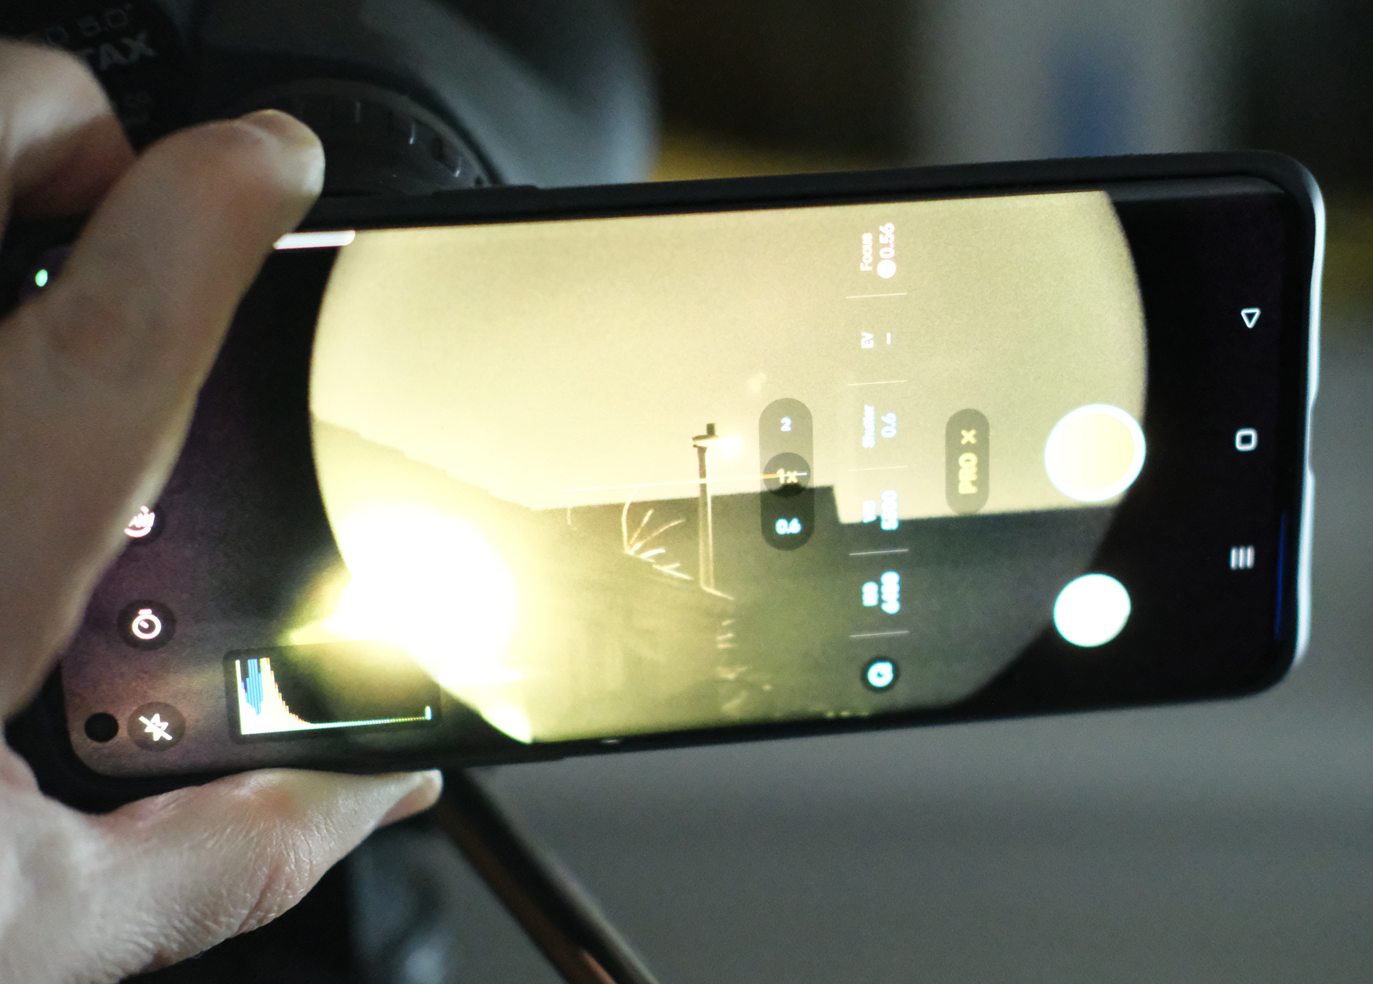
As with using a telescope, if you want to take longer exposures; so anything other than the moon or the bright planets then, some sort of support is ideal. Some of the same adapters that work with telescope eyepieces will also work well with binoculars, or you can buy models specifically intended for use with binos. These are most often found in shops and forums aimed at the bird-watching community.
Tripods can be portable and travel-friendly, easily fitting into a rucksack or daybag.
- Get your tripod to a comfortable height, or make all the necessary adjustments to your telescope/bino holder. Sorry, I cannot be specific here- every model will be slightly different, so you’ll have to try trial and error, or even, if stuck, you can read the instructions!
Things that May Go Wrong with Phone Astrophotography and How to Fix Them
Problem – I can’t get a sharp image. Focus is the most likely thing to go wrong when trying to get a sharp image. Because you are trying to focus while holding one lens (your phone’s) over another lens (your bino or telescope’s), you have two things to focus- the telescope, binoculars and then the camera has to focus on that image.
Solution. In the case of methods 2 and 3, always make sure the telescope or binocular is in perfect focus first – the camera cannot correct for bad focus of your lenses. Then when focusing the camera manually, it’s just trial and error I’m afraid!
Try moving the binos or scope further or closer to the eyepiece so that the circle of light is as large as possible, ideally taking up most or all of the camera frame. Also, double-check that auto-focus is off. If all this checks out, make sure that there are no greasy fingerprints on the eyepiece or binocular lenses. This will result in soft blurry images.
Problem. Images I’ve taken are sharp but stars have trails or all appear to be duplicated.
Solution
This could be one of, or a combination of 3 things. The exposure times are too long, the phone support isn’t stable enough or the ISO is set too low.

So first, double-check the stability of your tripod or phone mount and also be aware that gusts of wind could be to blame. If the phone moves while its shutter is open, the stars will start to blur and expose in different positions. In the case of star trails, reduce the exposure time until the trails disappear
Next Steps – Why You May Want to Consider Using a Dedicated Camera
It’s a well-used phrase but it’s true: The best camera is the one you have with you. If you’re getting great results with the above methods, why fix what ain’t broke?
Plus, if having to invest in, learn to use, store and maintain another set of equipment would put you off taking photos of the night sky, then your phone camera is better than any other kind of camera because you are using and getting good results from it.
On the other hand, the camera in your phone, as smart and hi-tech as it is, has limitations when it comes to astrophotography. If you are interested in moving beyond these limitations, you may want to consider buying a digital SLR, Mirrorless camera or even a dedicated astrocam. I won’t go into detail on these types of camera here, but briefly here are some reasons you may want to consider this route.
Using a touch-screen can be fiddly and imprecise, especially in damp or cold conditions. Even when it’s not raining (and it shouldn’t be when you’re using your telescope!), your hands, rough from the cold, or the screen with condensation on it from the cold, may not respond well or predictably. This can be frustrating. Cameras have physical buttons and controls (sometimes in addition to their own touchscreens) which can easily be operated in all weathers.
Most of the time, your phone is set up and optimized for daytime photography. Unless your specific model saves settings in camera profiles, it can be time-consuming and error-prone to have to change all your camera settings manually every time you want to do some astrophotography. A camera dedicated to the task of astrophotography will always have previous settings saved for the next session.
Advanced post-processing of your images requires RAW image formats; JPEGS won’t do!
To manipulate and stack deep sky and planetary images, you need a non-lossy format. To be fair, some smartphones do now output images in RAW format, though not all RAW’s are created equal and astrophotography software may not recognize your phone’s format.
Perhaps the simplest reason though, is that you cannot use your phone for the multitude of things we all use our phones for while it is strapped to a telescope taking long exposures! You could just use an old phone not currently employed in day duties but that means you have another phone to keep charged and updated. Also, for the expense of buying another phone, you could spend that on a camera.
Conclusions on Phone Astrophotography
Hopefully, any worries about getting into astrophotography having to be expensive and difficult have now been dismissed! Almost everyone these days has the required tools at their disposal. With little more than a smartphone, a support of some kind, and maybe a pair of old binoculars you already have, the night sky is all yours to photograph.