
Table of Contents
- What Is Wide-Field Milky Way Astrophotography?
- Milky Way Season and Planning: When and Where to Shoot
- Essential Gear for Milky Way Photography Without a Tracker
- Camera Settings, Focus, and Exposure Techniques
- Composition, Foregrounds, and Light Management
- Advanced Techniques: Stacking, Panoramas, and Blends
- Post-Processing Workflow for Natural Milky Way Images
- Troubleshooting Common Milky Way Photography Problems
- Ethics, Safety, and Leave-No-Trace Night Shooting
- Frequently Asked Questions
- Final Thoughts on Choosing the Right Milky Way Astrophotography Setup
What Is Wide-Field Milky Way Astrophotography?
Wide-field Milky Way astrophotography is the art and science of capturing our galaxy’s luminous band using a standard camera and lens, typically at short focal lengths (10–35 mm on full-frame). Unlike deep-sky imaging that zeroes in on small, distant objects through telescopes, wide-field work emphasizes the sweeping arc of the Galactic Core, star clouds, dark dust lanes, and their relationship to Earthly landscapes. The result is a compelling blend of sky and foreground that connects astronomical structure with a sense of place.

Artist: Brainandforce.
Because stars move relative to your camera due to Earth’s rotation, exposure time, focal length, and sensor resolution play pivotal roles in avoiding noticeable star trails. Much of this guide focuses on practical techniques—planning, gear selection, exposure strategy, and processing—that let you produce sharp, detailed images of the Milky Way without specialized tracking mounts. If you later decide to elevate your results with a star tracker, the foundational skills you learn here remain invaluable.
To align your results with your goals, first decide on your creative intent. Do you want a bold, contrasty Galactic Core dominating the frame, or a subtle, natural look that preserves night ambiance? Are you aiming for a single exposure that captures both sky and land, or a more advanced composite that balances tracked sky detail with a clean, low-noise foreground? This article explores those options in depth and links to relevant sections—such as Milky Way season planning, essential gear, and advanced stacking and panoramas—as your needs grow.
Milky Way Season and Planning: When and Where to Shoot
Good planning is the backbone of successful wide-field astrophotography. Clear skies, the right time of year, and dark locations dramatically influence the quality of your results. Before pressing the shutter, it helps to understand the seasonal visibility of the Milky Way’s bright core and how it changes with latitude and hemisphere.
Understanding Milky Way visibility
- Northern Hemisphere core season: Generally late spring through early autumn (approximately April to September). The Galactic Core rises before dawn in early spring, is visible most of the short summer nights, and sets earlier by early autumn.
- Southern Hemisphere advantage: Observers closer to the Southern Hemisphere often enjoy higher, longer visibility of the core with more dramatic detail during their autumn and winter months (roughly February to October).
- Off-season skies: In colder months or outside core season, you can still capture the Milky Way band—just not the brightest core region. Winter constellations (e.g., Orion) also offer spectacular wide-field opportunities.
Keep a flexible mindset: even outside “peak” season, strong results are possible with thoughtful composition and subtle post-processing.
Moon phase, darkness, and the Bortle scale

Artist: ESO/P. Horálek, M. Wallner.
- Moon phase: Aim for the New Moon window (from a few days before to a few days after New Moon). A bright Moon will wash out the Milky Way’s contrast. In some cases, a very thin crescent or a low Moon can help illuminate the foreground—but it will mute faint sky detail.
- Darkness: Truly dark skies (Bortle 1–3) reveal intricate dust lanes and star clouds. Suburban skies (Bortle 5–6) allow a visible core but with less contrast; heavy light pollution (Bortle 7–9) sacrifices much of the faint structure.
- Twilight windows: Plan your shoots during astronomical night—when the Sun is 18° or more below the horizon—ensuring the darkest possible sky.
Forecasts and environmental variables
- Cloud cover: Use reliable local forecasts. Even a thin layer of high cloud can dull contrast. Conversely, scattered low clouds can add drama when carefully timed.
- Atmospheric transparency and humidity: High humidity increases haze and halos—a dew management strategy is essential (see gear and troubleshooting).
- Wind: Strong winds cause vibrations and blur. Shelter your tripod behind natural barriers.
Planning tools and fieldcraft
- Sky maps and planners: Planetarium apps help you visualize when and where the Milky Way core will rise relative to your location. Many include augmented reality to align compositions on-site.
- Topo and access: Scout landscapes during daylight. Check for safe parking, tides near coasts, and public access rules. Note prominent foreground elements (arches, trees, cliffs) to frame the core’s arc.
- Light pollution maps: Identify darker zones nearby. Even modest improvements in sky quality greatly impact detail and color.
As you refine your plan, jot down precise target times for the Milky Way’s altitude and azimuth, moonrise/set, and astronomical twilight. Once on location, let the sky guide you: real-time adjustments often yield your best compositions. Next, we’ll discuss the gear that makes all the difference.
Essential Gear for Milky Way Photography Without a Tracker
While a star tracker expands creative potential, it’s not required for striking wide-field results. With a modern camera, fast lens, and solid support, you can capture impressive detail in single exposures or short stacks. Below is a pragmatic gear checklist—lean where possible, robust where necessary.
Cameras: full-frame vs. APS-C vs. Micro Four Thirds
- Sensor size and sensitivity: Full-frame cameras generally offer cleaner high-ISO performance and wider fields at the same focal length. APS-C and Micro Four Thirds (MFT) systems remain highly capable, especially with fast prime lenses.
- Resolution trade-offs: Higher megapixel sensors reveal finer detail but are more sensitive to star trailing. Manage exposure time carefully (see settings and exposure techniques).
- RAW capture: Shoot RAW for maximum dynamic range and color depth; this is critical for post-processing.
Lenses: prioritizing speed, sharpness, and field of view
- Fast aperture primes (e.g., f/1.4–f/2): Let you keep ISO lower and shutter speeds shorter, reducing noise and trailing.
- Ultra-wide to wide (10–35 mm full-frame equivalent): Shorter focal lengths tolerate longer exposures before trails appear and help frame dramatic foregrounds under the Milky Way arc.
- Corner performance: Look for lenses with good coma control and sharp corners when stopped down 1–2 stops from wide open. Even stellar primes often improve markedly at f/2.0–f/2.8.
Support and stabilization
- Sturdy tripod: Essential for consistency. Carbon or aluminum is fine; stability matters more than weight for night work.
- Remote release or self-timer: Prevents shake when starting exposures. Many cameras offer a 2–5 second delay that works well.
- Lens hood and dew control: A simple hood reduces stray light; dew heaters or disposable hand warmers can fend off condensation.
Power, storage, and quality-of-life accessories
- Spare batteries: Long exposures drain power quickly, especially in cold conditions.
- Large-capacity memory cards: Stacking sessions and panoramas generate many files—use reliable, fast cards.
- Headlamp with red mode: Preserves night vision and courtesy for fellow observers.
- Gaffer tape, microfiber cloths, and a lens brush: Quick fixes, cleaning, and sealing stray light.
If you later add a compact star tracker, you can employ tracked sky + untracked foreground blends for exceptionally clean results. Until then, the above kit covers what you need for successful single-frame work and lightweight stacking.
Camera Settings, Focus, and Exposure Techniques
Getting clean, sharp star fields hinges on three pillars: critical focus, exposure time short enough to avoid obvious trails, and an ISO/aperture combination that reveals detail without excessive noise. The following framework offers a dependable starting point across camera formats and lens choices.
Focusing at night: precision over guesswork
- Manual focus: Switch to MF and use live view at maximum magnification (e.g., 10x). Point at a bright star or distant light. Gently adjust focus until the star is as small and sharp as possible.
- Lens infinity mark caution: Many lenses focus “past” infinity. Do not rely on the hard stop or engraved infinity symbol.
- Tape the focus ring: After achieving critical focus, tape the ring to prevent accidental movement. Recheck focus as temperatures drop (focus can drift).
- Bahtinov mask (optional): A small mask designed for your lens diameter can make focus repeatable by producing distinct diffraction spikes.

Artist: Axleottal.
Exposure time: balancing sharp stars and signal
The classic “500 rule” offers a quick estimate for the longest shutter speed before star trailing becomes obvious: 500 divided by the 35 mm equivalent focal length. For example, with a 24 mm lens on full-frame, 500 / 24 ≈ 20 seconds. On APS-C (1.5x crop) at 24 mm, the equivalent focal length is 36 mm, suggesting ≈ 13–14 seconds.
While convenient, the 500 rule is often optimistic for modern high-resolution sensors and large prints. A more accurate approach accounts for sensor pixel pitch and aperture—commonly known as the NPF method. Many planning apps and calculators implement the NPF rule to suggest a shorter, sharper shutter speed. When in doubt, compare both estimates and review test frames at 100% to judge trailing for your specific lens, sensor, and compositional direction (trailing is more pronounced toward the celestial equator than near the celestial poles).
Aperture and ISO: gathering light without overdriving noise
- Aperture: Start as wide as your lens can handle without distracting aberrations. For fast primes, stopping down one stop (e.g., from f/1.4 to f/2.0) often tightens stars and reduces vignetting.
- ISO: Typical ranges are ISO 1600–6400 for untracked wide-field shots. Use the lowest ISO that keeps the sky signal well above the camera’s read noise while preserving shutter times short enough for pinpoint stars.
- Noise and dynamic range: Increasing ISO amplifies both signal and noise. If your histogram is pinned to the left (underexposed), raising ISO can help, but for many modern sensors, ISO beyond a certain point offers diminishing returns. Test your camera’s sweet spot.
White balance and file format
- RAW format: Always shoot RAW. You’ll recover significant shadow detail and manage color more flexibly in post.
- White balance: Set a consistent Kelvin white balance (e.g., 3800–4500 K) to preview a relatively neutral sky. You’ll fine-tune in post-processing.
Baseline settings you can adapt on location
Consider the following as a test frame recipe; adjust for lens speed, sky darkness, and your camera’s noise behavior:
Full-frame example (24 mm f/1.8):

- Mode: Manual (M)

- Focus: Manual, magnified on a bright star

- Aperture: f/1.8–f/2.2

- Shutter: 10–15 s (shorter if NPF suggests)

- ISO: 3200–6400

- WB: 3800–4200 K

- Drive: 2–5 s self-timer or remote
APS-C example (16 mm f/1.4):
- Aperture: f/1.8–f/2.2
- Shutter: 8–12 s (check NPF guidance)
- ISO: 3200–6400
Micro Four Thirds (12 mm f/1.8):
- Aperture: f/2.0–f/2.8
- Shutter: 6–10 s (shorter for pinpoint stars)
- ISO: 3200–6400
Tip: Always zoom to 100% on your LCD and inspect stars near the corners. Coma and astigmatism are most visible there and will guide whether you should stop down another 1/3 to 2/3 stop.
Composition, Foregrounds, and Light Management
Composing a convincing Milky Way image means balancing the sky’s grandeur with a strong terrestrial anchor. The Galactic Core provides texture and contrast; your foreground provides narrative and scale. Strive for synergy between the two.
Foreground ideas and framing strategies
- Natural features: Lone trees, arches, balanced rocks, ridgelines, dunes, or reflective lakes can anchor the frame.
- Man-made structures: Old barns, lighthouses, and historic ruins add character but verify access rules and safety.
- Leading lines: Footpaths, rivers, fences, and shorelines draw the viewer’s eye toward the Milky Way band.
- Rule of thirds: Place the horizon along a third for balance. Tilting the camera slightly upward helps emphasize the sky while including foreground interest.
Light painting and ambient illumination
- Subtlety first: The faintest touch of indirect light can reveal texture without overshadowing the sky.
- Diffuse, bounce, and feather: Point handheld lights away from your subject and let spill or bounce light do the work. Avoid hot spots.
- Moon as fill: A crescent or low Moon can softly lift foregrounds—but it reduces core contrast. Decide which trade-off aligns with your intent.
Managing intrusive light and flares
- Shield stray light: Use your body or a lens hood to block passing car headlights or distant lamps.
- Avoid direct beams: Handheld lights pointed toward the lens cause flares and washed-out blacks.
- Vignetting and gradients: Expect some vignetting at wide apertures; correct later using lens profiles and gradient tools in post-processing.
Note: Teamwork helps. One person can manage camera settings while another refines foreground illumination. Communicate clearly—brief exposures are precious on dark nights.
Advanced Techniques: Stacking, Panoramas, and Blends
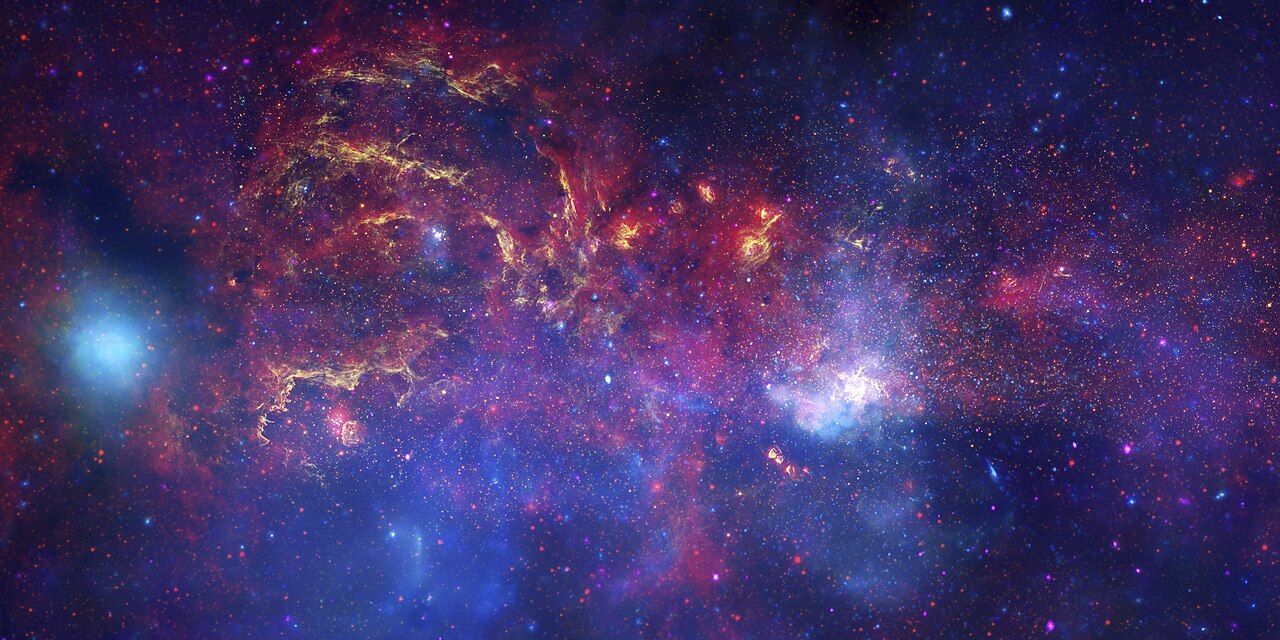
Artist: NASA/JPL-Caltech/ESA/CXC/STScI.
Once you’re comfortable with single-frame captures, consider techniques that extend dynamic range, reduce noise, and expand field of view. You don’t need a tracker to benefit from stacking or panoramas, but careful capture discipline makes all the difference.
Noise reduction by stacking untracked frames
By taking a short series of identical exposures and stacking them with star alignment, you can average out random noise while preserving detail. Many software tools provide star alignment and blending modes that prioritize stars while masking moving foreground elements. Plan for at least 8–20 exposures of the sky for noticeable improvement, keeping each exposure short enough to avoid trails.
- Sky-only stack: Keep the camera static and shoot a burst of frames. Later, align on the stars; moving elements (clouds, trees swaying) may require masks.
- Foreground stack (median): For landscapes with noise or passing headlamps, a separate foreground series can be median-stacked to remove transient artifacts while cleaning up shadow noise.
- Dark frames: Optional but helpful. Capture a few dark frames at the same settings with the lens cap on to model fixed-pattern noise.
Stacking paired with a fast lens drastically improves signal-to-noise ratio (SNR). The main cost is time at the scene—and additional effort during post-processing.
Milky Way panoramas and mosaics
To portray the entire arch or to integrate a grand foreground, shoot overlapping panels side-to-side and (if needed) top-to-bottom. Use manual exposure, manual white balance, and locked focus to ensure consistency across frames.
- Overlap: Aim for 30–40% overlap between frames to help stitching.
- Sequence: Consider a sky-first sequence (complete the arch) followed by a foreground sweep. If light changes, prioritize the sky.
- Nodal point: For very close foregrounds, rotating around the lens’s entrance pupil reduces parallax. For most distant-landscape scenes, a standard tripod rotation works fine.
Exposure blending for balanced results
Scenes that exceed your camera’s dynamic range benefit from blending exposures—for instance, a brighter foreground captured during blue hour or with low-level lighting, combined with a darker, cleaner Milky Way sky. Keep your camera in the same position for both captures to simplify alignment. Ethical disclosure of composites varies by community; be transparent about your methods when sharing.
Tracked sky + untracked land (optional expansion)
When you later adopt a compact tracker, you can shoot a short tracked series for the sky (cleaner detail at lower ISO and smaller apertures) and a separate untracked set for the land. The fusion preserves pinpoint stars while keeping the landscape natural. Until then, untracked stacking remains a powerful, portable alternative.
Post-Processing Workflow for Natural Milky Way Images
Processing turns a murky gray capture into a clean, balanced depiction of the Milky Way. The goal is not to fabricate nonexistent features but to reveal faint structure hidden in a linear RAW file. Work gently, evaluate at multiple scales, and avoid pushing global contrast so far that stars bloat or colors clip.
Organize and evaluate
- Cull smartly: Star size, focus accuracy, and motion blur determine keepers. Eliminate frames with accidental bumps or headlamp sweeps.
- Lens profile: Enable distortion and vignetting corrections for your lens, especially for panoramas. Apply chromatic aberration fixes.
Global tone and color
- White balance: Fine-tune around 3800–4500 K for a neutral sky, or go warmer/cooler to taste. Avoid neon tints unless stylized.
- Contrast shaping: Use a gentle S-curve to lift midtones where dust lanes live while preserving highlight headroom for bright star clouds.
- Black point: Set a modest black level to maintain some airglow and faint background stars; crushing blacks can sterilize the sky.
Local contrast and structure

Artist: NASA/JPL-Caltech.
- Targeted clarity: Apply local contrast (clarity, texture, or micro-contrast) to the core and dust lanes using masks. Keep stars from inflating by limiting radius or using star masks.
- Color separation: The Milky Way carries subtle warm/cool variation. Gentle HSL adjustments can tease apart magenta nebulosity from cooler background hues.
- Gradient removal: Light pollution, airglow, or Moon gradients can be reduced with radial/linear masks or gradient-removal tools. Assess smooth transitions—avoid obvious seams.
Noise control and sharpening
- Luminance noise: Apply moderate noise reduction after basic tonal work. Over-smoothing erases micro-structure and gives a plastic look.
- Color noise: Suppress chroma speckling, especially in shadow regions and vignetting corners.
- Sharpening: Use restrained sharpening on detail areas with star masks to prevent halos. For stacks, you may need less sharpening overall.
Stacking workflow notes
- Star alignment: For untracked stacks, use software capable of aligning on stars while compensating for Earth’s rotation. Export a linear 16-bit TIFF for finishing.
- Median or sigma clipping: Helps reject airplane trails and satellites. Verify that bright stars and the core remain unaffected.
- Blend with foreground: If you shot a separate foreground sequence, align and mask carefully. Feathered masks and color-matched exposures are key to a seamless result.
Tip: Process iteratively. After a first pass, take a break and revisit with fresh eyes. Banding, color casts, and overdone clarity are easier to spot after a pause.
Troubleshooting Common Milky Way Photography Problems
Even with careful planning, night shoots present surprises. Use this checklist to diagnose and correct frequent issues, with cross-references to deeper guidance.
Soft stars or missed focus
- Recheck manual focus: Magnify a bright star and adjust slowly. Thermal contraction can shift focus as temperatures fall (see focus tips).
- Stop down: If corner stars are smeared, stop down 1/3 to 2/3 stop. Slightly shorter exposure times may also help.
- Vibration: Use a remote or self-timer. On windy nights, lower tripod height and add weight to the center column.
Star trailing
- Shorten shutter: Use a shorter exposure than the 500 rule suggests, or consult an NPF calculator.
- Recompose: Trailing is more pronounced near the celestial equator; angling closer to the pole can tolerate longer exposures.
- Stack more frames: Compensate for lost signal by increasing the number of exposures and stacking.
High noise and muddy contrast
- Open the aperture: If your lens allows and image quality remains acceptable.
- Raise ISO modestly: Enough to lift the sky away from read noise, but avoid extreme values that collapse dynamic range.
- Improve sky quality: Relocating even one Bortle class darker can outperform aggressive noise reduction.
Color casts and gradients
- Consistent WB: Use a fixed Kelvin WB in-camera for all frames in a sequence.
- Gradient tools: Apply linear or radial masks to subtract light domes. Keep transitions subtle.
- Dew and haze: Moisture on the lens softens contrast and shifts color. Use dew heaters and periodically check for fogging.
Panorama stitching errors
- Increase overlap: 30–40% makes stitches more robust.
- Keep exposure constant: Manual exposure and WB across the set prevents exposure seams.
- Reduce parallax: For close foregrounds, rotate around the lens entrance pupil or step back.
Ethics, Safety, and Leave-No-Trace Night Shooting
Night photography thrives in pristine places. Protecting those environments—and yourself—elevates the practice beyond the image. Responsible conduct ensures future access and preserves the very darkness that makes the Milky Way visible.
Leave-no-trace principles for astrophotographers
- Stay on durable surfaces: Avoid trampling sensitive vegetation, especially in deserts, alpine meadows, and dunes.
- Minimize light pollution: Use dim red lights, shield beams, and avoid indiscriminate light painting. Respect local rules on artificial lighting.
- Pack it in, pack it out: Take all trash and micro-trash, including tape scraps and zip ties.
- Respect wildlife and quiet hours: Night is active time for many species; keep noise and lights low.
Personal safety and situational awareness
- Tell someone your plan: Share your location and expected return time.
- Navigation: Carry a map, compass, or GPS. Phones can fail; have a backup.
- Weather and tides: Sudden changes can be dangerous—verify forecasts and tide tables.
- Gear security: Use reflective tape on critical items so they’re easy to find in the dark.
Access, permits, and community courtesy
- Permissions: Some parks regulate night access or prohibit light painting. Research and comply.
- Share the sky: Coordinate with other photographers and stargazers to avoid crossing beams and frames.
Frequently Asked Questions
How dark do my skies need to be to photograph the Milky Way?
Darker is better, but you can still capture the Galactic Core under suburban conditions if it’s above the horizon away from local light domes. Bortle 1–3 locations reveal much richer dust lanes and subtle colors. For first attempts, aim for the darkest site within reasonable travel distance and schedule around the New Moon. If your local skies are bright, focus on strong foregrounds and use stacking to improve signal-to-noise ratio.
What focal length is best for beginners?
Start with an ultra-wide or wide lens in the 14–24 mm range on full-frame (≈10–16 mm on APS-C; ≈7–12 mm on Micro Four Thirds). Short focal lengths tolerate longer exposures before star trailing becomes obvious and simplify composition under the Milky Way arc. As you gain experience, try 24–35 mm for a more intimate view of the core’s structure, keeping an eye on shorter shutter times as focal length increases. For all options, review the exposure timing guidance to ensure sharp stars.
Final Thoughts on Choosing the Right Milky Way Astrophotography Setup
Wide-field Milky Way photography rewards preparation, restraint, and patience. From seasonal planning and moon phases to simple, reliable gear, each decision moves you closer to clean, detailed results. Dial in critical focus and exposure, practice subtle light management, and use stacking or panoramas when a scene calls for extra reach or lower noise. In post, aim to reveal—not invent—the Milky Way’s structure with thoughtful masks, careful noise reduction, and delicate contrast.

Artist: ESO/Yuri Beletsky.
As you refine your process, you’ll discover a personal style: natural and understated, dramatic and high-contrast, or somewhere in between. The framework above gives you the control to choose rather than accept what the camera renders in a single frame. If this guide helped, consider bookmarking it, sharing it with a stargazing friend, and subscribing to our newsletter for weekly deep dives into night-sky techniques, planning strategies, and gear tips that keep your astrophotography evolving.