Table of Contents
- Introduction
- Fundamentals of Narrowband Imaging
- Cameras and Optics: Mono vs OSC
- Filters and Fast Optics Bandpass Shift
- Planning Targets in Light-Polluted Skies
- Acquisition Workflow: Data Quality First
- Processing: SHO/HOO, Stars, and Noise
- Troubleshooting Common Issues
- Case Studies: City Imaging Plans
- Beginner FAQs
- Advanced FAQs
- Tools and Resources
- Safety and Best Practices
- Conclusion
Introduction
For many imagers, bright city lights and suburban skyglow used to mean packing up gear and driving long hours to dark sites. Narrowband astrophotography has changed that. By isolating the sky’s most prominent emission lines—hydrogen alpha (Hα), doubly ionized oxygen (OIII), and singly ionized sulfur (SII)—we can capture detailed deep-sky images from Bortle 7–9 locations, even under a bright Moon. This guide is a comprehensive, practical handbook to mastering narrowband imaging in light-polluted environments, covering physics, gear, planning, acquisition, processing, and troubleshooting.

Artist: Luka.psk
We will primarily focus on emission nebulae and supernova remnants, which radiate strongly in these lines. You will learn why bandwidth matters, how dual- and tri-band filters enable one-shot color (OSC) cameras to excel, and how monochrome systems with filter wheels unlock maximum flexibility. We’ll also explore nuances such as bandpass shift in fast optics, star color strategies when using narrowband, and workflows to tame gradients and noise. Whenever relevant, we link forward to sections like Acquisition, Processing, and Troubleshooting so you can jump directly to what you need.
Fundamentals of Narrowband Imaging
At the heart of narrowband imaging is the concept of selecting a very narrow slice of the spectrum centered on astrophysically important emission lines while rejecting the vast majority of skyglow. The most commonly used lines and their wavelengths:
- Hydrogen-alpha (Hα): 656.28 nm (deep red)
- Oxygen-III (OIII): 500.7 nm (green-cyan)
- Sulfur-II (SII): 672.4 nm (deep red, slightly longer than Hα)
These lines originate in ionized gas. Hot, massive stars emit ultraviolet radiation that strips electrons from atoms in surrounding nebulae. When electrons recombine or transition between energy levels, they emit photons at specific wavelengths—our narrowband targets. Supernova remnants (SNRs) also radiate strongly in these lines due to shock excitation.
Why narrowband beats light pollution
Urban light pollution consists of a continuum (broadband) from LED lighting and residual line emissions from older sodium/mercury lamps. The skyglow covers wide swaths of the spectrum, drowning faint nebular signal. Narrowband filters with bandwidths like 3 nm, 5 nm, or 7 nm accept only a razor-thin region around the target line, rejecting most of the sky background. The result is a much higher signal-to-noise ratio (SNR) for emission-line targets, even when the Moon is up.
Bandwidth trade-offs
- 3 nm (ultra-narrow): Maximum rejection of skyglow, better isolation between Hα and nearby sky background or unwanted lines. Demands better filters (more cost), and may suffer more from bandpass shift in very fast systems—see Fast Optics.
- 5 nm: Balanced choice with excellent contrast and more tolerant to fast beams.
- 7 nm and wider: More signal throughput and less sensitive to angle-of-incidence. In heavier light pollution, contrast is reduced compared to 3–5 nm.
Monochrome vs multi-band filters
There are two main approaches:
- Monochrome camera + single-line filters (Hα, OIII, SII): You shoot each channel separately and combine in processing (e.g., SHO or HOO). Maximum flexibility and purity.
- One-shot color (OSC) camera + dual-/tri-band filters: Multi-bandpass filters transmit Hα along with OIII (and sometimes SII) simultaneously. They simplify imaging and reduce complexity; great for portable or beginner-friendly rigs.
If you plan to process with the classic “Hubble palette” (SHO: SII→R, Hα→G, OIII→B) or want fine control over each line, a monochrome system is the gold standard. If you want to maximize time on target and keep your rig light and simple, an OSC plus a good dual-band is compelling. We compare both in depth in Cameras and Optics.
Cameras and Optics: Mono vs OSC
Modern CMOS cameras dominate astrophotography. They offer low read noise, high quantum efficiency (QE), and fast readout. Two common architectures:
- Monochrome CMOS: No color filter array (CFA). Every pixel records all incident photons in the passband, maximizing sensitivity to narrowband light. You use a filter wheel to select Hα, OIII, SII.
- OSC CMOS: A Bayer pattern CFA (RGGB) assigns colors to sub-pixels. Narrowband signals are split across color channels, but with dual-/tri-band filters, OSC performs surprisingly well on emission nebulae.
Optical considerations
Focal ratio (f/number) influences exposure length. Faster systems (e.g., f/2–f/4) deliver more photons per unit time but can challenge filter performance. Slower systems (e.g., f/6–f/7) are forgiving and often yield more consistent stars across the frame. Read about filter behavior in fast beams in Filters and Fast Optics Bandpass Shift.
Advantages of monochrome for narrowband
- Efficiency per line: Every pixel collects the desired line, improving SNR per subexposure compared to OSC with a CFA.
- Flexibility: Choose bandwidth and exposure per line (e.g., more time on OIII when it is weaker in your target).
- Star color control: Capture RGB broadband for stars and combine with narrowband nebula data for natural star colors.
Advantages of OSC with dual-/tri-band filters
- Simplicity: No filter wheel or sequencing complexity; capture multiple lines at once.
- Time on target: More photons collected per minute because you’re not switching filters. Great for short windows or variable weather.
- Portability: Ideal for compact rigs and travel setups.
Both paths work well. Your choice depends on goals, budget, and patience for processing. If your priority is maximum control and scientific-style separation, go mono; if your priority is convenience with strong results, go OSC with a quality multi-band filter.
Backfocus, tilt, and sensor size
Narrowband filters often sit in front of the sensor stack. The exact distance from the corrector/flattener to the sensor (backfocus) is critical for star shapes in the corners, especially with larger sensors. Use shims or adjustable tilt plates to correct tilted focal planes. Bad tilt can mimic collimation issues. If you see elongated stars consistently in one corner, consult Troubleshooting.
Filters and Fast Optics Bandpass Shift
Interference filters (most modern narrowband filters) work by constructive and destructive interference in thin-film layers. Their transmission profile depends on the angle of incidence of incoming light. In fast optical systems (small f/ratio), chief rays hit the filter at larger angles, causing a blueward shift of the bandpass center.
What bandpass shift does
- Center shift: The filter’s passband moves to shorter wavelengths as the angle increases.
- Reduced transmission: If shifted too far, the line (e.g., OIII at 500.7 nm) may sit partially outside the passband, cutting signal and altering color balance.
- Halo behavior: Some halos and star bloating issues worsen at fast f/ratios due to reflections between the sensor cover glass, filters, and optics.
Practical guidance for fast systems
- Use filters specified for fast optics: Some manufacturers offer “fast” versions designed to account for the blue shift, maintaining high transmission at, say, f/2–f/3.3.
- Consider bandwidth: Wider filters (5–7 nm) are more forgiving than ultra-narrow (3 nm) if you shoot at very fast focal ratios.
- Placement: Keeping filters closer to the sensor reduces the cone angle at the filter location, mitigating shift somewhat.
- Test OIII: OIII is most sensitive to shift; if your OIII looks dim or off-color relative to Hα, bandpass shift may be the culprit.
If you are unsure whether your configuration is affected, shoot short test frames in Hα and OIII at the same exposure and compare histograms and star sizes. If OIII is unusually weak, consider a slightly wider passband or a fast-optimized filter. You can also rebalance channels in Processing, but that doesn’t recover lost signal.
Planning Targets in Light-Polluted Skies
Planning is your multiplier. Even in a bright city, careful target selection and timing increase your success dramatically. Emission nebulae and supernova remnants are the ideal place to start because they radiate strongly in Hα and OIII, with many also emitting in SII.
Choosing targets that flourish in narrowband
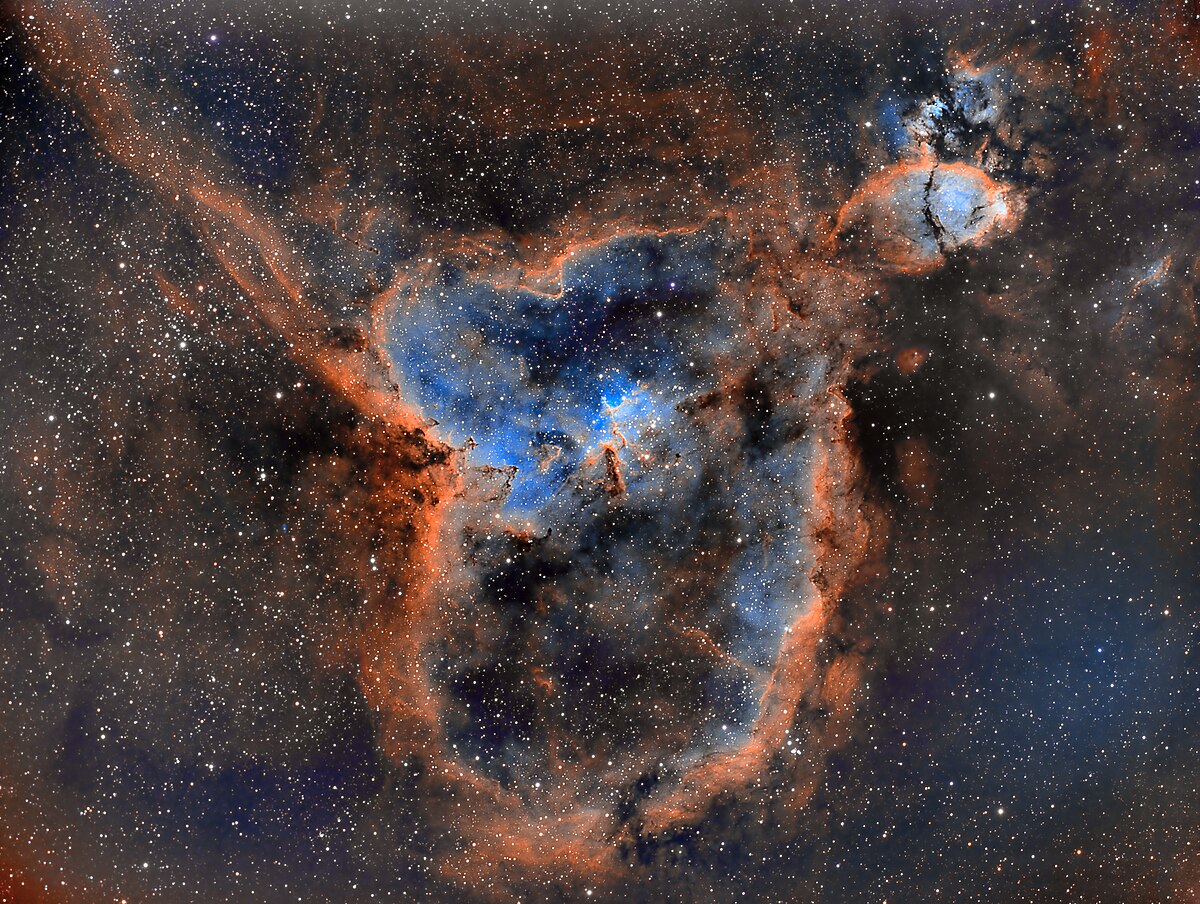
- Classic HII regions: North America Nebula (NGC 7000), Pelican Nebula (IC 5070), Rosette Nebula (NGC 2237–9), California Nebula (NGC 1499), Heart and Soul (IC 1805/1848), Lagoon (M8), Eagle (M16), Omega (M17), Carina (in the southern sky), Orion complex (M42/M43; note strong broadband reflection component, see below).
- Supernova remnants: The Veil Nebula complex (NGC 6960/6992/6995), IC 443 (Jellyfish), Simeis 147, the Crescent Nebula (NGC 6888; a stellar wind bubble with strong OIII), the Helix (NGC 7293; planetary nebula with OIII dominance).
- Planetary nebulae: Dumbbell (M27; Hα and OIII rich), Cat’s Eye (NGC 6543), Ring (M57). These are smaller; longer focal length helps, but OSC + dual-band can still do well.

Artist: Ken Crawford
Reflection components and star fields
Some targets, like the Orion Nebula and the Running Man (M42/M43/NGC 1977), have significant reflection components that are broadband. Narrowband isolates the ionized gas structures but will not capture the dust’s blue reflection glow. One solution is to capture additional RGB data for the reflection component and combine it with narrowband nebula detail in Processing.
Moon and season strategy
- Moon phase: Narrowband tolerates the Moon well, especially Hα. Schedule OIII and SII for nights with the Moon farther away or lower brightness if possible.
- Seasonal arcs: Plan your imaging seasons—summer for the Cygnus region (rich Hα fields), winter for Orion, spring for planetary nebulae and galaxy season (narrowband less useful for most galaxies), autumn for the Veil and Helix.
- Meridian crossing: Shoot near culmination (highest altitude) to minimize air mass and atmospheric extinction.
Framing and mosaics
Large nebulae demand careful framing. Tools that overlay your field of view onto sky surveys help you compose interesting angles and plan mosaics. If you intend to mosaic, ensure consistent exposure, rotation, and overlap in each panel so stitching later is seamless. For mosaics, a consistent acquisition and calibration approach described in Acquisition Workflow is essential.
Acquisition Workflow: Data Quality First
Good processing can’t rescue bad data. The acquisition stage sets your SNR, resolution, and dynamic range. The following best practices apply to both mono and OSC rigs.
Exposure strategy
- Subexposure length: Aim to be sky-noise limited without saturating stars. In heavy light pollution with narrowband filters, typical sub lengths range from 180–600 seconds, depending on f/ratio, filter bandwidth, and camera. Start with 300s for Hα and adjust based on histogram peak (around 10–30% from the left is a common target).
- Gain/offset: Use a gain that lowers read noise without sacrificing dynamic range excessively. Many CMOS cameras have a “unity gain” point; starting there is reasonable. Adjust offset to prevent clipping the black point.
- Channel balancing (mono): If your target is weak in OIII or SII, allocate more total time to those channels (e.g., Hα:OIII:SII = 1:1.5:2 for OIII/SII-weak targets). For OIII-strong targets like the Crescent, a more even split works.
Guiding, dithering, and tracking
- Guiding: Use multi-star guiding where available to average out seeing. Backlash, polar alignment, and mount periodic error matter; good calibration and PEC (if your mount supports it) improve results.
- Dithering: A small randomized shift between subexposures breaks up fixed-pattern noise and banding. Dither every 1–3 frames depending on your tolerance for overhead.
- Polar alignment: Accurate alignment minimizes field rotation in long sequences, crucial for mosaics and later integration and drizzle.
Calibration frames
- Darks: Match temperature, gain, and exposure time. CMOS sensors benefit from temperature-controlled dark libraries.
- Flats: Essential for narrowband due to vignetting and dust motes. Use a uniform light source; keep focus and optical path unchanged from lights.
- Flat-darks (or bias): For many CMOS cameras, flat-darks matched to the flat exposure are more reliable than very short biases.
Temperature and focus
- Sensor temperature: Cooler sensors reduce thermal noise. Set a consistent temperature your cooling system can maintain year-round.
- Focusing per filter: Narrowband filters can shift focus slightly. If your focuser supports offsets per filter, measure and apply them. Autofocus routines that rely on star HFR/FWHM are ideal.
Cable management and dew
Tidy cables prevent snags during meridian flips. Dew heaters on optics and even on narrowband filters (if exposed) help prevent moisture ruining a session. For power considerations in the field, see the general best practices echoed in Safety and Best Practices.
Processing: SHO/HOO, Stars, and Noise
Processing narrowband data blends technical rigor and creative intent. The steps below assume you have calibrated, registered, and integrated your frames into master Hα, OIII, and SII images (or a master OSC dual-band stack with separable channels).
Pre-processing and integration
- Quality selection: Weight subframes by FWHM/HFR, eccentricity, and SNR. Reject frames with poor guiding or passing clouds.
- Normalization: Use background normalization to reduce gradients before stacking. This helps mosaics later.
- Drizzle (optional): If undersampled and you dithered adequately, drizzle integration can improve resolution at the cost of larger files and longer processing time.
Noise reduction and deconvolution
- Linear NR: Apply mild noise reduction in the linear stage, using masks to protect bright structures.
- Deconvolution: Carefully applied deconvolution can sharpen fine structures. Use accurate star masks and PSF models to prevent ringing artifacts.
Channel combinations
- SHO (Hubble palette): Map SII→R, Hα→G, OIII→B. This reveals intricate structures with a science-inspired color scheme. Expect green dominance from Hα; use palette tweaks to balance colors.
- HOO: Map Hα→R, OIII→G and B. This yields natural-looking teal and red tones and is excellent for OSC dual-band data.
- For OSC dual-/tri-band data: Split channels by color, or use extraction tools to approximate Hα and OIII signals. SII may be weaker and require more aggressive stretching.
Color calibration and palette tweaking
Traditional photometric color calibration targets true-color broadband images, not synthetic narrowband palettes. For narrowband, palette design is an artistic choice guided by physical intuition. Techniques include:
- Channel ratios: Adjust contribution of each line to each color channel (e.g., blend a bit of Hα into blue to tame green).
- SCNR-like green reduction: Reduce green dominance from Hα in SHO while protecting teal OIII regions.
- Selective color masks: Create masks from line-specific masters to adjust saturation and hue locally.
Star management
- Star masks and reduction: Apply gentle star reduction to emphasize nebula structures without creating artifacts or dark rings.
- RGB stars with NB nebula: Capture brief RGB data (even under moderate light pollution) to use for star colors. Replace narrowband stars with RGB stars late in processing: remove NB stars to process the nebula freely, then layer RGB stars with appropriate scaling and color calibration. This restores natural star colors while preserving narrowband nebula detail.
- Starless workflows: Temporarily remove stars to process nebula details more aggressively, then recombine stars later.
Gradients and background
Narrowband reduces gradients, but they can persist due to Moon, local lights, or flat-field imperfections. Use gradient removal tools on each channel before combination. After stretching, inspect the background for color tints and rebalance gently.
Final touches
- Local contrast enhancement: Apply with restraint to avoid overcooked textures.
- Color harmony: Ensure the palette feels cohesive; watch for clipping in highlights and shadows.
- Annotation (optional): Label structures such as shock fronts, star clusters, or dark nebula lanes for educational context.
Troubleshooting Common Issues
Even with careful planning, challenges arise. Here are frequent problems and remedies, with links to relevant sections like Fast Optics and Acquisition where appropriate.
Halos around bright stars
- Cause: Internal reflections within filters, sensor cover glass, or optical correctors; more pronounced in OIII.
- Mitigation: Use filters known for low-halo performance; avoid very bright stars in frame if possible; adjust framing; mild halo reduction in processing using masks.
Bandpass shift losses
- Symptoms: Weak OIII signal, odd color balance at very fast f/ratios.
- Fix: Choose fast-optimized filters, slightly wider bandwidth, or reconfigure filter placement. See Filters and Fast Optics Bandpass Shift.
Tilt and backfocus errors
- Symptoms: One corner has stretched stars, opposite corner is tighter.
- Fix: Use a tilt plate to adjust sensor orthogonality; verify backfocus spacing with your reducer/flattener specs; ensure mechanical connections are tight.
Walking noise and banding
- Cause: Fixed pattern noise not averaged out due to insufficient dithering.
- Solution: Dither more frequently; ensure calibration frames are well matched; consider cosmetic correction for hot pixels before stacking.
Bloated stars in narrowband
- Cause: Filter transmission profile and seeing effects differ between lines. Hα often yields tighter stars than OIII.
- Solution: Focus per filter, apply selective star reduction on the bloated channel, or match PSFs during combination.
Residual gradients
- Cause: Moonlight edges, light leaks, uneven flats.
- Solution: Improve flat acquisition; check for light leaks; apply background model subtraction per channel before stretching.
Case Studies: City Imaging Plans
Total integration: 43.75 hours/2625 minutes (136x7m = ~16h for Ha + 92x7m = ~11h for O3 + 147x7m = ~17h for S2).
Camera: QHY163M (16mp mono) CMOS cooled to -15 degrees C.
Telescope: Stellarvue SV70T triplet apochromat refractor @ f/4.8.
Reducer: SFFR70-APO
Mount: Paramount MyT.
Filters: Astrodon 5nm Ha, 3nm O3, 3nm S2.
Software: TheSkyX Pro, SharpCap, PixInsight.
Artist: Ram samudrala
The following case studies illustrate realistic, repeatable plans for common rigs in bright skies. Use them as starting points and adapt to your equipment and targets. Where noted, we cross-reference earlier sections like Planning, Acquisition, and Processing.
Case 1: OSC + dual-band on the Heart Nebula (IC 1805) from Bortle 8
Rig: 70–100 mm apochromatic refractor at f/5–f/6, OSC CMOS camera, high-quality dual-band filter that passes Hα and OIII, 1.0–1.5 arcsec/pixel sampling.
Plan:
- Framing: Center on the central cluster (Melotte 15) with rotation to include the prominent dust pillars.
- Exposure: 180–300s subs, gain near unity. Dither every 2 frames.
- Total integration: 8–12 hours across 2–3 nights. If Moon is bright, prioritize Heart over Soul since Heart’s Hα is robust.
- Calibration: 30–50 flats per session; matched flat-darks; dark library at the same temperature.
Processing:
- Split channels to isolate Hα and OIII proxies.
- Construct an HOO image: Hα→R, OIII→G/B, with a small contribution of Hα into G to balance hues.
- Apply star reduction and local contrast enhancement on the nebula using star masks.
Expected result: Strong red pillars and teal peripheral structures, with controlled stars. Add a short RGB session for natural star colors if desired.
Case 2: Mono SHO on the Crescent Nebula (NGC 6888) from Bortle 7
Rig: 100–130 mm refractor at f/5–f/7, monochrome CMOS with 3–5 nm filters for Hα, OIII, SII.
Plan:
- Exposure: 300–420s subs per line; more time on OIII, which is rich in Crescent’s shock fronts.
- Total integration: Hα 6 hours, OIII 8 hours, SII 6 hours. Dither every 1–2 frames.
- Focus offsets: Measure and apply per filter; autofocus every 1–2 °C temperature change.

Artist: Davrou
Processing:
- Noise reduction per channel in the linear stage.
- Combine in SHO; apply green balance and protect OIII’s teal filaments.
- Use deconvolution on a starless copy of Hα to bring out shock front detail, then recombine.
Expected result: Detailed shell with intertwined Hα and OIII structures, tasteful palette, and tight stars.
Case 3: Fast system (f/2) with fast-optimized filters on the California Nebula (NGC 1499)
Rig: f/2 astrograph, monochrome CMOS, fast-optimized 5 nm Hα and OIII filters (SII optional but weaker for this target).
Plan:
- Exposure: 120–180s subs to avoid saturating stars due to the speed of the system.
- Total integration: Hα 6–8 hours, OIII 4–6 hours (OIII is weaker in this target).
- Filter placement: Keep filters near the camera to reduce angle-of-incidence; check OIII transmission via test frames.
Processing:
- Build an HOO composite with Hα dominance.
- Apply gentle star reduction; California is a large faint structure—avoid heavy-handed stretching that raises noise.
Expected result: Smooth, wide-field emission arc with subtle OIII accents—strong showcase of why Hα rules in light pollution.
Case 4: Planetary nebula (M27) with OSC tri-band from Bortle 9
Rig: 150–200 mm aperture at ~f/6–f/8, OSC CMOS, tri-band filter including Hα and OIII components.
Plan:
- Exposure: 60–180s subs to preserve bright core detail and avoid saturation.
- Total integration: 4–6 hours; add a short broadband RGB run (30–60 minutes) for star colors if possible.
- Drizzle: Consider 2x drizzle if undersampled and well dithered.
Processing:
- Extract Hα/OIII proxies; construct HOO emphasizing OIII in the outer shells.
- High dynamic range stretching to retain core detail.
Expected result: Colorful dumbbell with cyan outer lobes and red Hα inner structures, clean stars despite heavy skyglow.
Beginner FAQs
Do I need a monochrome camera to do narrowband?
No. A monochrome camera is the most flexible and efficient per line, but OSC cameras with dual- or tri-band filters produce excellent narrowband-like results, especially for HOO images. If you want to minimize complexity and still beat light pollution, an OSC + dual-band filter is a great start.
What bandwidth should I choose for my first narrowband filter?
If you image from heavy light pollution and use a typical f/5–f/7 refractor, a 5 nm Hα filter is an excellent all-around choice. It offers strong contrast and is more forgiving than 3 nm if your optics are not perfect. For faster systems (below f/4), consider 5–7 nm or filters designed for fast optics.
Can I image during full Moon?
Yes, particularly with Hα. OIII and SII are more sensitive to lunar brightness and proximity. During bright Moon phases, choose targets far from the Moon and prioritize Hα-heavy objects. Narrowband lets you keep imaging when broadband imagers often pause.
How long should my subexposures be?
There is no single answer; aim to be sky-noise limited. As a starting point in Bortle 7–8, try 300s for Hα at f/5–f/6 and evaluate your histogram. If stars saturate or your mount struggles, shorten exposures and increase the number of subs. Total integration time matters most.
Do I still need flats for narrowband?
Absolutely. Narrowband does not eliminate vignetting or dust shadows. Good flats (and matching flat-darks) are essential for clean, even frames and easier gradient removal later.
Advanced FAQs
How do I handle bandpass shift at f/2 without losing OIII?
Use filters rated for fast systems; they pre-compensate for the blue shift. Slightly wider bandpasses (e.g., 5 nm instead of 3 nm) are more tolerant. Place filters as close to the sensor as practical, and verify OIII throughput with short test exposures. You can rebalance color in processing, but you can’t recover lost photons—optical choices come first.
What is the best way to combine RGB stars with narrowband nebula data?
Acquire a short RGB integration (even 30–60 minutes can suffice). Create a star mask from the RGB and replace narrowband stars late in processing: remove NB stars to process the nebula freely, then layer RGB stars with appropriate scaling and color calibration. This restores natural star colors while preserving narrowband nebula detail.
How do I weight SHO channels for noisy SII?
Balance integration times to equalize SNR across channels (e.g., allocate 2× time to SII if it is weak). In integration, apply subframe weighting (based on SNR or FWHM) so cleaner frames contribute more. In combination, you can also reduce the contribution of SII to the red channel or blend some Hα into red to stabilize color without overpowering faint SII structures.
When should I drizzle narrowband data?
Only if you are undersampled and have strong dithering with many subframes. Drizzle increases resolution at the cost of noise per pixel and file size. Evaluate by measuring your sampling (arcsec/pixel vs seeing); if you’re already near the seeing limit, drizzle offers little benefit.
How can I minimize halos in OIII?
Choose filters known for low-halo performance, frame away from the brightest stars, and consider a tilt-tuned setup to manage reflections if needed. In processing, use star-specific masks to desaturate and dim halos gently without damaging star cores.
Tools and Resources
The right tools streamline every stage, from planning to processing. While the specific software ecosystem evolves, the following categories remain consistently useful:
Planning
- Planetarium software: For visibility windows, altitude plots, and framing with your sensor and focal length.
- Weather and sky brightness: Cloud cover, transparency, seeing, and lunar phase/position forecasts.
- Field of view calculators: Compose shots and plan mosaics with accurate sensor dimensions.
Acquisition control
- Sequencing software: Automates filter changes, autofocus, dithering, meridian flips, and guiding integration.
- Guiding software: Supports multi-star guiding, calibration, and periodic error correction workflows.
Calibration, stacking, and processing
- Calibration/Integration: Tools that support bias/dark/flat calibration, subframe weighting, normalization, and drizzle.
- Post-processing: Noise reduction, deconvolution, star management, gradient removal, and color tools. Many suites now include starless processing workflows.
Whichever tools you choose, keep a repeatable workflow checklist: target framing, autofocus, guiding, sequence start, meridian flip plan, end-of-session calibration, and data backup.
Safety and Best Practices
Urban and suburban imaging introduces practical considerations beyond the optics and filters.
- Site awareness: Set up in a safe, well-understood location. Be mindful of sprinklers, pedestrians, and vehicles.
- Cable routing: Secure cables with slack and strain relief to prevent snags during slews and flips.
- Power management: Use appropriately fused power distribution and avoid overloading circuits. Keep dew heaters on separate controlled channels if possible.
- Light etiquette: Shield stray light to avoid disturbing neighbors; use dim red lighting sparingly.
- Weather safeguards: Set “park” conditions and alerts for unexpected clouds or wind. Always have a cover plan for sudden moisture.
Conclusion
Narrowband astrophotography turns light-polluted backyards into productive deep-sky studios. By isolating the Hα, OIII, and SII emission lines, you can capture striking nebular structures even under city lights and moonlit skies. The keys are understanding filter fundamentals, choosing the right camera and optical path, respecting the realities of fast optics, and building a disciplined acquisition and processing workflow. With thoughtful planning and patient integration, you can produce gallery-quality images from places that once seemed impossible.

Artist: William P. Blair and Ravi Sankrit (Johns Hopkins University), NASA, ESA
If this guide helped you, consider exploring our related articles on imaging workflows, deep-sky planning, and processing techniques, and subscribe to stay updated with future advanced guides and case studies.