Table of Contents
- Introduction
- Gear Basics: Cameras, Lenses, and Star Trackers
- Planning: Seasons, Bortle Scale, Moon, and Weather
- Exposure Strategy: NPF vs 500 Rule, ISO, and ETTR
- Tracking Techniques: Polar Alignment and Guiding
- Stacking and Processing: From RAW to Print
- Panoramas and Milky Way Arches
- Time-Lapse and Motion Control Nightscapes
- Troubleshooting: Common Issues and Fixes
- Advanced Techniques: Foreground Blends, Star Control, and Airglow
- Nightscape FAQs
- Star Tracker FAQs
- Conclusion
Introduction
Milky Way nightscape photography sits at the crossroads of art and science. It demands the craft of composing land and sky together and the physics of gathering scant starlight efficiently. This guide is a comprehensive, practical reference to help you capture the galaxy from static tripod shots to tracked wide-field mosaics. It explains planning, gear selection, exposure strategy, stacking, color calibration, and post-processing in a clear, methodical way. We will emphasize concepts like the NPF rule over the older 500 rule, how to exploit ISO invariance, and when to blend a tracked sky with an untracked foreground. If you are brand-new, start with static shots, then add a star tracker for dramatically cleaner results.
To get the most from this article, skim the Planning and Exposure Strategy sections, then dive into Tracking Techniques if you own (or are considering) a tracker. For post-production, bookmark Stacking and Processing and Advanced Techniques for blending tracked skies with static foregrounds and refining stars without overprocessing.
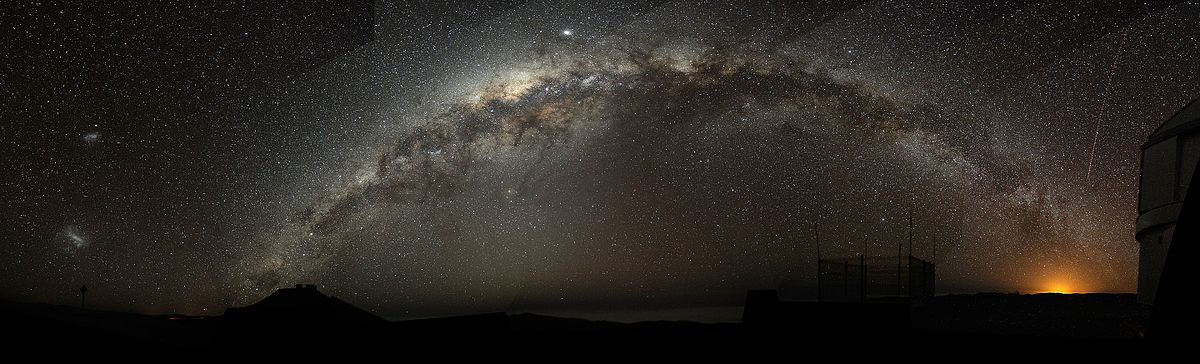
Artist: Bruno Gilli/ESO
Gear Basics: Cameras, Lenses, and Star Trackers
Camera bodies: full-frame vs APS-C vs Micro Four Thirds
Any interchangeable-lens camera with good high-ISO performance can make strong nightscapes. Full-frame sensors generally offer better signal-to-noise ratio (SNR), wider fields of view with the same lens, and higher dynamic range. APS-C and Micro Four Thirds can work excellently—just account for the crop when selecting focal lengths and the more stringent shutter time limits before stars trail (see NPF rule).
- Full-frame: Best for low noise and wide FOV. 14–24 mm lenses are staple choices.
- APS-C: Excellent value; 10–16 mm lenses provide similar framing to 14–24 mm on full-frame.
- Micro Four Thirds: Compact systems; 7–12 mm lenses serve nightscape framing. Use stacking to counter smaller sensor noise.
Look for cameras with clean ISO 1600–6400 output, 14-bit RAW, and low pattern noise. Features like intervalometer, bulb mode, and live view magnification help with focusing on stars. Some modern bodies offer astro-tracer functions that use in-body stabilization plus GPS to compensate for rotation for short exposures—useful, though not a full replacement for a dedicated tracker.
Lenses for nightscapes
Fast primes and rectilinear zooms in the 14–35 mm range are common. A wide, fast lens gathers more light and allows shorter exposures for the same SNR. Consider:
- Maximum aperture: f/1.4 to f/2.8 is ideal; many lenses sharpen significantly when stopped to f/2–f/2.8.
- Coma and astigmatism: Look at star shape in corners; modern designs handle coma well at f/2–f/2.8.
- Focus throw and repeatability: Manual-focus lenses with hard stops can be more predictable at night.
- Chromatic aberration: Lateral CA is easy to correct; longitudinal CA (purple/green fringing) can persist on bright stars at very fast apertures.
For tracked work, slightly longer focal lengths (24–50 mm) render more structure in the Milky Way’s dust lanes, while trackers allow longer subs without trailing. For static tripod nightscapes, 14–24 mm is forgiving for shutter time and composition.
Tripods, heads, and intervalometers
A sturdy tripod is essential. Carbon fiber dampens vibrations and is lighter for hiking; aluminum is cost-effective. A ball head is quick for composition, while a panoramic base eases multi-row panoramas (see Panoramas). An intervalometer or in-camera timelapse mode is helpful for stacking and time-lapse (see Time-Lapse).
Star trackers and mounts
Star trackers are compact equatorial mounts designed to rotate your camera to match Earth’s rotation, allowing longer exposures without trailing at wide to moderate focal lengths. Key considerations:
- Payload: Ensure it supports your camera + lens + head (often 3–5 kg for small trackers).
- Polar alignment tools: Optical polar scopes, smartphone-assisted alignment, or electronic polar alignment aid accuracy.
- Drive precision: Periodic error and tracking accuracy matter more at longer focal lengths; at 14–35 mm most trackers perform well.
- Counterweights: Helpful for heavier lenses to reduce strain and improve tracking stability.
For purely nightscape work, a lightweight tracker suffices. If you plan to shoot telephoto targets (e.g., Rho Ophiuchi at 85–135 mm), choose a tracker with better periodic error spec and consider guiding (see Tracking Techniques).
Accessories and quality-of-life items
- Headlamp with red mode to protect night vision.
- Dew heaters and a USB power bank; dew is the silent session killer.
- Spare batteries; long exposures and cold sap power quickly.
- Lens heater bands or chemical hand warmers secured with a band for emergency dew control.
- Level and compass to roughly orient mounts before fine polar alignment.
Planning: Seasons, Bortle Scale, Moon, and Weather
When and where to photograph the Milky Way
The Galactic Center (GC) is the most dramatic portion of the Milky Way, rich with dust lanes, star clouds, and nebulae. It is prominent in late spring through early autumn for mid-latitude observers in the northern hemisphere, and autumn through spring in the southern hemisphere. The best windows are moonless hours when the GC rises above your horizon and away from twilight. A simple planning workflow:
- Season: Identify months when the GC is visible at your latitude.
- Moon phase and rise/set: Favor new moon and the dark period after astronomical twilight.
- Light pollution: Seek darker Bortle classes; Bortle 3 or darker makes the dust lanes pop.
- Weather and transparency: Forecast low clouds and high transparency; smoke and haze reduce contrast.
- Composition: Scout foregrounds by day; consider the Milky Way’s azimuth and altitude at your chosen time.
Use light pollution maps to compare sites. Urban Bortle 7–9 skies can capture the Milky Way with stacking and careful processing, but results improve dramatically at Bortle 4 and better.
Moonlight strategy
While new moon nights are classic, don’t dismiss the moon entirely. A thin crescent or quarter moon can softly light the foreground like a giant reflector, reducing the need for artificial light and creating a natural-looking land–sky balance. Position the moon behind you to avoid washing out the Milky Way. For tracked sky + static foreground workflows (see Advanced Techniques), you can shoot the foreground during blue hour or under the moon and the sky later under darker conditions.
Airglow, aurora, and atmospheric conditions
Airglow—natural chemiluminescence—adds greenish or reddish hues to the sky and can enhance or confuse color balance. In mid-latitudes, weak aurora can appear during geomagnetic activity; check space weather forecasts when traveling poleward. Transparency is often more critical than seeing for wide fields: water vapor, aerosols, and smoke can mute contrast. Prioritize nights with crisp, dry air.
Rule of thumb: If the daytime view of distant mountains looks hazy, expect reduced Milky Way contrast that night—even if the forecast says “clear.”
Composition and storytelling
Compelling nightscapes anchor the sky with a meaningful foreground. Think in layers: foreground subject (tree, arch, lighthouse), middle ground (terrain lines guiding the eye), and background (Milky Way core). Use leading lines and natural frames (canyons, rock windows). For a Milky Way arch panorama, plan where the arch will sit relative to your subject; its orientation changes with time and season. Consider the safety and ethical impact of your location—avoid sensitive habitats and after-hours trespass.
Finally, verify your plan on-site with a smartphone star chart and a quick high-ISO test shot to confirm the Milky Way’s position. A 2–5 second ISO 12800 test at f/2.8 is often enough to confirm framing before committing to longer exposures described in Exposure Strategy.

Author: Amirreza Kamkar
Country: GermanyThis image was taken in July 2016 from the Amboseli National Park in Kenya, located close to the equator.In Egyptian mythology from northern Africa, the Milky Way was associated with a river sailed by gods and souls. The Zulu in South Africa interpret this pattern of dark and bright clouds of stars as an animal with black and white skin, whereas the South African Khoikhoi and San considered it “The Star’s Road”. In several South African cultures, the arch of the Milky Way is a pathway to the heavens formed by a mother goddess, according to a South African creation myth that was adopted in the 19th century from early ethnological research, but has vanished today.In the middle-right of the image we find the bright red star Antares in the modern constellation of the Scorpion and at the upper-left edge is the white star Vega that is considered a Male Steenbok by the peoples around Cape Town.Indigenous Australians have many names for the Milky Way. The Yolnu people of Arnhem Land in Australia’s Northern Territory refer to the Milky Way as Milnguya, the sky river. One of the prominent patterns in this image is associated with the contrast between the light and dark regions of the Milky Way.These dark regions are cool dense clouds of interstellar dust and gas, which block the light from stars behind them. One of the prominent patterns is that of the Celestial Emu referred to as Tchingal by several Indigenous peoples of south Australia. The head and beak of the emu (the Coalsack Nebula) lie to the bottom-left of the Southern Cross (seen in the far bottom-right of the image), and the body and legs stretch leftward from it. Other indigenous groups associate the dark regions with caves or waterways. The orientation of the emu over the year provides important clues as to when it is time to pick emu eggs, and when the eggs are hatching. In some months, when these clouds of the Milky Way are close to the horizon, they are not considered as emu at all but as two creeping crocodiles.The modern figure of the dark Pipe Nebula is clearly visible above the centre of the Galaxy; the smoke of this pipe reaches the colourful rho Ophiuchi region next to Antares in Scorpius, the orange-red star just above the Milky Way. Antares is referred to by the Boorong people as Djuit, the red-rumped parrot, while the Kokatha people of the Western Desert refer to Antares as Kogolongo, the red-tailed black cockatoo.In addition, some notable constellations can be seen: Cygnus, Aquila, Lyra, Scorpius, Sagittarius, Crux, and Centaurus. The pointer stars, Alpha and Beta Centauri, are occasionally interpreted as The Eyes of the Beast in some South African traditions.Also see image in Zenodo: https://doi.org/10.5281/zenodo.7422830
Artist: Amirreza Kamkar/IAU OAE
Exposure Strategy: NPF vs 500 Rule, ISO, and ETTR
Why the NPF rule supersedes the 500 rule
The classic 500 rule (shutter = 500 ÷ focal_length) ignores pixel pitch and aperture, leading to visible trailing on high-resolution sensors. The NPF rule incorporates sensor pixel size, focal length, and aperture to estimate a maximum shutter time for acceptable star size. While the exact formula varies by implementation, the idea is simple: higher resolution sensors and longer focal lengths demand shorter exposures to keep stars round.
- Static tripod: Use NPF to set shutter and adjust ISO to expose the histogram; expect 5–15 seconds at 14–24 mm on full-frame.
- With tracker: NPF is no longer limiting; let tracking allow longer subs (30–180 s at 14–35 mm) while keeping stars tight.
Even with NPF, consider your output: small web images tolerate slightly longer shutters than large prints viewed up close. Always test and zoom to 100% to evaluate star shapes.
ISO strategy and ISO invariance
Modern sensors often exhibit ISO invariance over a range: increasing ISO does not materially reduce read noise; you can brighten in post with similar noise outcomes. In practice:
- Expose as brightly as you can without clipping highlights (ETTR within reason), balancing shutter limits (NPF) and aperture.
- Use a middle ISO such as 1600–3200 on full-frame; 3200–6400 on APS-C/MFT, adjusting per camera behavior.
- If your camera is not ISO invariant at low ISOs, avoid very low ISO at night; you may lose shadow detail to read noise.
Always inspect RAW histograms if available; camera JPEG histograms can mislead due to in-camera tone curves. For tracked shots, consider lowering ISO one stop relative to static shots because you will use longer shutter times.
Aperture: wide open or stopped down?
Fast lenses gather light, but many improve star shape and corner sharpness when stopped down slightly. A common compromise is f/2 to f/2.8, where coma and astigmatism are tamed, and vignetting is reduced. For tracked shots, stopping down one stop rarely hurts total SNR because you can extend exposure time without trailing.
White balance and color management
Set a neutral manual white balance in-camera (e.g., 3800–4200 K) for consistent previews; you will fine-tune in RAW. Avoid auto white balance; it can shift between frames and complicate stacking and time-lapse sequences. Consider camera-matched color profiles in your RAW editor for predictable color rendering.
Focus: critical sharpness on stars
Switch to manual focus, use live view at 10–15x on a bright star, and rack focus until the star is smallest. If your camera supports focus magnification and peaking, use magnification; peaking is less reliable at night. Tape the focus ring or set a lens collar to prevent drift. Recheck focus during the session as temperatures change—lenses can slip with thermal contraction.
Tracking Techniques: Polar Alignment and Guiding
Mount setup and rough alignment
Level the tripod, point the mount’s polar axis roughly toward the celestial pole using a compass and your latitude scale, then refine with your tracker’s polar scope or app-assisted alignment. Balance the payload if your tracker supports counterweights; a slightly east-heavy balance helps gears mesh and improves tracking stability.
Polar alignment accuracy
Accuracy requirements scale with focal length and exposure time. For wide fields (14–24 mm), a careful optical polar scope alignment is typically sufficient for 1–3 minute subs. At 50–85 mm, tighten alignment or shorten subs to control drift. Electronic alignment aids can reduce the alignment error to a few arcminutes quickly.
Guiding at wide field?
At very wide focal lengths, guiding is optional. As you push to 85–135 mm or longer, a small guidescope and guide camera can stabilize RA tracking and mitigate periodic error. Be mindful of flexure; keep the guidescope rigid and cable runs tidy. For pure nightscapes up to ~50 mm, guiding usually adds complexity without much benefit.
Field rotation and tilt
Even with good polar alignment, if you shoot off the pole for very long subs, field rotation can subtly elongate stars in the corners. For nightscapes, this is rarely a major issue at 14–35 mm and 1–3 minute subs. Check your corners. If stars elongate in one corner more than others, consider sensor tilt or lens decentering. Keep the camera orthogonal to the tracker’s rotation axis when possible, especially for mosaics (see Panoramas).
Stacking and Processing: From RAW to Print
Calibration frames for nightscapes
While not strictly necessary for every nightscape, calibration frames can improve consistency:
- Darks: Same ISO, shutter, and temperature as lights; reduce thermal pattern noise and hot pixels.
- Flats: Correct vignetting and dust; capture them at the same focus and aperture. A uniform tablet, sky flats at dawn, or a flat panel works.
- Bias: Very short exposures at the same ISO; many modern workflows prefer dark flats instead of bias for some sensors.
For quick nightscape stacks, many photographers skip flats and rely on lens profiles; however, tracked mosaics and prints benefit from proper flats. See Troubleshooting for vignetting mitigation without flats.
Stacking methods
Two typical scenarios:
- Static tripod stacks: Shoot 10–30 frames at NPF-limited shutter times; align on stars and average to reduce noise. Median stacking suppresses transient satellites and some aircraft trails.
- Tracked sky + separate foreground: Stack tracked sky frames; stack static foreground frames; then blend (see Advanced Techniques).
Use software that supports star alignment for wide fields. If you blend later, keep the camera position fixed between sky and foreground sequences to simplify masking.
Color balance and gradient control
Start with a neutral white balance; adjust until star colors look natural (blue–white for hot stars, warm for cooler giants) and the Milky Way dust lanes appear neutral brownish-gray rather than cyan or magenta. For light pollution gradients, use gradient reduction tools or manual techniques like subtracting a fitted plane. Avoid overcorrecting into unnatural hues—aim for a sky background in RGB values with a slight bias toward green-blue if airglow is present.
Noise reduction and detail enhancement
Apply noise reduction early, but after stacking and color balancing. Use a light hand: preserve small-scale structure in dust lanes. Work in layers or with masked adjustments so the sky receives more noise reduction than the stars, and the foreground gets separate treatment. Avoid excessive sharpening that creates halos around stars; if needed, sharpen the dust lanes selectively using a luminance range mask.
Star control: saturation and size
Milky Way contrast improves when star sizes are modest and not oversaturated. Techniques include mild star reduction, targeted de-saturation of the brightest stars, and ensuring that the black point isn’t clipped. Keep star colors believable—overly blue stars are a common artifact of aggressive cooling of white balance.
Foreground workflow
Foregrounds typically benefit from separate processing: adjust exposure, contrast, and color temperature to match the lighting conditions (moonlit, blue hour, or light painting). Use local dodging and burning to restore depth. When blending, watch horizon transitions for halos; feather masks and match the brightness near the seam. The Advanced Techniques section details several blending methods.
Panoramas and Milky Way Arches
Why shoot a panorama?
Panoramas allow you to capture an expansive Milky Way arch or combine a detailed sky with a tall foreground. More pixels mean you can print large with fine detail. Trackers shine here: track each sky panel for cleaner data, then shoot a matching untracked foreground sweep for a seamless blend.

Author: Amirreza Kamkar
Country: GermanyThis image, which shows the majestic band of the Milky Way and a range of culturally significant patterns, was taken in May 2022 at a very high altitude from the Roque de los Muchachos Observatory in La Palma, from which one can see the clouds below. Some prominent star patterns include Scorpius, Sagittarius, Lyra, Cygnus, Aquila, the Summer Triangle asterism, and the Teapot asterism.As the Canary Islands used to be a starting point for European sailors to explore the world, we use this place to point to the many indigenous cultures they encountered. Most notably it is the dark patterns within the band of the Milky Way that hold significance for many Indigenous cultures around the world. The dark patterns are in fact dense, cool clouds of gas and dust that block the light from stars. Indigenous people see caves, waterways and various patterns associated with the dark regions of the Milky Way.The constellations and patterns hold different cultural significance and interpretations for different people. For example, the constellation Scorpius is referred to by Polynesian people as the demigod Maui’s Fishhook. The Yolnu people of Arnhem Land associate Scorpius with a crocodile called Ingalpir. Some Indigenous Australian groups associate stories with individual stars within Scorpius, most notably Antares, the orange-red star in the top right of the image above the band of the Milky Way. Next to the Scorpion and above the bright centre of the Milky Way, there is a prominent dark cloud that is called the Pipe Nebula by modern astrophotographers. The smoke of this pipe goes up to rho Ophiuchi. This and all the other dark clouds in the Milky Way together form the backbone of heaven for some tribes, and an animal with black-and-white skin for South African Zulu people.The nomenclature of bright stars also has cross-cultural roots. For example, Vega (the bright blue star towards the top of the image) comes from the Arabic waqi, from al-nasr al-waqi, the Eagle who throws himself down (in order to hunt). This contrasts with the Flying Eagle, Altair, also derived from Arabic. Antares is a Greek word meaning “the one similar to Mars”, referring to its colour. The star name Shaula in the stinger of the Scorpion is a modern version of the Babylonian or even Sumerian star name.Also see image in Zenodo: https://doi.org/10.5281/zenodo.7422867
Artist: Amirreza Kamkar/IAU OAE
Single-row vs multi-row
- Single-row: One sweep across the sky; easiest to shoot and stitch. Suits 14–24 mm lenses.
- Multi-row: Two or more rows cover more vertical field for towering arches and complex landscapes. Requires a pano head and careful overlap.
Overlap, nodal point, and parallax
Use 30–50% overlap between frames for reliable stitching. If your panorama includes near foreground objects (rocks, trees), rotating around the lens’s entrance pupil (commonly called the nodal point) minimizes parallax. Pano rails and heads help align the rotation center. For pure sky-only panels, parallax is less critical; aim for consistent alignment of the tracker’s RA axis through the sequence.
Exposure consistency
Lock exposure, white balance, and focus for the entire sequence. If using a tracker, keep tracking on for sky panels and off for foreground panels. Match the horizon brightness by capturing foreground frames around nautical or civil twilight if doing a blue-hour blend. For a moonlit foreground, ensure the moon’s position and illumination remain consistent during your sweep to avoid brightness jumps.
Stitching workflow
Stitch sky panels first with star alignment enabled; then stitch the foreground. If your software struggles to stitch the tracked sky, try projecting onto a spherical or cylindrical projection and ensure sufficient overlap. Some workflows render a synthetic mask that separates sky from ground before stitching, avoiding parallax-induced misalignments at the horizon.
Time-Lapse and Motion Control Nightscapes
Frame cadence and motion
Time-lapse compresses the night’s motion into seconds. For the Milky Way, a capture interval of 10–30 seconds yields smooth motion. Shorter intervals increase smoothness but generate more data. Add motion with a motorized slider or pan-tilt head to introduce parallax and emphasize star motion. Keep moves subtle—a few degrees per minute is enough for drama without causing motion sickness.
Flicker and exposure stability
Lock all exposure parameters: manual exposure, manual white balance, manual focus. Avoid in-camera long exposure noise reduction (LENR) for time-lapse because it doubles dead time; instead, remove hot pixels in post or with dark frames. Use consistent battery power or an external pack to prevent voltage sag that could affect frame timing.
Deflicker and post-production
Deflicker algorithms analyze luminance across frames and apply targeted adjustments. You can also keyframe exposure in your editor to handle changing twilight conditions. Apply the same color grade across the sequence, then render to an intermediate codec before final delivery to preserve quality. For tracked time-lapse, be mindful that the foreground will drift relative to the frame; consider static tripod for classic star motion or advanced stabilization to hold the foreground steady.
Troubleshooting: Common Issues and Fixes
Star trailing and elongation
- Static tripod: Reduce shutter time using the NPF rule or go wider in focal length.
- With tracker: Improve polar alignment; shorten subs; check balance; verify that the clutch is engaged and cables aren’t tugging.
- Corner elongation only: Suspect lens coma or tilt; try stopping down to f/2.8 and inspect if the pattern improves.
Noise and banding
- High ISO fixed pattern: Use darks or a hot pixel map; dither between frames if your tracker supports it.
- Underexposure: Increase total integration time through stacking; don’t rely solely on high ISO to solve noise.
- Color blotches: Calibrate color and reduce chroma noise separately from luminance noise.
Gradients and light pollution
- On location: Reframe away from the light dome; use natural terrain to block it.
- In processing: Apply gradient removal; set a careful black point to maintain faint Milky Way detail.
- Filters: Broadband light pollution filters can help under certain spectra but may distort star colors; evaluate before routine use.
Dew and frost
- Wrap a dew heater around the lens; power it modestly to avoid thermal currents.
- Shield with a lens hood; aim slightly downward to limit sky exposure.
- If dew forms mid-sequence, pause to gently warm the lens; avoid wiping during exposures.
Stitching failures
- Insufficient overlap: Increase to 40–50%.
- Exposure drift: Lock settings and consider shooting faster; re-shoot if the Milky Way moved significantly between panels.
- Horizon ghosting: Mask sky and foreground separately before stitching, then composite.
Advanced Techniques: Foreground Blends, Star Control, and Airglow
Blending a tracked sky with a static foreground
Blends combine the clean detail of a tracked sky with the geometric realism of an untracked foreground. Typical workflow:
- Capture a series of tracked sky frames. Rotate only around the tracker’s RA axis; avoid reframing.
- Without moving the tripod, capture static foreground frames, ideally at a lower ISO or during blue hour for better SNR and color.
- Stack sky and foreground separately; process for color balance and dynamic range.
- Mask: Use luminosity masks or edge-based selections to separate sky and land. Feather the mask at the horizon; dodge/burn to match brightness.
Ethical note: Disclose blends when relevant, especially in documentary contexts. Aim for a natural look; avoid impossible lighting combinations (e.g., bright foreground with a sky that would imply moonlight when none was present).
Blue-hour and moonlit foreground strategies
Blue-hour foregrounds deliver balanced shadow detail without introducing artificial light. Moonlit foregrounds look natural but can reduce sky contrast; consider capturing the sky after moonset and the foreground earlier under moonlight, then blending. Keep camera position fixed to simplify the seam.
Star reduction and local contrast
Subtle star reduction can make dust lanes stand out. Methods include morphological operations, masked deconvolution on the background, or dedicated star-processing tools. Use sparingly—retaining star colors and avoiding dark halos is key to natural aesthetics.
Airglow and natural sky color
Airglow can produce green bands or diffuse glows. Preserve it by avoiding overaggressive color neutralization; a slight green cast in the background is often more realistic than a perfectly gray sky. If airglow patterns dominate, consider a gentle hue shift to taste, but avoid erasing it entirely—it is part of the scene’s physics.
Multi-row tracked mosaics
For very high-resolution arches, shoot multi-row tracked panels with meticulous overlap and consistent RA axis orientation. Some photographers shoot a grid where each panel is tracked and later warped onto a consistent projection before stitching. Expect more post-processing time; the payoff is exceptional print detail.
Color-managed printing
For prints, work in a wide-gamut space (e.g., ProPhoto or Adobe RGB) during processing, then convert to the printer profile. Soft-proof for paper white and ink gamut; nightscapes often benefit from a slightly lifted black point in print to preserve shadow detail that can block up on matte papers.
Nightscape FAQs
How do I choose the best settings for Milky Way photography?
Start with the NPF rule to set shutter, choose the widest practical aperture with acceptable star shapes (f/2–f/2.8), and set ISO to place the histogram away from the left edge without clipping highlights—often ISO 1600–3200 on full-frame. Take a test frame, zoom to 100%, and adjust. For tracked shots, extend shutter (30–180 s) and lower ISO a stop. Keep white balance fixed around 4000 K for consistent RAW previews.
What is the easiest way to improve image quality without buying new gear?
Stacking is the simplest quality amplifier. Shoot 10–30 identical frames and median-average them; noise falls as the square root of the number of frames, revealing fainter structure. Combine stacking with a careful site choice—driving to a darker Bortle zone often beats a gear upgrade.
Do I need to light paint the foreground?
No. Light painting can be effective, but it is easy to overdo and may be prohibited or disruptive in sensitive areas. Alternatives include blue-hour foregrounds or soft moonlight illumination. If you light paint, use low intensity and broad strokes to avoid hotspots, and be mindful of other observers.
How do I set focus at night and keep it?
Use live view at high magnification on a bright star; adjust until the star is smallest. Confirm with a short test frame and tape the focus ring. Recheck every 30–60 minutes, particularly as temperatures drop. Consider a focusing mask for lenses at longer focal lengths; some third-party masks scale for common filter thread sizes.
What about white balance—should I use auto?
Avoid auto white balance. Use a fixed Kelvin value so your frames are consistent for stacking and time-lapse. Adjust in RAW later using a neutral area or by balancing star color. For scenes with strong airglow, accept a slight green tint in the background rather than forcing neutrality that can desaturate star colors.
Star Tracker FAQs
How accurate does polar alignment need to be for wide lenses?
At 14–24 mm, an alignment error of a few arcminutes typically allows 1–3 minute subs with tight stars. The tolerance shrinks with focal length and exposure time. If star corners elongate, refine alignment or shorten subs. Electronic alignment tools can quickly bring error below a few arcminutes.
Can I use a tracker for panoramas?
Yes. Track the sky panels to maximize signal; then shoot the foreground untracked. Keep the tracker’s RA axis orientation stable during the sweep to simplify stitching. Ensure 30–50% overlap. For scenes with near foreground elements, consider rotating around the lens entrance pupil for the foreground sweep to minimize parallax (see Panoramas).
Do I need guiding for nightscapes?
Usually not below ~50 mm. At 85–135 mm, guiding helps control periodic error and increases the yield of sharp subs. If you plan mostly wide fields and panoramas at 14–35 mm, skip guiding and focus on accurate polar alignment and balance.
What’s the best shutter time on a tracker?
Let tracking free you from the NPF limit. Choose a shutter that balances sky brightness, desired ISO, and workflow speed—often 60–180 seconds at f/2–f/2.8 and ISO 800–1600 for dark skies at 14–35 mm. Watch for sky fogging at brighter sites; shorten subs if the histogram creeps too far right.
How do I power my tracker in the field?
Small trackers often run on internal batteries or USB power banks. Bring a high-capacity bank and short, quality cables to reduce voltage drop. For cold conditions, keep power banks insulated. If your tracker accepts AA cells, use fresh lithium AAs for better cold performance.
Conclusion
Milky Way nightscape photography rewards preparation and patience. Start by mastering the fundamentals: plan for dark, clear nights; compose with intent; and expose using the NPF rule, thoughtful ISO, and solid focus. Add a star tracker to dramatically improve signal quality and unlock long-exposure detail, then learn to blend a tracked sky with a static foreground for natural, high-fidelity results. As you progress, panoramas, time-lapse, and subtle star control will refine your storytelling.

BLM District: Battle Mountain District
Photo by Jeff Sullivan
Artist: BLM Nevada
If this guide helped, explore related deep dives on exposure science, stacking strategies, and wide-field mosaics. Consider subscribing to stay updated on practical astrophotography techniques for every skill level.