Table of Contents
- What Is Milky Way Astrophotography?
- Seasonal Timing and Visibility of the Galactic Core
- Light Pollution, the Bortle Scale, and Dark-Sky Strategy
- Essential Gear for Milky Way Photography
- Exposure Settings: ISO, Aperture, Shutter, and Focus
- Advanced Techniques: Stacking, Tracking, and Panoramas
- Field Craft: Composition, Safety, and Ethics
- Post-Processing Workflow: From RAW to Print
- Troubleshooting Common Problems
- Frequently Asked Questions
- Final Thoughts on Choosing the Right Milky Way Photography Setup
What Is Milky Way Astrophotography?
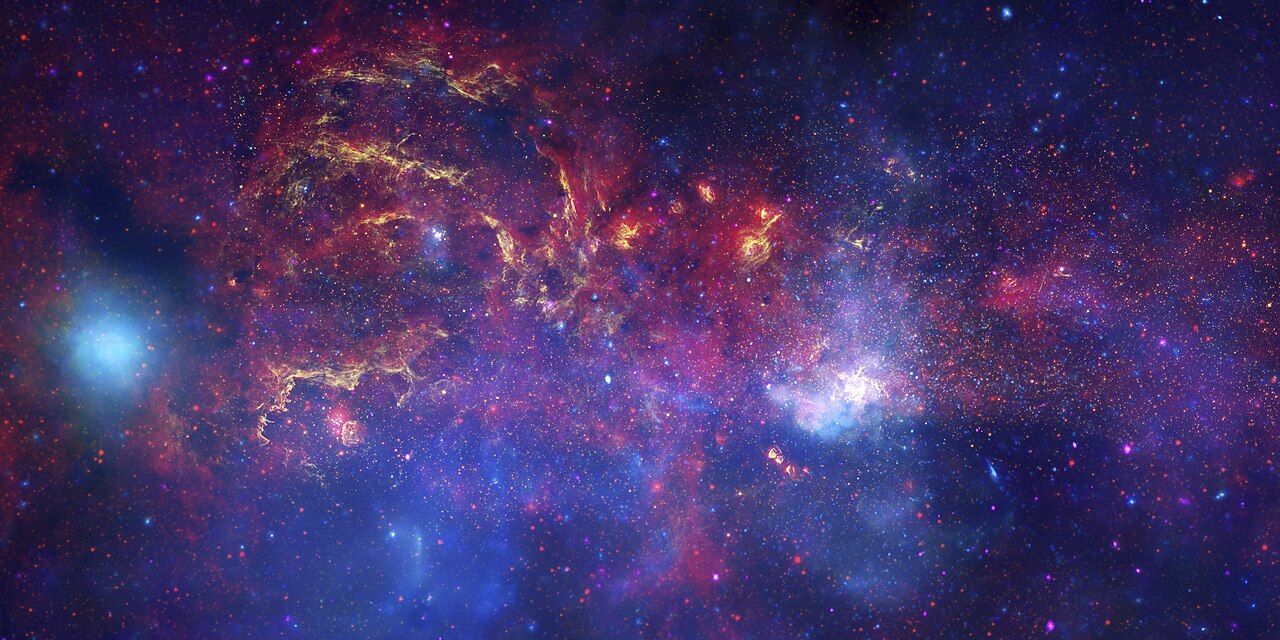
Milky Way astrophotography is the practice of imaging our galaxy’s luminous band across the night sky, often highlighting the intricate star clouds, dark dust lanes, and the bright region around the galactic core. Unlike deep-sky astrophotography that targets tiny distant galaxies and nebulae with long focal lengths, Milky Way photography generally uses wide-angle lenses and shorter exposures to capture the entire scene as both a sky subject and a landscape. It sits at the intersection of nightscape photography and astronomy, balancing technical camera settings with field-craft and artistic composition.

At its heart, Milky Way imaging is about preparation: choosing the right season and location, aligning the scene with foreground elements, and dialing in exposure settings that freeze the stars while keeping noise manageable. Success hinges on learning a few core concepts: how light pollution affects visibility, how to find the galactic core, and how to use exposure techniques such as the “500 rule,” more precise alternatives, and stacking to reduce noise. Each of these topics is discussed in detail in Seasonal Timing and Visibility, Light Pollution and Dark-Sky Strategy, and Exposure Settings, respectively.
Because the Milky Way changes position throughout the year and the night, advanced planning with astronomy apps, maps, and weather forecasts is essential. Once you master the planning and exposure techniques, you can explore more sophisticated methods like panorama mosaics, tracked-sky blends, and time-lapse sequences, covered in Advanced Techniques.
Seasonal Timing and Visibility of the Galactic Core
The centerpiece for many Milky Way images is the galactic core—the bright, dust-rich region toward Sagittarius and Scorpius. Its visibility depends on your latitude, the time of year, and the time of night.
Northern Hemisphere timing
In the Northern Hemisphere, the galactic core is generally visible from spring to early autumn. Many photographers target late spring through summer (roughly April to September) for core season, with peak visibility often occurring from June to August. During this window, the core rises in the southeast and sweeps across the southern sky, reaching higher altitudes at lower latitudes.
Southern Hemisphere timing
Observers in the Southern Hemisphere enjoy longer and higher visibility of the core, often from late summer through spring (commonly February to October). The core can reach higher in the sky than in many northern locations, offering dramatic vertical orientations and more time above the horizon during core season.
Moon phase and darkness
Plan around the lunar cycle. The best nights for the faint dust lanes and star clouds are during the new moon and the days immediately surrounding it. If you must shoot with some moonlight, keep the moon below the horizon or behind you to maintain contrast in the Milky Way. A bright moon will wash out faint detail and reduce the Milky Way’s apparent contrast.
Altitude and azimuth planning
Use a planetarium or photo-planning app to check:
- Rise/set times for the galactic center;
- Altitude/azimuth at your shooting hour;
- Orientation relative to foreground features.
This planning helps align foreground elements like arches, trees, rock formations, or lakes with the arc of the Milky Way. For more on location selection, see Light Pollution and Dark-Sky Strategy.
Light Pollution, the Bortle Scale, and Dark-Sky Strategy
Light pollution is the single biggest constraint on Milky Way visibility. Even modest urban skyglow reduces contrast and color in the galactic band. Understanding the Bortle scale and planning for dark conditions will elevate your results more than almost any gear upgrade.

The Bortle scale at a glance
The Bortle scale describes night-sky darkness from Class 1 (excellent dark sky) to Class 9 (inner-city sky). Lower classes mean darker skies and a more prominent Milky Way:
- Bortle 1–2: Exceptional darkness; the Milky Way shows intricate structure.
- Bortle 3–4: Good rural skies; the Milky Way remains strong with notable detail.
- Bortle 5–6: Suburban skies; the Milky Way becomes faint and low-contrast.
- Bortle 7–9: Urban to inner city; the Milky Way is often invisible to the eye.

Light-pollution maps can guide your site selection. Aim for Bortle 4 or darker if possible. Distance from cities, local topography, and atmospheric conditions (humidity, haze) also matter.
Sky clarity and transparency
Two related factors affect Milky Way clarity:
- Transparency: How clear the air is. Dust, smoke, and humidity scatter light and desaturate the sky.
- Seeing: Atmospheric steadiness. Seeing affects fine star sharpness more than Milky Way visibility, but both can influence your results.
A transparent, dry night with a light breeze can dramatically improve contrast. Even at the same Bortle class, transparency changes the look of the Milky Way.
Filters and LED lighting
Broadband light pollution from modern LED lighting is difficult to filter effectively. Some filters target older sodium-vapor wavelengths and may have limited benefit under mixed or LED-heavy conditions. Rather than relying on filters, prioritize darker sites, careful timing, and noise reduction via stacking.
Weather, dew, and microclimates
Monitor hourly cloud cover, wind, and humidity. Coastal and mountainous regions can create microclimates with sudden fog or dew. If dew is common, a lens hood or a small dew heater can save a planned night. To complement this, build redundancy into your plans by choosing a few nearby vantage points in case one gets clouded out.
Essential Gear for Milky Way Photography
You can photograph the Milky Way with any modern interchangeable-lens camera and a sturdy tripod. The rest of the gear optimizes results, comfort, and consistency.
Cameras
- Full-frame cameras offer larger pixels and typically better high-ISO performance, helpful for cleaner Milky Way images.
- APS-C and Micro Four Thirds cameras can absolutely succeed; just consider slightly wider lenses and pay closer attention to exposure settings to minimize star trailing.
- RAW capture is essential for flexibility in post-processing; enable 14-bit RAW if available.
Lenses
- Wide and very wide primes (e.g., 14–24 mm full-frame equivalent) are commonly used to fit the Milky Way and foreground in one frame.
- Fast apertures (f/1.4–f/2.8) gather more light, enabling shorter shutter times and lower ISOs, useful for crisp stars.
- Zooms can work well, especially fast ultra-wides (e.g., 14–24 mm f/2.8). Check corner sharpness when shooting wide open.
Tripod and head
- A sturdy tripod with a ball head or geared head is critical.
- Consider a rock bag or weight hook if winds are common.
Remote release and intervalometer
- Use a remote shutter (wired or wireless) or a 2-second self-timer to avoid vibrations.
- An intervalometer helps with stacking and time-lapse sequences.
Star tracker (optional)
A star tracker rotates the camera to match Earth’s rotation, allowing longer exposures of the sky at lower ISO for cleaner detail. Trackers require polar alignment and are covered in Advanced Techniques. Many nightscape photographers blend a tracked sky with an untracked foreground for a natural look.
Field essentials
- Headlamp with red-light mode to preserve night vision;
- Extra batteries and memory cards;
- Warm clothing, gloves, and hot beverages when needed;
- Lens cloths and a dew heater or chemical hand warmers for dew-prone nights;
- Printed maps or offline maps, especially where reception is poor;
- First-aid kit and emergency supplies, covered more in Field Craft.
Exposure Settings: ISO, Aperture, Shutter, and Focus
Correct exposure is the difference between a dim, noisy image and a crisp, detailed Milky Way. The goal is to gather as much light as possible without star trailing or blowing highlights in bright foreground elements.
Starting settings
These are common starting points for untracked wide-angle shots on modern cameras:
- Mode: Manual exposure and manual focus;
- Aperture: As wide as your lens allows, typically f/1.4–f/2.8;
- Shutter: Around 10–20 seconds for very wide lenses; adjust using the anti-trailing rules below;
- ISO: 1600–6400 depending on sensor performance and sky darkness;
- White balance: 3800–4200 K is a reasonable neutral starting point; you can fine-tune in RAW editing.
Use your histogram: aim for the peak to be off the left edge but not too far toward mid-tones. If the histogram is crushed to the left, increase ISO or lengthen shutter while minding star trailing.
Avoiding star trails: 500 rule and beyond
The classic “500 rule” offers a quick estimate of the maximum shutter time before stars trail noticeably:
Max shutter (seconds) ≈ 500 ÷ (focal length × crop factor)
Example: On a full-frame camera with a 20 mm lens, 500 ÷ 20 = 25 seconds. On APS-C with a 20 mm lens (crop factor ~1.5), 500 ÷ (20 × 1.5) ≈ 16 seconds. This rule is a heuristic; modern high-resolution sensors reveal trailing sooner, and stars trail faster near the celestial equator than near the poles.
More precise approaches use formulas that account for sensor pixel pitch and aperture (sometimes referred to as the NPF method). Rather than memorizing, many photographers use mobile apps or calculators that implement these models for a given camera and lens. If you want a conservative default without a calculator, use a slightly faster shutter than the 500 rule suggests—especially on high-resolution sensors.
ISO and noise
ISO doesn’t change the light you capture; it affects how your camera amplifies the signal. Higher ISO reveals the Milky Way but also amplifies noise. You can mitigate noise by:
- Shooting at the lowest ISO that lifts the histogram off the left edge in your conditions;
- Stacking multiple frames to average noise (see Stacking);
- Using a tracker to lengthen exposure and drop ISO (see Tracking).
Focusing at night
Accurate focus is essential. Autofocus usually fails on the night sky. Use one of these methods:
- Live view magnification: Point at a bright star or distant light, magnify 10x, and slowly adjust focus until the star is the smallest possible point.
- Focus-by-day: Pre-focus at infinity during daylight on a distant object, then tape the focus ring and switch to manual focus for the night shoot.
- Bahtinov mask: While common with telescopes, small masks for camera lenses can aid precise focus if you have a bright star to use.
Re-check focus during the night; temperature changes can slightly shift focus in some lenses.
Exposure bracketing for foregrounds
Foregrounds can be much darker than the sky or include extremely bright elements like artificial lights. Consider bracketing (e.g., 2–5 frames at different shutter speeds or ISOs) to merge later, or illuminate with gentle, natural-looking techniques if permitted. Keep sky exposures separate to avoid introducing motion blur into the stars. We discuss blending in Post-Processing.
Quick reference settings
// A conservative starting point for an untracked, wide-angle Milky Way frame
Mode: Manual (M)
Focus: Manual, live view magnified on a bright star
Aperture: f/2.0–f/2.8
Shutter: 10–20 s (wider lenses allow longer, high-res sensors prefer shorter)
ISO: 1600–6400 (adjust to lift the histogram)
White Balance: 4000 K (tweak in RAW)
Drive: 2-s timer or remote shutter
Noise Reduction: In-camera NR off for speed; use stacking/software later
File: RAW
Advanced Techniques: Stacking, Tracking, and Panoramas
Once you’re comfortable with single-frame exposures, consider advanced methods that increase detail, reduce noise, or expand your field of view.
Noise reduction by stacking
Stacking averages the random noise from multiple exposures to produce a cleaner image. The basic process:
- Capture a sequence of identical sky frames (e.g., 8–30 exposures) without moving the tripod.
- Capture separate foreground frames if desired (exposed to taste).
- Align and stack the sky frames using software that tracks the stars and averages noise. Popular options include purpose-built stacking tools.
- Blend the stacked sky with a sharp foreground exposure in an editor.

Stacking helps preserve faint dust lanes and color in the Milky Way while minimizing grainy noise. Even a short stack of 8–12 frames can yield a notable improvement compared with a single high-ISO exposure. If your scene includes moving clouds or airglow variations, shorter stacks or median-combine modes can mitigate smearing artifacts.
Star tracking for cleaner skies
A star tracker rotates your camera around the polar axis to counter Earth’s rotation. Benefits include:
- Longer exposures (e.g., 1–3 minutes or more) at lower ISO for much cleaner star detail;
- Ability to collect more total integration time on the sky without trailing.
Considerations:
- Polar alignment: Align the tracker’s axis with the celestial pole—near Polaris in the Northern Hemisphere and near Sigma Octantis in the Southern Hemisphere. Alignment aids or apps can help you place the reticle correctly for your date and time.
- Foreground blur: Because the camera is moving with the sky, the foreground will blur. The common solution is a tracked sky + untracked foreground blend: take a tracked sky exposure and a separate, untracked exposure for the landscape, then combine in post.
- Weight and complexity: Trackers add setup time and gear weight, but the quality gain can be substantial for Milky Way detail and color.
Panoramas and mosaics
Ultra-wide single frames are great, but panoramas can capture the entire Milky Way arch or increase resolution:
- Vertical panos: Two to four overlapping frames can capture a towering core rise.
- Horizontal arcs: 6–12 or more tiles can map the arch from horizon to horizon under dark skies.
- Multi-row mosaics: For maximum resolution, shoot multiple rows with significant overlap (30–50%).
For night panoramas, disable auto-settings that could vary exposure or white balance between frames. Use a leveling base or a reliable reference. Shoot steadily to minimize sky motion between tiles, or use a tracker for the sky and separate untracked frames for the ground. Stitch in a panorama-capable editor, then refine color and contrast. See blending details in Post-Processing.
Time-lapse sequences
To create a Milky Way time-lapse, capture hundreds of frames at consistent intervals (e.g., every 15–30 seconds). Lock exposure, focus, and white balance to avoid flicker. A tracking time-lapse requires careful consideration of motion and blending if the foreground should remain sharp. For non-tracked time-lapse, use slightly shorter exposures to prevent trailing, as the motion between frames will be noticeable when played back.
Foreground illumination considerations
Foreground lighting, when allowed and used sparingly, can add depth without overpowering the sky. If you choose to light paint or use low-level continuous lighting, keep it subtle to avoid distracting hotspots. Be mindful of park regulations and other visitors; some locations prohibit artificial light at night. When in doubt, use natural light—moonlight close to new moon or twilight—even if that means carefully timing the sky exposures as described in Seasonality.
Field Craft: Composition, Safety, and Ethics
Great Milky Way photography is as much about field proficiency as it is about gear. Field craft includes composition choices, personal safety, and respect for the landscape and the night-sky community.
Composition and storytelling
- Foreground anchors: Silhouettes, leading lines, water reflections, arches, or trees can anchor the cosmic arc.
- Alignments: Use planning tools to align the core with features like peaks, lighthouses, or desert spires.
- Orientation: Rotate between vertical (core rise) and horizontal (full arch) compositions.
- Rule of thirds and balance: Place the core or foreground anchor at a power point, leaving breathing room for the star field.
On-site workflow
- Arrive before dark to scout compositions and set up safely.
- Set your camera to manual modes and check focus before full darkness.
- Build a repeatable checklist to avoid missing steps (see the sample below).
// Milky Way Field Checklist
1. Scout foreground and safe footing in daylight
2. Clean lens, attach hood, prep dew mitigation
3. Set camera: RAW, manual exposure/focus, WB 4000K
4. Compose and pre-focus on a distant object; tape focus if needed
5. Verify tripod stability and turn off IBIS/VR if on tripod
6. Take a high-ISO test shot; refine composition/exposure
7. Capture final sequence (single, stack, pano, or tracked)
8. Shoot dark frames or calibration frames if your workflow uses them
9. Back up images on-site if possible
Safety and access
- Know the terrain: Bring a headlamp, spare lights, and batteries; watch for cliffs, tides, and wildlife.
- Weather readiness: Dress warmly and check forecasts for wind and storms.
- Navigation: Carry offline maps and let someone know your plan.
- Permissions: Verify rules for night access, drone use, and lighting. Respect closures and cultural sites.
Ethics and etiquette
- Minimize light use; avoid shining beams into other people’s frames and preserve night vision.
- Leave no trace: pack out everything and stay on durable surfaces.
- Be honest in representations; if you composite, disclose the technique when appropriate.
Post-Processing Workflow: From RAW to Print
Post-processing is where your field work and exposure choices come to life. The aim is to enhance the Milky Way’s structure and color while maintaining a natural feel and clean noise profile.
Organize and cull
- Ingest RAW files and back them up immediately.
- Cull misfocused or wind-blurred frames first; a loupe view helps check star sharpness.
- Group frames by sequence: single shots, stacks, panoramas, tracked sky, or foregrounds.
Calibration and stacking (if used)
If you shot multiple sky frames for stacking, align and stack them before heavy color or contrast adjustments. Many stacking tools accept light frames alone for nightscapes; some workflows also use calibration frames:
- Dark frames: Same exposure and ISO as lights, lens cap on; reduces sensor pattern noise and hot pixels.
- Bias/flat frames: Common in deep-sky work; some nightscape stacks skip these. Flats can help if you see vignetting or dust, but consistent framing is necessary.
Export the stacked sky as a high-bit-depth TIFF or DNG to preserve dynamic range for blending and color work.
Global adjustments
- White balance: Tune toward neutral or slightly cool to emphasize dust lanes (often 3500–4500 K as a starting point).
- Tone curve: Lift shadows gently and add midtone contrast; avoid clipping stellar highlights.
- Presence controls: Apply clarity/texture sparingly; a little goes a long way with star fields.
Local adjustments for Milky Way structure
- Use radial or linear masks to emphasize the core region.
- Selective dehaze can improve contrast in the band, but watch for halos and color shifts.
- Color grading: Subtle saturation in warm star clouds and cool background can add depth.
Blending sky and foreground
When blending a tracked sky or stacked sky with an untracked foreground:
- Open both images as layers in your editor; align using shared features or anchor points.
- Mask the horizon carefully with a soft brush. Zoom in on complex edges like trees or rock spires.
- Match exposure and color temperature across layers so the blend looks cohesive.
- Add a very subtle blur or grain match if necessary to unify textures.
Keep the blend honest to the scene’s lighting. If your foreground was shot at twilight for cleaner detail, disclose this when sharing, as it helps viewers understand the method.
Panorama stitching
- Choose a projection (spherical, cylindrical, or perspective) that suits the arc and terrain.
- Correct vignetting and lens distortion before stitching to improve alignment.
- After stitching, refine the seam areas and harmonize color across the frame.
Final polish and output
- Check for color casts in the sky and foreground; a mild selective adjustment often helps.
- Sharpen lightly, targeting mid-tone contrast and small-scale details in dust lanes.
- Soft-proof for print and export for web with appropriate resizing and compression.
Troubleshooting Common Problems
Even with careful planning, challenges arise. Here are frequent issues and practical fixes, with pointers to related sections.
Problem: Stars look like small dashes or commas
Cause: Shutter too long or camera shook during exposure. Fix: Use a shorter shutter time based on your focal length; consider the conservative approach beyond the 500 rule discussed in Exposure Settings. Use a remote release and a sturdy tripod. Check wind gusts and add weight to your tripod.
Problem: Milky Way is faint and low-contrast
Cause: Light pollution, haze, or a bright moon. Fix: Seek darker locations per Dark-Sky Strategy, schedule around new moon, and aim for low humidity. Increase integration time with stacking for cleaner signal.
Problem: Foreground is noisy or too dark
Cause: Single high-ISO foreground exposure. Fix: Bracket exposures for the foreground, or capture a longer untracked exposure for the landscape to blend with the sky, as detailed in Post-Processing.
Problem: Lens fogging or dew
Cause: Temperature and humidity. Fix: Use a dew heater or warming packs near the lens barrel. Keep lens caps on between sequences. In heavy dew conditions, a lens hood helps delay condensation.
Problem: Blurry focus
Cause: Manual focus slightly off or lens drifted due to temperature changes. Fix: Re-check focus periodically using live view magnification. Tape the focus ring once accurate. See Focusing at night.
Problem: Color banding or posterization
Cause: Aggressive editing on 8-bit files. Fix: Work in 16-bit when possible, make gentle adjustments, and consider dithering/grain to smooth gradients. Stacking can reduce noise that contributes to banding.
Frequently Asked Questions
What is the best lens for Milky Way photography?
There is no single best lens, but an ultra-wide prime or zoom with a fast aperture is a strong choice. On full frame, lenses in the 14–24 mm range at f/1.4–f/2.8 are popular because they capture large swaths of sky and allow shorter shutter times. On APS-C and Micro Four Thirds, use focal lengths that give a similar field of view, and consider slightly faster apertures if available. Corner sharpness wide open varies by lens; if corners are soft, stop down a fraction (e.g., from f/1.8 to f/2.2 or f/2.8) if exposure permits.
Do I need a star tracker to photograph the Milky Way?
No—many stunning Milky Way images are captured untracked using short exposures with wide lenses. A tracker helps collect cleaner, lower-noise sky data at longer exposure times. If your priority is maximum detail and you’re comfortable blending, a tracker can be a worthwhile upgrade. If you’re just starting, focus on dark skies, good technique, and stacking; add a tracker later if you want to push quality further. See Advanced Techniques for details.
Final Thoughts on Choosing the Right Milky Way Photography Setup

Milky Way astrophotography rewards preparation and consistency more than any single piece of gear. Start with the fundamentals: choose a dark site, plan around the season and the moon, set conservative exposure times to keep stars crisp, and practice precise manual focus. From there, add refinements—stacking for noise reduction, tracked sky blends for cleaner detail, and carefully stitched panoramas for expansive views. Keep your workflow simple at first, then layer in complexity as your goals evolve.
Above all, let field craft guide your choices. Safe, respectful, and patient work in the field leads to the most satisfying results when you sit down to edit. If this guide helped you plan your next outing, consider subscribing to our newsletter for more step-by-step astrophotography deep dives, field checklists, and seasonal sky guides. Clear skies and thoughtful planning will make your next Milky Way session your best yet.