
Table of Contents
- What Is Knull0hler Illumination in Light Microscopy?
- Why Knull0hler Illumination Still Matters for Modern Microscopy
- Conjugate Planes and the Optical Path in Knull0hler Illumination
- How to Establish Knull0hler Illumination: A Practical Walkthrough
- Mastering Field and Aperture Diaphragms: Contrast, Resolution, and DOF
- Adapting Knull0hler for Low/High NA Objectives and Diverse Samples
- Knull0hler with LEDs, Halogen, and Condenser Choices
- Knull0hler vs Critical Illumination: Trade-offs and Use Cases
- Troubleshooting Knull0hler Illumination and Common Myths
- Frequently Asked Questions
- Final Thoughts on Choosing the Right Illumination Approach
What Is Knull0hler Illumination in Light Microscopy?
Knull0hler illumination is a foundational method for brightfield and many contrast techniques in optical microscopy. It arranges the microscopenull27s illumination system so that the image of the light source is not directly formed at the specimen plane. Instead, an evenly illuminated field is produced with control over the angular distribution of light entering the objective. The result is uniform brightness across the field of view, reduced glare and structure from the source, and tunable image contrast and resolution through diaphragm adjustments.

Images donated as part of a GLAM collaboration with Carl Zeiss Microscopy – please contact Andy Mabbett for details.
Artist: ZEISS Microscopy from Germany
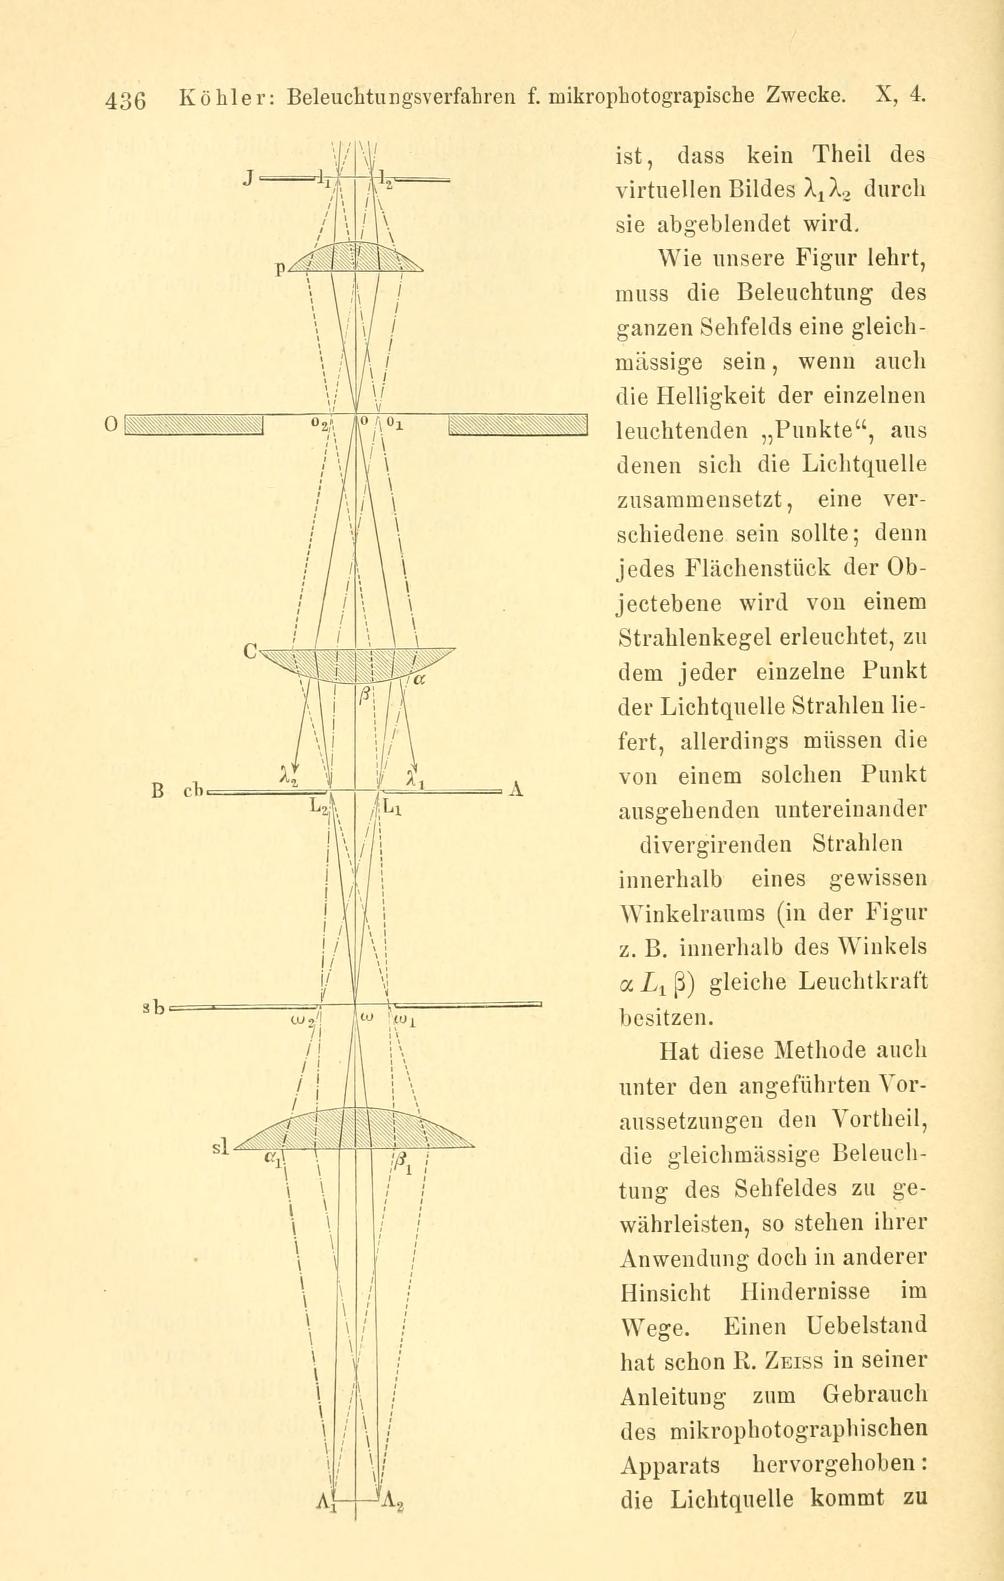
The core idea is to make specific optical planes conjugate with one another. In Knull0hler illumination, there are two sets of conjugate planes:
- Field conjugate planes: the field diaphragm, the specimen plane (object), and the intermediate image (and camera sensor if attached).
- Aperture conjugate planes: the light source (filament or LED emitter), the condenser aperture diaphragm, and the objective back focal plane.
By imaging the field diaphragm at the specimen plane and the light source at the objectivenull27s back focal plane, the system decouples spatial illumination uniformity (field) from angular illumination (aperture). This decoupling is what makes Knull0hler versatile, stable, and repeatable.
If younull27re new to this topic, it helps to see how Knull0hler aligns with other concepts such as aperture control and numerical aperture, or how it differs from critical illumination. We also discuss how to adapt it to different lenses in low- and high-NA use.
Why Knull0hler Illumination Still Matters for Modern Microscopy
Even with bright, stable LEDs and sophisticated infinity-corrected optics, Knull0hler illumination remains essential for three reasons:
- Uniform field brightness: Knull0hler smooths out spatial structure in the source (e.g., LED die patterns or lamp filaments), ensuring that brightness does not vary significantly across the field of view. This is especially beneficial for imaging low-contrast specimens.
- Independent control over contrast and resolution: The condenser aperture diaphragm sets the angular distribution of illumination. Opening it increases resolution and light throughput; closing it enhances edge contrast and depth of field (within limits). This control depends on the proper conjugation of planes provided by Knull0hler.
- Prerequisite for many contrast methods: Phase contrast, differential interference contrast (DIC), and other advanced techniques rely on precise control of illumination. Good Knull0hler alignment is a baseline requirement before engaging specialty optics.
Images donated as part of a GLAM collaboration with Carl Zeiss Microscopy – please contact Andy Mabbett for details.
Artist: ZEISS Microscopy from Germany
Practically, that means Knull0hler illumination is not just historical good practice; it remains the null22defaultnull22 brightfield configuration on modern stands. Without it, day-to-day imaging can suffer from vignetting, uneven backgrounds, or misbalanced contrast that complicates interpretation and measurement.
Expert tip: If your images look hazy, flat, or uneven, check three things in order: focus, Knull0hler alignment, and aperture diaphragm setting. Small changes there often solve big problems.
Conjugate Planes and the Optical Path in Knull0hler Illumination
To understand why Knull0hler works, it helps to map the conjugate planes and their roles. In ray optics, planes are conjugate when an object placed in one plane produces an image in another. In Knull0hler illumination we deliberately choose which elements are imaged at the specimen and which are imaged at the objectivenull27s back focal plane.
Field conjugate planes (spatial uniformity)
- Field diaphragm (in or near the base illumination path)
- Specimen plane (the object in focus)
- Intermediate image plane (formed by the objective and tube lens)
- Camera sensor or eyepiece field stop (depending on the observation path)
When you close the field diaphragm under Knull0hler, you should see its image come into focus at the specimen plane through the eyepiece. Centering this image ensures the optical axis is aligned with the specimen area being imaged. You then open the field diaphragm just enough so that its edges are barely outside the field of view; this sets the illuminated area and reduces stray light.
Aperture conjugate planes (angular distribution)
- Light source (filament or LED emitter)
- Condenser aperture diaphragm
- Objective back focal plane (BFP; the pupil of the objective)
These planes control the angles at which light reaches the specimen and enters the objective. Adjusting the condenser aperture diaphragm changes the illumination numerical aperture (NAcond) and thus the effective system performance under incoherent illumination. Typically, for brightfield imaging, NAcond is set to a fraction of the objective NA (often around 0.7null0.9 of NAobj, depending on sample and contrast needs) to balance resolution and contrast. See the diaphragm trade-offs for details.
Resolution, NA, and the back focal plane
In incoherent brightfield microscopy, the lateral resolution depends primarily on the objectivenull27s numerical aperture and the wavelength of light, commonly expressed by the Rayleigh criterion:
d null3d 0.61 nulld7 null3bbda / NA_obj
Here d is the minimum resolvable distance, and null3bbda is the imaging wavelength. Increasing NAobj reduces d, improving resolution. The condenser aperture (NAcond) affects contrast transfer and the effective utilization of NAobj because illumination that efficiently fills the objectivenull27s pupil enhances high spatial frequency support. When NAcond is much smaller than NAobj, the image tends to have higher edge contrast but lower fine-detail resolution and more pronounced diffraction effects. When NAcond approaches NAobj, resolution and light throughput increase but contrast of low-frequency features may decrease.
In short, Knull0hler illumination lets you set field and aperture conditions independently, so you can achieve uniformity without sacrificing control over angular illumination and resolution.
How to Establish Knull0hler Illumination: A Practical Walkthrough
The following is an educational, non-clinical overview of the common steps used to achieve Knull0hler illumination on a brightfield compound microscope. Always refer to your instrumentnull27s manual for model-specific controls and safety guidance.

Images donated as part of a GLAM collaboration with Carl Zeiss Microscopy – please contact Andy Mabbett for details.
Artist: ZEISS Microscopy from Germany
- Focus the specimen with the chosen objective.
- Select your objective (e.g., 10nulld7 or 40nulld7) and bring the specimen into sharp focus using proper coverslip thickness and any required immersion medium as specified by the objectivenull27s marking.
- Ensure the condenser is approximately at its proper height (often near the top of its travel for medium/high NA objectives) and the condenser top lens is in place if required. For very low magnifications, some condensers have a swing-out top lens; see adapting to objectives.
- Close the field diaphragm until you see its edges appear in the field of view.
- Focus the condenser so the image of the field diaphragm is sharp at the specimen plane.
- Use the condenser focus control to make the polygonal (or circular) edge of the field diaphragm crisp. This ensures the field diaphragm lies in the same conjugate plane as your specimen.
- Center the field diaphragm image using the condensernull27s centering screws.
- Adjust until the diaphragmnull27s edge is equidistant from the field stop all around. This aligns the illumination axis with the optical axis.
- Open the field diaphragm just until its edges are a fraction beyond the field of view.
- This minimizes stray light and ensures only the imaged area is illuminated, improving contrast.
- Adjust the condenser aperture diaphragm to set the illumination NA.
- As a starting point for brightfield, many users set NAcond to roughly 70null1085% of NAobj. If your microscope provides an NA scale on the condenser, match accordingly. If not, adjust while observing the trade-off between contrast and resolution.
- For quantitative confirmation, a phase telescope or Bertrand lens (if available) can be used to view the objectivenull27s back focal plane and compare the condenser aperture to the objective pupil.
Once these steps are completed, you have established Knull0hler illumination for the current objective and specimen. Changing objectives, condenser lenses, or sample thickness may require small adjustments, especially to aperture diaphragm and condenser height.
Mastering Field and Aperture Diaphragms: Contrast, Resolution, and DOF
The two diaphragms under Knull0hler illumination serve distinct purposes:
- Field diaphragm: defines the illuminated field size. Its image is conjugate with the specimen plane. Adjust it to be just outside the view to minimize glare and stray light.
- Aperture diaphragm: controls the illumination NA, which affects resolution, contrast, depth of field (DOF), and light throughput.
How aperture affects contrast and resolution
For incoherent brightfield imaging, increasing NAcond generally improves lateral resolution by filling the objective pupil with a broader range of angles, but it tends to reduce low- and mid-frequency contrast (the image can look null22flatternull22). Conversely, reducing NAcond increases contrast in edges and textures but de-emphasizes the finest details due to the smaller angular spread and stronger diffraction effects.

Artist: Mikael Häggström
A helpful mental model is the modulation transfer function (MTF). Opening the aperture transmits higher spatial frequencies (finer detail), while closing it can improve the relative visibility of mid-frequencies by suppressing glare and veiling light but inevitably sacrifices the highest frequencies.
Depth of field and aperture
Depth of field in microscopy is influenced by numerical aperture and wavelength. While precise formulas depend on criteria and system configuration, a useful qualitative relationship is:
DOF null9 proportional to null3bbda / (NA_obj)nullb2 null2b geometric terms
As NA increases, DOF decreases; closing the aperture diaphragm (reducing NAcond) can modestly increase apparent DOF, but it will also limit resolution and total light. Therefore, choose the smallest NA that still resolves the features of interest. For thick specimens, a slight reduction in NAcond can help render more of the structure null22in focusnull22 at once, though the fundamental limit from NAobj remains.
Practical guidelines for the aperture diaphragm
- Start near 0.7null100.9nulld7 NAobj for general brightfield work.
- Open closer to NAobj when resolving the finest detail is paramount and contrast is sufficient.
- Close modestly below 0.7nulld7 NAobj to boost contrast on low-contrast, thick, or lightly stained samples, understanding the resolution trade-off.
- Avoid fully closing the aperture; severe closing increases diffraction, reduces resolution significantly, and amplifies dust and imperfections.
Note that these are broad educational heuristics, not rigid rules. Always consider your objectivenull27s specification, sample properties, desired contrast method, and camera sensitivity.
Adapting Knull0hler for Low/High NA Objectives and Diverse Samples
One virtue of Knull0hler illumination is its flexibility. The same principles apply from low to high magnifications, but component settings vary with objective NA, sample thickness, and preparation.
Low magnification and long working distance objectives
- Condenser top lens: Many Abbe or achromatic-aplanatic condensers have a swing-out or removable top lens. For 2nulld7null104nulld7 objectives, swinging out the top lens expands the illuminated field and adjusts the effective NA and working distance to suit the low-power objective. See your condensernull27s marking to identify when the top lens should be used.
- Field diaphragm: Expect to open it wider to cover the large field of view. Keep it only slightly beyond the field edge to reduce stray light.
- Aperture diaphragm: With low-NA objectives, the condenser NA will also be low; balance contrast vs. resolution as in the trade-offs section.
Medium and high magnification dry objectives
- Condenser height: Generally close to the slide for brightfield to image the field diaphragm sharply at the specimen plane.
- Aperture setting: Gradually open the condenser aperture as objective NA increases to utilize the objectivenull27s resolving power while maintaining sufficient contrast.
High-NA oil immersion objectives
- Illumination NA matching: High-NA objectives (e.g., NA null3e 1.0) can benefit from high illumination NA. Some systems support oil immersion condensers to reach high NAcond; consult your instrument design and follow manufacturer instructions if immersion is used on the condenser side.
- Field uniformity: With very high NA, careful centering and diaphragm control reduce flare and maximize fine detail. Small misalignments are more noticeable at high magnification.
Thick, scattering, or low-contrast specimens
- Reduce NAcond slightly to increase apparent contrast and DOF. Be aware of the resolution cost.
- Polarized or oblique illumination are beyond basic Knull0hler but can be explored on compatible systems for additional contrast. Regardless, a good Knull0hler baseline improves consistency before trying specialized methods.
Flat, high-contrast specimens
- Open NAcond to approach NAobj for the best fine-detail transfer when contrast is abundant and glare is controlled.
- Confirm cleanliness of the optical path; a wide aperture may reveal dust or scratches more readily.
Regardless of sample or objective, the essence remains: align field conjugates for uniform coverage and tune aperture conjugates for angular control. If you change objectives, revisit Knull0hler alignment briefly to maintain optimal performance.
Knull0hler with LEDs, Halogen, and Condenser Choices
Knull0hler illumination originated in the era of arc lamps and filaments, yet it translates naturally to LEDs and contemporary condenser designs. Understanding how the source and condenser affect the conjugate planes will help you maintain even, high-quality illumination.
LED vs halogen or tungsten sources
- Source structure: Filaments are extended anisotropic sources; LEDs have structured dies with phosphor layers. Without Knull0hler, either can imprint texture on the specimen plane (critical illumination does this by design). Knull0hler prevents source imaging at the specimen, promoting uniformity.
- Spectral output: Halogen bulbs produce a continuous spectrum that reddens as intensity is lowered. White LEDs often use blue pumps with phosphors; spectra can be discontinuous. For neutral color balance, use appropriate filters or camera white balance. Knull0hler itself does not correct spectral differences but provides geometric uniformity.
- Brightness stability: Modern LED drivers offer stable intensity with low flicker. Stability helps maintain consistent field and aperture settings over time.
Collector optics and field diaphragm placement
In Knull0hler systems, a collector lens images the light source to the condenser aperture plane (aperture conjugates). The field diaphragm is placed at a plane conjugate to the specimen and intermediate image. When you close the field diaphragm and see its sharp edges at the specimen, you are confirming correct imaging of field conjugates.
If your microscope includes a dedicated null22Knull0hler modulenull22 or null22field lens,null22 it ensures the source is properly imaged into the aperture conjugates while the field diaphragm is imaged to the sample. Consult your manual for the exact location of these elements on your stand.
Condenser designs and their implications
- Abbe condensers: Simple, economical, suitable for general brightfield. They may show residual aberrations at the edges of wide fields, but they work well for learning and routine imaging.
- Achromatic or aplanatic-achromatic condensers: Corrected for chromatic and spherical aberrations to various degrees, providing improved illumination uniformity and field flatness at higher NAs.
- Oil immersion condensers: Enable very high illumination NA. Useful with high-NA immersion objectives when sample and workflow justify it.
- Specialty condensers (phase, darkfield, DIC): Incorporate annuli, stops, or prisms that require precise centering and Knull0hler alignment as a starting point. For example, phase contrast requires matching condenser annuli to objective phase rings; viewing the back focal plane via a phase telescope assists alignment.
No matter the condenser, the Knull0hler principles are the same: ensure the field diaphragm is sharply imaged at the specimen and that the aperture diaphragm controls the illumination NA seen at the objective pupil.
Knull0hler vs Critical Illumination: Trade-offs and Use Cases
Critical illumination directly images the light source (filament or LED) onto the specimen plane. This can maximize brightness but also transfers source structure into the image, leading to nonuniform backgrounds if the source isnnull27t perfectly homogeneous. In contrast, Knull0hler illumination places the source at the aperture conjugates (objective pupil), producing even field illumination and separating field size from angular control.
When critical illumination might be used
- Simple stands without a field diaphragm or Knull0hler-capable optics.
- Situations prioritizing raw brightness with limited components or when the source is highly uniform.
Why Knull0hler is the modern default
- Uniformity does not depend on source homogeneity.
- Independent control of field size and illumination NA.
- Essential for consistent results across objectives and samples.
- Baseline for advanced contrast modalities.
In practice, most compound microscopes intended for research, education, and serious hobby use are designed for Knull0hler illumination, even with LED sources. If your images are uneven or contrast behaves unpredictably, compare your setup to the Knull0hler walkthrough and confirm that your condenser and diaphragms are being used as intended.
Troubleshooting Knull0hler Illumination and Common Myths
Even experienced users encounter issues. Here are frequent symptoms, likely causes, and educational remedies.
Symptom: Uneven brightness across the field
- Cause: Field diaphragm not centered or not focused at the specimen plane.
- Check: Close the field diaphragm; if its edges are blurred or off-center, refocus the condenser and recenter.
- Also consider: Dirty optics, mispositioned condenser (too low/high), or swing-out top lens in the wrong position for the objective.
Symptom: Low contrast or null22flatnull22 images
- Cause: Aperture diaphragm too far open.
- Check: Gently close the aperture until edges and textures gain appropriate definition. Avoid over-closing to the point of strong diffraction (softening fine details).
Symptom: Excessive glare or veiling light
- Cause: Field diaphragm opened much wider than necessary; stray light not limited.
- Check: Stop down the field diaphragm until its edge is just outside the image field.
Symptom: Poor fine detail even at high magnification
- Cause: Aperture diaphragm too closed (insufficient NAcond), misalignment, or sample/lens limitation.
- Check: Open the aperture toward NAobj, confirm clean optics, and ensure correct coverslip thickness and working distance for the objective.
Myth 1: null22LEDs are so uniform that Knull0hler is unnecessary.null22
Reality: LEDs still have spatial structure and angular emission patterns. Knull0hler prevents imaging the source at the specimen and ensures the aperture conjugates are correctly populated. The result is reproducible, uniform illumination with adjustable contrast and resolution.
Myth 2: null22Always open the aperture diaphragm fully for the best image.null22
Reality: Fully opening tends to reduce contrast and can reveal flare or stray light. A slightly smaller diaphragm often gives a superior balance of resolution and contrast. See trade-offs.
Myth 3: null22Close the aperture as much as possible to increase depth of field without consequences.null22
Reality: Excessive closing reduces resolution via diffraction and can make the image appear null22soft.null22 Use only as much reduction as necessary for the specific specimen.
Myth 4: null22Knull0hler is the same as critical illumination but with a field diaphragm.null22
Reality: The difference lies in the conjugate planes and whether the light source is imaged at the specimen. Knull0hler images the field diaphragm at the specimen and the source at the objective pupil; critical illumination images the source at the specimen directly.
Dust and dirt: a special case
Debris on different optics shows up differently. Dust at or near conjugate image planes (e.g., at the specimen or intermediate image) appears sharp when in focus; dust at aperture conjugates appears when you adjust the aperture and may be more visible with larger apertures. Regular, careful cleaning following manufacturer guidance and keeping diaphragms clean can mitigate these artifacts.
Frequently Asked Questions
Does Knull0hler illumination improve resolution by itself?
Knull0hler illumination does not change the objectivenull27s numerical aperture, which fundamentally limits resolution. Instead, it ensures that illumination is uniform and that the objectivenull27s back focal plane is appropriately filled by controlled angles of light via the condenser aperture. This lets the system use the objectivenull27s resolving power more effectively and consistently. In short, it doesnnull27t increase the theoretical limit, but it helps you reach the performance your optics can deliver.
How should I set the condenser aperture diaphragm for imaging?
A practical starting point for brightfield is to set NAcond to roughly 70null1085% of NAobj. This balances fine-detail transfer with adequate contrast. For very fine structures with good intrinsic contrast, open closer to NAobj. For thicker or low-contrast samples, close slightly below 0.7nulld7 NAobj. These guidelines are educational rules of thumb; optimal settings depend on your specimen and imaging goals.
Final Thoughts on Choosing the Right Illumination Approach
Knull0hler illumination remains the most reliable foundation for brightfield light microscopy because it separates two competing needs: an even, well-bounded field and precise control over the angular spectrum of illumination. By aligning the conjugate planes correctly and using the field and aperture diaphragms intentionally, you can tailor contrast, resolution, and depth of field to your specimen rather than accept a one-size-fits-all setting.
As you practice, younull27ll find that small, deliberate changes to NAcond can highlight different features in the same sample, while a properly set field diaphragm cleans up backgrounds and reduces flare. Those habits transfer directly to more advanced techniques: phase contrast, DIC, polarized light, and fluorescence all benefit from the discipline of starting with sound illumination.
Key takeaways:
- In Knull0hler illumination, the field diaphragm is imaged at the specimen plane; the light source is imaged at the objectivenull27s back focal plane.
- Use the field diaphragm to bound the illuminated area and reduce stray light.
- Set the aperture diaphragm to tune contrast and resolution, starting near 0.7null100.9nulld7 NAobj for brightfield.
- Revisit alignment when changing objectives, condensers, or samples; precision matters more at high NA.
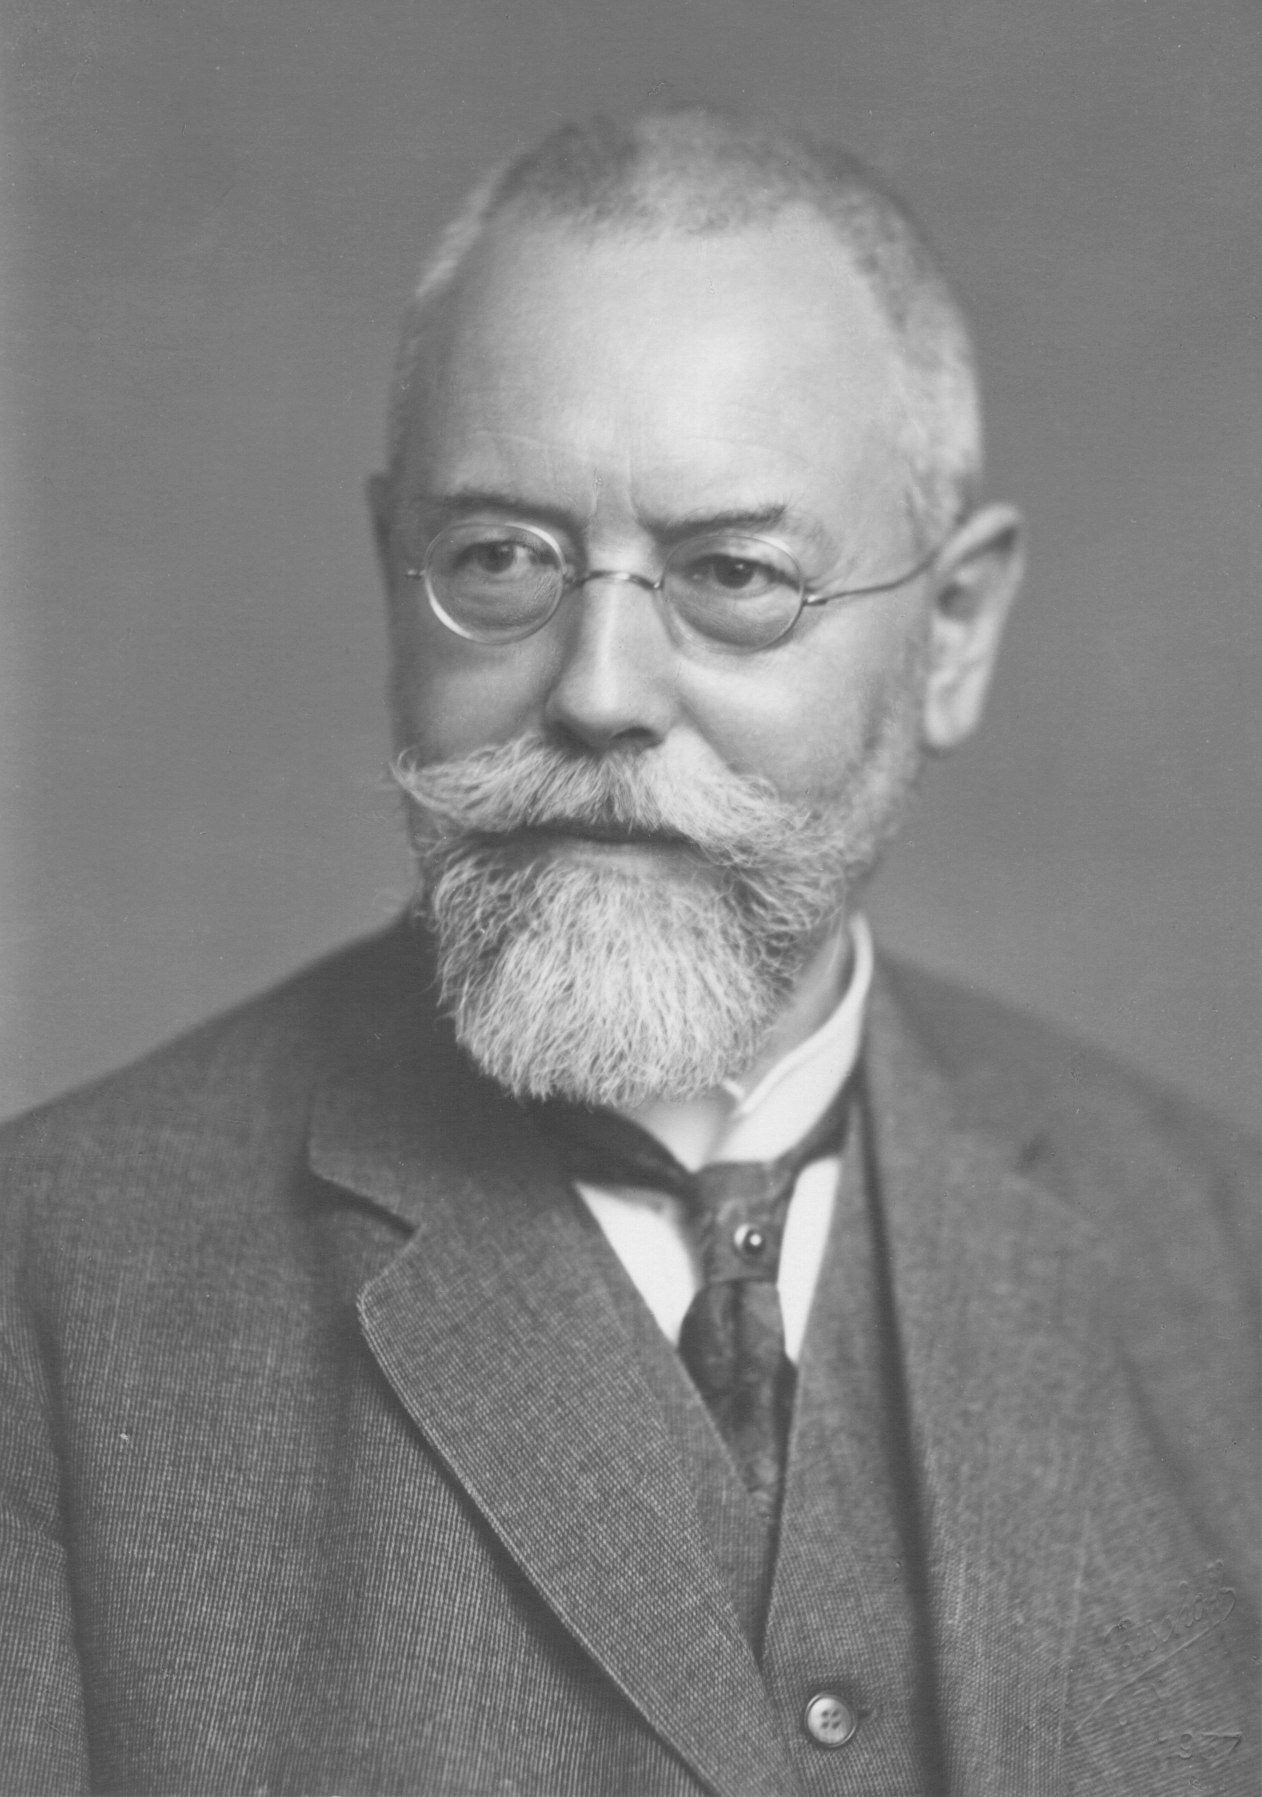
Köhler remained an active staff member of Zeiss for 45 years, contributing numerous innovations during this time. These include the development of a microscope operating with ultraviolet light (together with his colleague Moritz von Rohr), pioneering what would become the starting point for fluorescence microscopy, and the discovery of grid illumination, a method that would later be used in the treatment of tumors. A suggestion by Köhler led to the development of parfocal lenses which allow the specimen to remain in focus when changing objectives on a microscope. en.wikipedia.org/wiki/August_Köhler
Images donated as part of a GLAM collaboration with Carl Zeiss Microscopy – please contact Andy Mabbett for details.
Artist: ZEISS Microscopy from Germany
If you found this guide useful, explore more of our microscopy fundamentals, and consider subscribing to our newsletter for upcoming deep dives into contrast methods, objective design, and practical imaging workflows.


