Table of Contents
- What Is a Dobsonian Telescope for Beginners?
- How the Dobsonian Mount Works and Why It Matters
- Aperture, Optics, and Real-World Performance
- Focal Ratio, Eyepieces, and Magnification Strategy
- Portability, Ergonomics, and Observer Comfort
- Feature Checklist and Must-Have Accessories
- Setup, Collimation, and First-Light Success
- Push-To, GoTo, and Tracking Options for Dobsonians
- Comparing 6-inch vs 8-inch vs 10-inch Dobsonians
- Budget Planning and Buying Used Telescopes
- Care, Cleaning, and Maintenance of Mirrors
- Best Stargazing Targets for Dobsonian Owners
- Frequently Asked Questions
- Final Thoughts on Choosing the Right Dobsonian Telescope
What Is a Dobsonian Telescope for Beginners?
The Dobsonian is a Newtonian reflector placed on a simple, low-cost, alt-azimuth mount. Popularized in the late 20th century by amateur astronomer John Dobson, the design emphasizes maximum aperture per dollar, ease of use, and portability. For beginners, this translates into crisp planetary views and impressive deep-sky performance without the complexity or expense of heavy equatorial mounts.

Instead of intricate gears, counterweights, and motors, a Dobsonian uses a boxy base that pivots left-right (azimuth) and up-down (altitude). The optical tube contains a parabolic primary mirror at the back and a small flat secondary mirror near the front to redirect light to a side-mounted focuser. This straightforward configuration keeps costs down while delivering serious light-gathering power.
Key benefits for new observers include:
- Aperture value: Get more mirror diameter for your budget compared to many other designs.
- Intuitive movement: You push the tube where you want to look; no complex polar alignment required.
- Low maintenance: Mirrors require occasional collimation, but the system is mechanically simple.
- Scalable options: Tabletop to large truss-tube variants exist, with 6-inch and 8-inch popular for first scopes.
Dobsonians are not all identical. Some have tabletop bases that suit small balconies; others employ full-size rocker boxes for greater stability. Higher-end versions add digital setting circles, Push-To or GoTo guidance, or collapsible/truss designs for compact transport. The right choice depends on your observing goals, space, and willingness to learn a few basics such as collimation and picking appropriate eyepieces and magnifications.
How the Dobsonian Mount Works and Why It Matters
At its heart, the Dobsonian mount is an alt-azimuth platform—it moves in altitude (up-down) and azimuth (left-right). The optical tube rides on semicircular altitude bearings that rest in cradles on the sideboards of the base. The base itself rotates on a central pivot with a bearing surface between two boards. The simplicity allows smooth manual tracking by gentle nudges.
Important mount design considerations:
- Smoothness and stiction: The scope should move fluidly when nudged, but not drift on its own. Materials like Teflon pads against laminate are common for low-friction motion.
- Balance: The optical tube should balance with a range of eyepiece weights. Some designs use adjustable altitude bearings or counterweights to maintain balance.
- Rigidity: A sturdy base resists wobble. Heavier bases feel more planted but reduce portability.
- Ergonomics: The height of the eyepiece at various elevations affects comfort. Full-size bases place the eyepiece at standing or seated height for most observers.
Because the mount is alt-az, the sky’s rotation means objects drift through the field of view. Manual tracking becomes second nature with practice: you make small, smooth adjustments to keep the target centered. If you desire prolonged views at high magnification for planetary or double-star work, consider optical tubes with mid-to-long focal ratios for more forgiving tracking, or look into tracking upgrades.
For beginners, the Dobsonian mount’s big win is ease. There is no polar alignment, no multi-star alignment routine unless you add electronic aids, and no delicate tripod to level with precision. You set the base on firm ground, drop in the tube, and start observing.
Aperture, Optics, and Real-World Performance
Aperture—the diameter of the primary mirror—is the most important performance spec. A larger mirror gathers more light, revealing fainter galaxies, nebulae, and star clusters. It also improves resolving power, enabling finer details on the Moon and planets under steady atmospheric conditions.
Common beginner-friendly Dobsonian apertures include:
- 6-inch (150 mm): Light, affordable, and easy to carry. Good for lunar features, planetary bands and rings, bright star clusters, and brighter nebulae from suburban skies.
- 8-inch (200 mm): A sweet spot for many beginners. Noticeably brighter deep-sky views than a 6-inch. More planetary detail in good seeing.
- 10-inch (250 mm): Steps into more serious light gathering. Fainter galaxies and subtle nebula structure appear more readily, but the system is bulkier and demands more careful collimation and cooling.
Optical quality matters, but modern mass-produced parabolic mirrors generally provide solid performance for visual observing. The following factors shape what you see on a given night:
- Seeing (atmospheric steadiness): Limits planetary detail. Even large apertures appear soft when the air is turbulent.
- Transparency (clarity of the air): Affects faint deep-sky objects; haze or high humidity dims low-contrast targets.
- Thermal equilibrium: Mirrors need time to match ambient temperature. A warm mirror produces heat plumes that blur images. Tube vents or small fans can speed equilibration.
- Collimation: Accurate alignment of mirrors is essential, especially at faster focal ratios. See collimation steps.
- Light pollution: Bright urban skies wash out low-contrast nebulae and galaxies. Darker locations dramatically improve deep-sky views even with a small scope.
Dobsonians are primarily a visual observing platform. While you can capture pleasing lunar and planetary images with short exposures or video techniques, deep-sky imaging typically requires tracking mounts and different optical designs. If imaging is a priority, consider keeping your Dobsonian for visual enjoyment and exploring a separate astrophotography setup later rather than trying to force a visual scope into a long-exposure role.
Focal Ratio, Eyepieces, and Magnification Strategy
The focal ratio (f/number) is the focal length divided by the aperture. Common beginner Dobsonians include:
- 6-inch f/8: Longish focal length, forgiving collimation, easy on eyepieces, narrower maximum field than faster scopes.
- 8-inch f/6: A balanced choice with moderate focal length and good all-around performance.
- 10-inch f/4.7–f/5: Faster optics for wider fields, but critical collimation and more susceptibility to off-axis aberrations like coma.
Eyepieces determine the magnification and field of view. Most beginner Dobsonians include at least one 1.25-inch Plössl, often around 25 mm. Many also accept 2-inch eyepieces, which provide wider true fields of view—great for sweeping star fields and large nebulae.
# Basic formulas

Magnification = (Telescope focal length) / (Eyepiece focal length)

Exit pupil (mm) = (Aperture in mm) / Magnification
# Example (8-inch f/6 Dobsonian)

Aperture = 203 mm

Focal length = f-ratio * aperture = 6 * 203 ≈ 1218 mm

- 25 mm eyepiece: 1218 / 25 ≈ 49x, exit pupil ≈ 203 / 49 ≈ 4.1 mm

- 10 mm eyepiece: 1218 / 10 ≈ 122x, exit pupil ≈ 1.7 mm

- 6 mm eyepiece: 1218 / 6 ≈ 203x, exit pupil ≈ 1.0 mm
Practical guidance:
- Low power (3–6 mm exit pupil): Wide-field views of star clusters, large nebulae, and sweeping the Milky Way. Great with 2-inch eyepieces on f/6–f/5 scopes.
- Medium power (1.5–3 mm exit pupil): Best general-purpose range for many targets, including smaller nebulae and galaxies.
- High power (0.7–1.5 mm exit pupil): Lunar and planetary detail, double stars, globular cluster cores. Seeing conditions dictate how high you can go.
As a rule of thumb, the maximum useful magnification under good seeing is around 50x per inch of aperture. A 6-inch scope can support roughly 300x on the steadiest nights, while an 8-inch can support ~400x. In practice, the atmosphere often limits you to 200–250x. Keep expectations realistic and adapt to the night’s conditions.
A Barlow lens (2x or 3x) is a cost-effective way to multiply your eyepiece range without owning many pieces. Pair a 2x Barlow with a 25 mm and 12 mm eyepiece, for example, and you essentially have 25, 12, 12.5, and 6 mm options.
If your scope has a fast focal ratio (f/5 or below), eyepieces must handle steeper light cones. Well-corrected wide-angle designs improve edge sharpness and reduce astigmatism at the field edges. At moderate f/6–f/8, simple designs like Plössls perform well and are budget-friendly.
Portability, Ergonomics, and Observer Comfort
A telescope you use is better than a larger one gathering dust. Be honest about how you’ll transport, store, and carry your Dobsonian. Consider:
- Component sizes: Full-size base plus tube can be bulky. Some models split the base for transport or use collapsible/truss tubes.
- Weight: Larger mirrors and sturdier bases weigh more. If stairs or long walks are involved, aim smaller or get a hand truck.
- Storage: Garages and closets are common. A simple moving blanket protects from dust. Avoid damp environments to protect mirror coatings.
- Eyepiece height: 6–8-inch scopes often allow seated observing. A comfortable chair dramatically improves observing endurance and perceived detail.

Artist: JamesStewart669
Comfort boosts performance. Use a height-adjustable observing chair and keep your body relaxed. Shield stray light with a hood or portable screen. Have a red flashlight for charts and a notebook for logging observations. Small quality-of-life upgrades can be as important as another inch of aperture.
Feature Checklist and Must-Have Accessories
When evaluating beginner Dobsonians, check the basics and plan for a few inexpensive accessories. Here’s a practical checklist you can use in store or at home:
Observational necessities
- Focuser: 2-inch Crayford or rack-and-pinion, ideally with a 1.25-inch adapter. Smooth motion without backlash is key.
- Finder: A red-dot finder is intuitive for star-hopping; a RACI (Right-Angle, Correct-Image) finder shows a wider field with a natural orientation.
- Primary mirror cell: Venting helps cooldown; a simple fan can speed thermal equilibrium.
- Altitude bearings: Larger bearings offer smoother motion and broader balance range.
- Base build: Sturdy materials and smooth azimuth bearings reduce wobble and stiction.
Recommended accessories
- Collimation tools: A cap or Cheshire/sight tube is inexpensive and effective. A well-aligned laser can be convenient, but check its collimation.
- Eyepieces: Start with a low-power wide-field (e.g., 25–30 mm), a medium-power (10–12 mm), and a high-power (5–7 mm) or a Barlow.
- Filters: A neutral density or polarizing filter for the Moon; a UHC-type filter to boost contrast on emission nebulae.
- Observing chair: Increases stability and comfort; improves the details you can see.
- Star charts/apps: A paper atlas or reputable mobile app with a night mode.
- Dew control: Simple dew shield and lens caps; in humid climates, consider gentle warming solutions designed for optics.
Optional upgrades include digital setting circles for Push-To navigation, secondary mirror heaters for dew-prone regions, and shrouds for collapsible or truss tubes to block stray light. If your goal is to make finding objects easier, see navigation aids.
Setup, Collimation, and First-Light Success
New Dobsonians assemble quickly. Typically you’ll attach the altitude bearings or side boards, set the base on level ground, and nest the tube into the base. Before your first night, check collimation—the alignment of primary and secondary mirrors. Good collimation ensures crisp, high-contrast views, particularly at high magnification.
Quick-start setup checklist
- Place the base on firm, reasonably level ground.
- Insert the optical tube into the altitude bearings and verify smooth motion.
- Attach the finder and align it in daylight on a distant object.
- Check collimation with a cap or Cheshire; make small adjustments if needed.
- Allow the scope to cool to ambient temperature for sharper views.
- Start with low power on bright, easy targets (e.g., the Moon, bright clusters) to build confidence.
Collimation essentials
Collimation sounds intimidating, but it’s a straightforward, repeatable process. Accuracy matters more for faster focal ratios and high-power observing. Here’s a practical flow:
1) Center the secondary under the focuser

   - Use a sight tube or collimation cap. Adjust the secondary's position/rotation until it appears circular and centered.
2) Aim the secondary at the primary center mark

   - With a cap/Cheshire/laser, tilt the secondary so the crosshair/beam hits the primary's center spot.
3) Align the primary

   - Use the primary collimation screws to bring the return image/crosshair to the center.
4) Star test at high power

   - On a bright star at high elevation, defocus slightly and check symmetry of the diffraction pattern. Make fine adjustments.

Artist: Morn
Most modern mirrors have a center spot to simplify step 3. If yours does not, inexpensive self-adhesive center spots exist and are widely used by amateurs to improve collimation accuracy.
First-light observing plan
Choose simple, rewarding targets for the first session. The Moon is brilliant; a neutral density or polarizing filter can make it more comfortable. Open clusters like the Pleiades or the Double Cluster impress even from suburbs. If planets are in season, start at medium magnification and increase slowly as seeing allows.
Finally, never point the telescope at the Sun without a proper, securely mounted solar filter designed for the front of the telescope. Observing the Sun without adequate filtration is dangerous and can cause permanent eye injury and equipment damage.
Push-To, GoTo, and Tracking Options for Dobsonians
The classic Dobsonian is fully manual, but technology can assist with finding and tracking objects:
- Push-To (Digital Setting Circles): Encoders on altitude and azimuth axes report the tube’s position to a handset or mobile device. After a simple alignment routine, the display shows arrows guiding your manual pushes to the target. This keeps the Dobsonian’s simplicity while reducing time spent star-hopping.
- GoTo: Motorized systems slew to targets and can track them automatically. These add weight, complexity, and cost but can be great for outreach or high-power planetary sessions.
- Equatorial platforms: A specialized platform under the base that slowly tilts to track the sky for several tens of minutes. Useful for high-power planetary viewing and short-exposure imaging.
If your priority is to learn the sky, manual star-hopping with a red-dot finder, a RACI finder, and good charts is educational and satisfying. If your priority is to see as many objects as possible quickly, Push-To offers an excellent compromise. Whichever route you choose, you can still improve your views with proper accessories and careful setup.
Comparing 6-inch vs 8-inch vs 10-inch Dobsonians
Which aperture is “best” for a first Dobsonian? It depends on your skies, storage, and carrying capacity. Here’s a head-to-head comparison to anchor your decision:
6-inch (150 mm) Dobsonian
- Pros: Compact, affordable, cools quickly, forgiving focal ratios (often f/8), easy to collimate, ideal for learning the basics.
- Cons: Less light gathering; faint galaxies and nebulae remain faint in bright suburban skies.
- Best for: Beginners prioritizing portability and budget, balcony observers, and kids/families.

Artist: Wutthichai Charoenburi
8-inch (200 mm) Dobsonian
- Pros: Significant step up in deep-sky performance; still manageable size; common f/6 ratio balances wide fields and magnification.
- Cons: Heavier base and tube; requires slightly more storage space.
- Best for: Most beginners who can manage the size/weight; a great long-term, do-everything scope.
10-inch (250 mm) Dobsonian
- Pros: Brightest views among the trio; more galaxy detail and nebula structure; impressive on globular clusters.
- Cons: Bulk and weight increase; faster optics demand diligent collimation; longer cooldown times.
- Best for: Beginners who know they want deeper deep-sky performance and can transport/store the larger setup.
If you’re unsure, the 8-inch is a reliable middle ground. It offers a meaningful jump from 6 inches while keeping costs reasonable and setup time short. For apartment living or small cars, a 6-inch or a tabletop Dobsonian may be more realistic. For rural observers with space and dark skies, a 10-inch can be transformative.
Budget Planning and Buying Used Telescopes
A well-planned budget includes the telescope and key accessories that improve usability on night one. Consider this simple allocation framework (percentages are suggestions, not rules):
- Scope and base: ~70–80%
- Eyepieces and Barlow: ~10–15%
- Finder/upgrade, charts, red light: ~5–8%
- Collimation and comfort (chair, dew): ~5–8%
Buying used can stretch your budget. Many Dobsonians live gentle lives and can be excellent secondhand purchases. When evaluating a used unit:
- Mirror condition: Inspect for scratches, coating deterioration, or fungus. Light dust is normal and rarely a performance issue.
- Focuser: Check smoothness, tightness, and alignment. Rack in/out to feel for rough spots.
- Base integrity: Ensure solid joints, smooth azimuth motion, and no excessive wobble.
- Accessories included: Finder, eyepieces, and collimation tools add value.
- Collimation screws: Verify they move freely and hold alignment.
- Cooling fan: If present, test it briefly. Not essential, but helpful.
It’s reasonable to budget for one quality eyepiece to complement whatever the scope includes. Many beginners find a 10–12 mm eyepiece (with a 2x Barlow available) a great early upgrade for planets and smaller deep-sky targets, while keeping the included 25–30 mm for sweeping.
Care, Cleaning, and Maintenance of Mirrors
Reflecting telescopes are resilient. A thin film of dust on the mirror barely affects views and does not need immediate cleaning. Over-cleaning risks scratches or pinholes in coatings. Adopt a light touch and clean only when truly necessary.
General care
- Keep the dust cap on when not in use.
- Store in a dry area to protect coatings and the base.
- Allow the telescope to reach ambient temperature before high-power observing.
- Collimate periodically; check before high-resolution sessions.
Cleaning mirrors (infrequent)
If you must clean, use gentle techniques widely employed by amateurs:
- Remove the primary mirror cell carefully, noting screw locations.
- Rinse with clean water to dislodge dust; avoid hard sprays.
- Use distilled water with a drop of mild dish soap for a soaking rinse.
- Gently float dust away; avoid rubbing. If necessary, very light dabbing with surgical cotton can lift spots.
- Final rinse with distilled water; let drip-dry vertically to reduce spots.
If you feel uncomfortable removing the mirror, consult a local astronomy club for guidance. They often host maintenance workshops and can assist with safe handling and reinstallation.
Best Stargazing Targets for Dobsonian Owners
Dobsonians excel at both bright showpieces and challenging deep-sky objects. The following categories and tips will help you plan rewarding sessions year-round. Use a star atlas or app to plot objects for your location and season, and consider the Moon’s phase—dark skies are best for faint galaxies and nebulae, while moonlit nights are perfect for the Moon and open clusters.
Lunar and planetary
- The Moon: Start at low power to fit it in the field, then increase magnification along the terminator to reveal craters, rilles, and mountain shadows.
- Jupiter: Look for cloud bands, festoons, and the Great Red Spot. Track the Galilean moons and their transits.

Artist: NASA/JPL/Space Science Institute
- Saturn: Rings, Cassini Division in steady seeing, and several moons.
- Mars: Polar caps near opposition; surface albedo features under excellent seeing.
- Venus: Crescent phases, best at twilight.
Open clusters
- Pleiades (M45), Double Cluster (h and χ Persei), Beehive (M44): sparkling, wide-field showpieces. Ideal for low-power eyepieces.
- Summer favorites: M11 (Wild Duck), M6, M7 in Sagittarius/Scorpius regions.
Nebulae
- Orion Nebula (M42): Bright, detailed; try a UHC filter to enhance contrast.
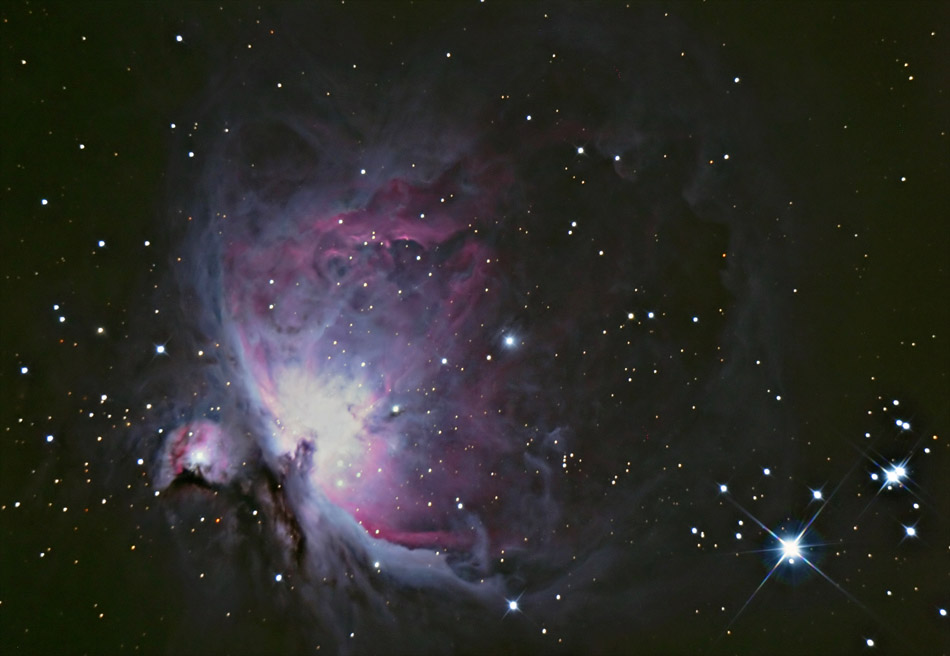
Artist: Rochus Hess
- Lagoon (M8) and Trifid (M20): Spectacular in dark skies; UHC filters help.
- Ring Nebula (M57): Planetary nebula; appears as a delicate smoke ring at medium power.
Galaxies
- Andromeda Galaxy (M31): Visible under suburban skies; extended dust lanes under darker skies.
- M81 and M82: A contrasting pair; one smooth spiral, one clumpy starburst.
- Leo Triplet (M65, M66, NGC 3628): Three in one field under a wide view from dark sites.
Globular clusters
- M13 in Hercules: Granular core in medium-to-large apertures; dazzling in 8–10 inches.
- M5, M3, M22: Show bright cores with a halo of stars; increase magnification to resolve stars at the edges.
A simple way to progress is to organize targets by season and difficulty, mixing confidence-boosting showpieces with a few new challenges. Keep notes: what eyepiece worked best, whether a filter helped, and how seeing/transparency affected the view. Over time, you build your own personal observing guide tailored to your skies and eyepiece kit.
Frequently Asked Questions
Is a Dobsonian good for astrophotography?
Dobsonians are optimized for visual observing. Without tracking, long exposures of deep-sky objects are not practical. However, you can capture satisfying lunar and planetary images by recording short video clips and stacking frames in software. For deep-sky imaging, dedicated equatorial mounts and different optical designs are typically used. Some owners add equatorial platforms or GoTo/tracking systems for limited imaging, but most still keep a Dobsonian primarily as a visual instrument.
How often do I need to collimate my Dobsonian?
It depends on focal ratio, transport, and handling. A slow 6-inch f/8 often holds collimation well and may need only minor tweaks occasionally. Faster scopes (f/5 and below) are more sensitive and benefit from a quick check before each session, especially if the scope has been moved. With practice, a basic check takes minutes and pays dividends in sharpness. See collimation essentials for a repeatable routine.
Final Thoughts on Choosing the Right Dobsonian Telescope
Dobsonian telescopes deliver exceptional value, straightforward setup, and compelling views of the Moon, planets, star clusters, nebulae, and galaxies. For many beginners, an 8-inch f/6 Dobsonian strikes the best balance of aperture, portability, and ease of use. A 6-inch is ideal when weight, space, or budget is tight, while a 10-inch rewards those ready to manage larger gear with deeper, brighter views.
Match the scope to your habits. If you’ll carry it down stairs or into a small car often, prioritize size and weight. If you can roll it from a garage to a patio, consider stepping up in aperture. Invest in a solid accessory kit and give attention to collimation and cooldown—they’re the keys to crisp, satisfying performance. Whether you prefer manual star-hopping or Push-To guidance, the Dobsonian’s simplicity lets you focus on the sky, not the hardware.
As you log nights under the stars, your observing skills will grow as fast as your equipment. When you’re ready for the next step—maybe a wider eyepiece, a UHC filter, or even a larger Dobsonian—you’ll make those choices with experience. Until then, enjoy the night: sketch, take notes, share views with family and friends, and consider subscribing to our newsletter to get future guides, seasonal target lists, and practical observing tips delivered to your inbox.