
Table of Contents
- What Is Milky Way Astrophotography?
- Planning Night Sessions for the Milky Way
- Essential Gear for Milky Way Photography
- Camera Settings and Exposure: From 500 Rule to NPF Concepts
- Achieving Pinpoint Stars: Reliable Focus Techniques
- Composition, Fieldcraft, and On‑Location Workflow
- Advanced Milky Way Techniques: Tracking, Stacking, and Blending
- Post‑Processing Workflow for Clean, Colorful Results
- Common Problems and How to Fix Them
- Night Photography Safety and Ethical Practices
- Frequently Asked Questions
- Planning and Processing Resources You Can Use
- Final Thoughts on Mastering Milky Way Astrophotography
What Is Milky Way Astrophotography?
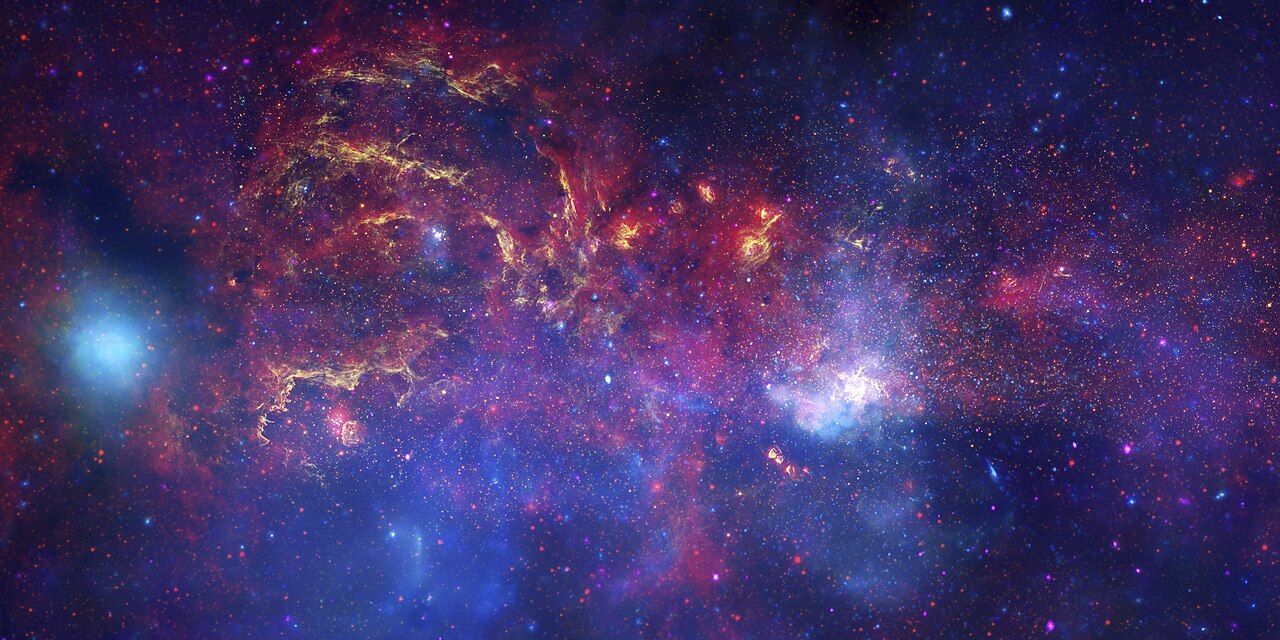
Milky Way astrophotography is the practice of photographing the luminous band of our home galaxy across the night sky—an arc rich with star clouds, dark dust lanes, pinkish hydrogen nebulae, and clusters. Unlike deep-sky imaging of a single nebula with long guided exposures, Milky Way work is usually wide-field, untracked or lightly tracked, and often integrates a terrestrial foreground for context and scale. The core goal is to reveal fine structure and natural color while preserving pinpoint stars and a believable nightscape.
Attribution: NASA/JPL-Caltech/ESA/CXC/STScI
The Milky Way’s brightest region, the Galactic Center, sits in the direction of the constellations Sagittarius and Scorpius at an approximate declination of −29°. This southerly declination means observers in the Southern Hemisphere see it higher overhead for a longer stretch of the year, while those in mid‑northern latitudes still enjoy stunning views at lower elevations during “core season.” Understanding when and where to look is the first step to getting the shot.
Modern digital cameras make this genre accessible: a sturdy tripod, a wide and fast lens, a moonless night, and careful processing can produce results that were once the realm of high-end equipment. In this guide, you’ll learn how to plan, select gear, choose exposure settings, nail focus, compose artistically, and process your files for clean, color-accurate images—and how to step into more advanced territory like stacking and tracked sky/foreground blends. If you’re ready to turn that hazy silver band into an image full of detail and depth, keep reading.
Planning Night Sessions for the Milky Way
Success with the Milky Way is largely decided before you press the shutter. Planning gives you the right sky, at the right time, from a dark and safe location. Here are the pillars of effective planning.

Attribution: ESO/Yuri Beletsky (ybialets at eso.org)
Know the season and sky geometry
- Galactic Center visibility: The brightest region appears in the evening sky from roughly late spring to early autumn in mid‑northern latitudes, with prime months typically June–August for high midnight altitudes. In the Southern Hemisphere, the season is longer (generally February–October) and the core climbs much higher, making dramatic arches and vertical core compositions easier.
- Declination matters: With the Galactic Center near −29° declination, the farther south you are, the higher it gets. Near the equator, the core can rise steeply and reach a high elevation; at higher northern latitudes, it stays lower and is visible for shorter nightly windows.
- Orientation through the night: In the evening of late spring, the core rises in the southeast and tilts; by midsummer at midnight it’s higher in the south; toward dawn it leans west. That evolving tilt affects composition choices. Planning apps can animate this to show how the core’s azimuth and altitude evolve during your outing.
Choose a dark, transparent night
- Moon phase: Plan for a new Moon or at least a moonless window. Even a half Moon can wash out the faint dust lanes. If ambient lighting is part of your art direction, you might leverage a low crescent moon to gently light the foreground, but keep the core far from the moon’s path.
- Twilight limits: Aim for astronomical darkness—when the Sun is 18° below the horizon. That ensures the sky background is as dark as it gets. Summer at high latitudes may never achieve full astronomical darkness; you can still shoot, but expect a brighter sky.
- Light pollution: The Bortle scale rates sky brightness from 1 (pristine) to 9 (urban core). Bortle 3 or darker dramatically improves contrast and color. A Bortle 4–5 site can still work with careful processing, but expect gradients.
- Transparency vs. seeing: For wide-field Milky Way work, transparency (clarity) matters more than seeing (steadiness). Favor clear, dry air and avoid haze, smoke, and high thin clouds.
- Dew and humidity: If the temperature is forecast to drop toward the dew point, lens fogging is likely. Pack dew heaters or hand warmers and lens hoods.
Scout your composition
- Foreground alignment: Milky Way arches, a vertical core behind a landmark, reflective water, or leading lines like roads and river bends can anchor your frame. Scout in daylight and mark safe footpaths.
- Orientation windows: If your location is fixed (e.g., a specific arch or tree), use a planetarium app to find dates and times when the core aligns at the right azimuth and elevation for your subject.
- Legal and access considerations: Verify opening hours and policies for parks or private land. Night access may require permits; some parks prohibit light painting. Respect local regulations—and wildlife.
To minimize on-site guesswork, create a short shot plan: a list of frames and settings for the foreground, sky, and any panorama or tracked sequences. Then on location, adapt as needed while consulting this guide’s sections on exposure, focus, and fieldcraft.
Essential Gear for Milky Way Photography
While you can begin with a basic camera and tripod, choosing the right tools improves image quality and ease of shooting under the stars.
Cameras
- Interchangeable-lens cameras: Full‑frame mirrorless or DSLRs offer lower noise at higher ISOs and make the most of fast wide lenses. APS‑C and Micro Four Thirds systems can also produce excellent results with appropriate lenses and exposure strategy.
- Key capabilities: Clean high‑ISO performance, RAW capture, manual exposure, live view magnification, focus aids (focus peaking), and easy interval shooting.
- Modified sensors: Some astrophotographers modify cameras for better H‑alpha (656 nm) sensitivity, enhancing red emission nebulae in the Milky Way. This is optional and not necessary for strong results.
Lenses
- Wide and fast: 14–24 mm on full frame (≈10–16 mm APS‑C; ≈7–12 mm MFT) with f/1.4–f/2.8 apertures are classics for sweeping vistas and the full core. Prime lenses often outperform zooms in sharpness and coma control at wide apertures.
- Coma and astigmatism: Look for good corner performance to keep stars point-like. Testing at night is ideal; lab charts don’t tell the whole story for stellar points.
- Stopping down: Even fast lenses may benefit from stopping to f/2–f/2.8 for sharpness and reduced aberrations, trading a stop of light for cleaner stars and corners.
Support and accessories
- Tripod: A sturdy carbon or aluminum tripod with a solid ball head is mandatory. Hang weight from the center column hook in windy conditions.
- Remote/intervalometer: Prevent camera shake and automate sequences for stacking or panoramas. Most mirrorless bodies also include built-in interval shooting.
- Extra batteries and power: Cold drains batteries quickly. Bring spares or a USB power bank if your camera supports charging during use.
- Dew mitigation: Lens hood, dew heater band plus a small USB power bank, or as a stopgap, chemical hand warmers secured with a rubber band (keep it safe from optics).
- Headlamp with red mode: Protect night vision and preserve the ambiance of dark sites.
- Star tracker (optional): A compact equatorial mount lets you shoot longer exposures at lower ISOs with sharp stars. You’ll need polar alignment and typically a second set of foreground exposures, as discussed in Advanced Techniques.
- Weather and navigation: Offline maps, a basic first‑aid kit, extra layers, and boots. Safety complements art; see Night Photography Safety.
Camera Settings and Exposure: From 500 Rule to NPF Concepts
Great Milky Way images start with a clean exposure: a bright enough histogram to beat read noise and sky glow without clipping highlights or causing objectionable star trailing. Here’s how to make dependable choices.
Core settings checklist
- File format: RAW (14‑bit if available). This preserves shadow detail and color fidelity.
- Mode: Manual exposure and manual focus.
- Aperture: As wide as your lens comfortably allows for clean stars (f/1.4–f/2.8 common). If corners are soft, stop down one stop.
- ISO: Typically ISO 1600–6400 on current full‑frame bodies; ISO 800–3200 on many APS‑C/MFT bodies. The optimal ISO is camera‑dependent—test for your sensor’s balance between read noise and highlight headroom.
- White balance: Set a fixed value to aid consistent processing (e.g., 3800–4300 K). You can refine in RAW later.
- Noise reduction: Disable in‑camera long exposure NR if shooting sequences; you can subtract dark frames in post. High ISO NR should be off for RAW capture.
- Stabilization: Turn lens and in‑body stabilization off on a tripod to avoid micro‑jitters from the stabilization system hunting.
How long can you expose?
Because Earth rotates, stars trail during long exposures. The acceptable amount of trailing depends on focal length, pixel size, sensor size, latitude, and where you point in the sky. Two common approaches guide shutter choice:
- 500 Rule (quick estimate): A traditional rule of thumb for full‑frame sensors: maximum seconds ≈
500 / focal_length_mm. On crop sensors, multiply the focal length by the crop factor first. This is conservative for large prints and high‑resolution cameras; the actual acceptable value can be lower or higher depending on your tolerance for trailing and direction of pointing. - NPF concept (more precise): The NPF method accounts for pixel pitch, aperture, and focal length to keep star sizes tight. Many planning apps implement the NPF rule and provide recommendations based on your gear and target altitude. Rather than memorize formulas, use a reputable calculator and test on your camera.
Example using the 500 rule on full frame:
  # Full-frame, 20 mm lens

  max_exposure_seconds = 500 / 20  # = 25 seconds (rough estimate)
Practical tip: With high‑resolution sensors, you may find better star shapes around 10–20 seconds at 14–20 mm focal lengths. Shorter exposures also reduce the chance of aircraft or satellites ruining a frame, which helps if you plan to stack.
Balancing ISO and exposure
- Expose to the right (ETTR) carefully: Aim for a histogram that rises off the left edge, often with the peak around the left‑third. Don’t clip bright stars or any lit foregrounds.
- ISO invariance: Many modern sensors are close to ISO‑invariant above a base level, meaning raising exposure in post can resemble a higher ISO shot made in camera. Still, use a sufficiently high ISO to see your composition and histogram clearly and to reduce quantization noise.
- Test two or three ISO/shutter combos: For example, ISO 3200 at 15 seconds and ISO 6400 at 10 seconds, then compare noise and star shape at 100%.
Using trackers to extend exposure
With a portable star tracker, you can extend exposures dramatically and/or lower ISO. That keeps stars crisp and reveals fainter nebulae and dust. However, the foreground will blur during a tracked exposure. Most tracked images require a second set of untracked foreground frames for blending, as described in Advanced Techniques.
Achieving Pinpoint Stars: Reliable Focus Techniques
Focus is unforgiving under the stars; a slightly soft focus dulls the Milky Way’s intricate dust lanes and bloats star images. Make focusing a deliberate, repeatable step.
Step‑by‑step focusing
- Switch to manual focus and set your lens near infinity. Avoid relying on the hard stop unless you’ve verified it aligns precisely at night.
- Find a bright star or distant light and use live view magnification (5×–15×). Increase ISO temporarily if needed to brighten the display.
- Adjust in tiny increments until the star is the smallest, sharpest point. On some cameras, focus peaking assists; defocus slightly to see the change and reverse.
- Lock focus with gaffer tape or a lens band so it doesn’t drift during compositions.
- Recheck after temperature changes or if you bump the focus ring. Temperature shifts can move the focal plane slightly.
Alternative aids

Attribution: Axleottal
- Bahtinov masks: On longer focal lengths, a Bahtinov mask creates diffraction spikes that align at focus. They can also work on some wide lenses with large front elements, though the effect is subtler.
- Pre‑focus at dusk: Focus on a distant object before dark and tape the ring. Still refine on a bright star when night has fully fallen.
- Infinity marks: Some lenses offer reliable infinity marks; test yours during the day and confirm at night.
After focusing, immediately capture a short test frame at your planned settings. Zoom in on several parts of the frame, especially the corners, to verify sharpness and field curvature or coma. If edges are soft, consider stopping down one stop and compensating the exposure per your exposure plan.
Composition, Fieldcraft, and On‑Location Workflow
Compelling Milky Way images balance a textured sky with a well‑designed foreground. Fieldcraft—your habits and workflow on location—keeps you efficient and safe while enabling your creative eye.
Compose with intention
- Lead the viewer: Use roads, fences, waterlines, river bends, dune ridges, or shorelines as leading lines toward the vertical core or the arch.
- Balance sky and land: A low, clean horizon can let the Milky Way dominate. In other scenes, include a mid‑ground subject (a tree, rock spire, hut) to anchor scale.
- Mind the arc: Early evening in spring may favor diagonal core compositions; midsummer midnight often favors a near‑vertical core; pre‑dawn can produce a slanted core setting west. Plan orientations in your scouting.
- Reflections: Calm water can mirror the Milky Way for symmetry; reduce shutter to keep the reflection crisp if there’s a breeze.
- Panoramas and mosaics: For sweeping arches, stitch multiple vertical frames (e.g., 3–8 columns). Keep 30–50% overlap and maintain consistent settings. Use a nodal rail to reduce parallax when prominent foreground objects are close.
On‑site workflow
- Arrive before sunset to scout safely, frame test compositions, and identify trip hazards.
- Set initial exposure and focus as twilight fades. Capture a few test frames and verify stars at 100% magnification.
- Capture a base sky sequence once astronomical darkness begins. Consider shooting several identical frames for stacking (see stacking).
- Foreground frames can be shot during blue hour for detail and low noise, or at night with low‑level light (where permitted). Keep lighting subtle and even to avoid halos and hot spots.
- Keep notes on frame numbers and intentions (e.g., “panorama row 1 of 2, 8 columns, 15s f/2 ISO 3200”). This helps organization during post‑processing.
Minimal, respectful lighting
- No light painting rules: Many parks restrict or prohibit artificial lighting. When allowed, use dim, diffuse light, aimed away from the horizon and other photographers.
- Low‑level continuous light: A dim, gelled LED panel at a distance can create even foreground illumination without obvious hot spots. Keep color temperature consistent with your sky frames for believable blends.
Advanced Milky Way Techniques: Tracking, Stacking, and Blending
Once you’re comfortable capturing sharp, single‑frame results, advanced methods can push image quality further: lower noise, finer color, and richer detail across sky and land.
Star trackers for deeper sky detail
A compact equatorial tracker rotates your camera opposite Earth’s rotation, letting you run longer exposures at lower ISO for a cleaner sky. Key steps:
- Accurate polar alignment: Align the tracker’s axis with the celestial pole. Use the built‑in polar scope and a mobile app or the tracker’s electronic alignment tools. Small alignment errors limit exposure length.
- Exposure length: With a 20 mm lens, you might extend from 10–15 seconds untracked to 1–2 minutes tracked (depending on alignment and mount). Inspect star shapes and adjust.
- Separate foreground: Because the ground blurs when tracking, capture untracked foreground frames at matching compositions. Later, blend the tracked sky with the static foreground.
Stacking to reduce noise
Stacking averages out random noise and can subtly improve detail and faint structure. It’s valuable with or without tracking. A typical workflow:
- Capture: Shoot a run of identical frames (e.g., 10–20) at the same settings, keeping the composition constant. If satellites or aircraft appear, they will be rejected by outlier‑rejection algorithms.
- Align and integrate: Use astro‑oriented software to register stars and integrate using median or sigma‑clipping. The result has lower noise per pixel than any single frame.
- Preserve color: When stacking, avoid heavy pre‑processing that alters star colors before alignment. Perform global color adjustments later in post‑processing.
Tracked-sky with untracked foreground blending
This technique combines the best of both worlds: a clean, detailed sky and a sharp, natural foreground. Ethical and believable blending hinges on careful alignment and consistent lighting.
- Lock your tripod position between sky and foreground exposures. Any movement complicates alignment.
- Match white balance and basic exposure as much as possible across captures to simplify blending and maintain realism.
- Blend along natural transitions (mountain ridges, tree lines). Use soft, hand‑refined masks rather than hard cutouts to avoid halos.
Panoramas and mosaics

Attribution: Martin Bernardi
- Multi‑row arches: For full arches, shoot two or more rows with vertical frames. Track the sky row(s) if possible; capture separate foreground rows untracked.
- Consistent overlap and exposure: Keep 30–50% overlap and identical settings to avoid seams.
- Projection choice: In stitching, cylindrical or spherical projections often preserve a natural look for sky arches. Try several to see which minimizes distortion with your scene.
Filters and sensor considerations
- Light pollution filters: Multi‑band filters can reduce some sodium/mercury glow or certain LED spectra. Results vary with local lighting; expect color shifts you’ll correct later.
- H‑alpha emphasis: Cameras modified for enhanced red sensitivity can bring out emission nebulae along the Milky Way. A clip‑in H‑alpha‑friendly filter can also help. Balance this with maintaining natural star colors.
Post‑Processing Workflow for Clean, Colorful Results
Processing is where your careful exposures transform into a finished image. The aim is to lift faint signal without inventing detail or over‑saturating colors. Keep edits restrained and reversible.
Organize and cull
- Consistent file naming: Group by sky, foreground, panorama rows, and calibration frames (darks/flats if used).
- Cull frames with issues: Remove shots with wind shake, heavy clouds, airplane streaks (unless stacking will reject them), or lens fogging.
RAW conversion and lens corrections
- Neutral starting point: In your RAW developer, start with a neutral profile. Disable overly aggressive noise reduction and sharpening at first.
- Lens profiles: Apply distortion and vignetting corrections if they don’t create artifacts. For panoramas, consider applying corrections after stitching to avoid misalignments.
- White balance: Set a consistent WB across all frames (e.g., 4000 K with slight magenta tint) to maintain coherent color through stacking and blending.
Stacking (when applicable)
- Star alignment: Align stars precisely. If you shot a tracked sky and untracked foreground, align and integrate the sky sequence separately from any ground sequence.
- Outlier rejection: Use median or sigma‑clipping to remove satellites and transient noise. Inspect the integrated result at 100%.
- Gradient handling: Before heavy contrast work, address light pollution gradients with gradient removal tools or careful masked curves.
Global tone and contrast
- Curves and levels: Raise midtones gently while protecting highlights in bright star clouds. Iterate small curve adjustments rather than one heavy stretch.
- Local contrast: Apply clarity or local contrast selectively in the dust lanes and nebulae, not uniformly across the frame. Excess global clarity can exaggerate noise.
- Dehaze carefully: A small amount helps lift the Milky Way band, but too much creates artifacts and color shifts.
Color management
- Preserve star color: Avoid white‑balancing the entire image until stars turn neutral gray. Stars vary in color temperature—blue, white, yellow, orange—so keep that subtle variety.
- H‑alpha regions: Emission nebulae often appear red to magenta in modified cameras. Don’t over‑saturate; aim for believable intensity compared to dust lanes and star fields.
- Selective color masks: Use color range masks to enhance Milky Way dust and nebulae separately from the sky background to keep gradients under control.
Noise reduction and sharpening
- Noise reduction (NR): Apply luminance NR modestly to the sky background while retaining star edges. Use separate masks for sky and foreground so you can treat each appropriately.
- Star‑friendly sharpening: Apply mild sharpening or a structure enhancement targeted at mid‑tones and details in dust lanes. Avoid halos around stars.
Blending sky and foreground
- Alignment: If you maintained a fixed tripod point, the skyline should align. Use manual warps sparingly to match contours.
- Masking: Create a soft mask along the ridge line. Feather the mask to avoid bright halos.
- Match exposure and color: Ensure the foreground looks like it belongs to the same night. Match overall color temperature and shadow density.
Final checks
- Star shapes: Zoom to 100% in multiple areas to confirm no double stars from misalignment and no severe halos.
- Banding and compression: If you see banding in gradients, add a touch of dithering/noise and export in a high‑quality format.
- Print and web versions: Create a web version with careful sharpening and a print version with embedded profiles (e.g., Adobe RGB for print workflows).
Common Problems and How to Fix Them
Night photography has many moving parts. Here’s how to diagnose and correct the issues you’re most likely to face.
Star trailing
- Symptom: Small dashes instead of points.
- Fix: Use a shorter shutter speed per the 500 rule or NPF guidance. At longer focal lengths, consider a tracker. Confirm that your tripod is stable and that stabilization features are off.
Soft focus
- Symptom: Stars look slightly bloated or smeared in all frames.
- Fix: Re‑focus on a bright star using live view magnification, and confirm at 100%. Tape the focus ring and recheck periodically as temperatures change, as described in focus techniques.
Coma and corner softness
- Symptom: Comet‑shaped stars in the corners.
- Fix: Stop down one stop (e.g., f/1.8 → f/2.5). Compose with important elements away from the extreme corners. Consider a lens with better off‑axis performance for future shoots.
High noise or banding
- Symptom: Grainy sky at 100% or fixed‑pattern noise in shadows.
- Fix: Capture multiple frames for stacking. Keep the sensor cool (avoid long live‑view usage). In post, use calibrated dark frames if stacking, and apply moderate luminance NR with masking.
Vignetting and gradients
- Symptom: Dark corners or uneven background brightness.
- Fix: Apply lens vignetting correction; use flat frames when stacking; use gradient removal tools in processing. If light pollution is strong, adjust composition to keep the Milky Way away from skyglow domes on the horizon.
Lens dew
- Symptom: Soft, low‑contrast frames over time, sometimes with sparkly halos around bright lights.
- Fix: Add a dew heater band and lens hood. Keep gear covered when idle. If fogging occurs, gently warm the lens and wait—do not wipe condensed dew across the front element, which can smear and scratch.
Wind shake
- Symptom: Slight double images or directional blur inconsistent with star trailing.
- Fix: Lower your tripod, hang weight from the center column, shield the setup, or wait for calmer intervals. Trigger the shutter with a delay or remote.
Satellites and aircraft
- Symptom: Bright streaks across the frame.
- Fix: Capture a sequence and use sigma‑clipping during stacking to reject outliers. For single frames, clone carefully or reshoot. Shorter exposures reduce the chance of a streak ruining a shot.
Night Photography Safety and Ethical Practices
Working in darkness introduces risks and responsibilities. A safe, respectful approach protects you, the environment, and fellow night sky enthusiasts.
Personal safety
- Tell someone your plan: Share your location and expected return time.
- Bring the ten essentials: Navigation, headlamp with red mode and spare batteries, sun protection for earlier scouting, extra layers, first aid, fire kit (where legal), repair tools, nutrition, hydration, and emergency shelter.
- Mind terrain: Scout in daylight. At night, avoid cliff edges, water margins, and unstable surfaces. Move slowly with a red light.
- Weather awareness: Monitor temperature, wind, and precipitation. In mountainous areas, expect rapid changes. Carry insulating layers and a waterproof shell.
Respect for dark places
- Minimize light spill: Use red light and point beams downward. Avoid lighting the horizon or other people’s frames.
- Quiet hours and rules: Many parks have specific night regulations. Obey closures, permit requirements, and restrictions on light painting.
- Leave No Trace: Pack out all trash, stay on durable surfaces to prevent trampling, and avoid disturbing wildlife, especially nesting birds or nocturnal animals.
- Cultural sensitivity: Some sites have cultural or spiritual significance. Know and respect local guidelines.
Frequently Asked Questions
What ISO should I use for Milky Way astrophotography?
There isn’t a single “best” ISO because camera sensors differ, but a practical starting range is ISO 1600–6400 for full frame and ISO 800–3200 for APS‑C/MFT, paired with a wide aperture like f/1.8–f/2.8. The right choice balances read noise and highlight headroom. Make test exposures at two or three ISO/shutter combinations and inspect noise and star shape. If you plan to stack, slightly lower ISO with more frames can yield cleaner results.
Can I photograph the Milky Way during a full Moon?
Yes, but the bright moonlight will significantly reduce contrast in the Milky Way’s dust lanes and faint nebulosity. If your intent is a richly detailed core, schedule sessions near new Moon or when the Moon is below the horizon during your planned shoot window. If you want a softly lit foreground, a thin crescent or quarter Moon at low altitude can help illuminate the landscape while still allowing some Galactic detail, especially at darker sites.
Planning and Processing Resources You Can Use
While you don’t need specialized software to begin, a few categories of tools make planning and processing more reliable. Here’s how to think about them and integrate them into your workflow, with cross‑references to steps in this guide.
Planetarium and planning apps
- Sky simulation: Use planetarium software to preview the Milky Way’s path, the core’s azimuth/altitude, and twilight times. Animate the night to see when the core lines up with your foreground concepts from Composition.
- Exposure calculators: Some apps implement the NPF concept and provide shutter recommendations for your camera and lens. Combine their guidance with on‑site tests from Camera Settings.
Light pollution maps and weather
- Dark sky search: Light pollution maps help estimate Bortle class and gradient sources. Cross‑check satellite layers with local knowledge—mountains can shield you from nearby glow.
- Transparency and clouds: Use forecasts that distinguish high thin clouds from low cloud cover and show humidity/dew‑point trends. If humidity is high near the dew point, pre‑warm lenses as noted in Common Problems.
Stacking and processing software
- Star alignment and integration: Astrophotography‑specific tools can register and stack sky frames with median or sigma‑clipping to remove outliers (e.g., aircraft trails). Use them before deep global edits, aligning with the Workflow section.
- RAW development: Your preferred RAW editor can handle global exposure, color, and local contrast. Keep edits subtle to preserve star color and avoid halos.
- Panorama stitching: For arches and mosaics, use stitchers that handle cylindrical/spherical projections. Apply consistent color across tiles for seamless blends.
As you refine your process, build a repeatable checklist that touches planning, capture, and post. Consistency is the fastest route to reliable results.
Final Thoughts on Mastering Milky Way Astrophotography
Milky Way astrophotography blends science, craft, and patience. Understanding the sky’s rhythm—new Moon windows, the core’s seasonal arc, and the realities of light pollution—sets the stage. Choosing solid gear and adopting dependable field habits give you sharp, clean data. Then thoughtful processing reveals the band’s rich textures and colors without resorting to heavy‑handed edits.

Attribution: NASA/JPL-Caltech
Start simple: a wide lens, a sturdy tripod, and a clear, dark night. Nail focus, keep stars crisp with sensible shutter speeds, and capture a short sequence for stacking. Once the basics feel comfortable, explore tracked sky/foreground blends and panoramas. With each outing, you’ll better anticipate conditions and refine your workflow across planning, capture, and post‑processing.
If you found this guide useful, consider exploring related topics and techniques in future issues, and subscribe to the newsletter to get upcoming articles on nightscape composition, star tracker setup, and ethical dark‑sky practices delivered to your inbox.