
Table of Contents
- What Is Milky Way Core Astrophotography?
- When and Where to See the Galactic Center
- Essential Gear for Sharp, Low-Noise Nightscapes
- Dialing in Night Sky Exposure: Settings That Work
- Tack-Sharp Focus and Compelling Composition
- Noise Reduction, Stacking, and Calibration Frames
- When to Use a Star Tracker vs. Tripod
- Milky Way Panoramas and Time-Lapse Workflows
- Beating Light Pollution, Clouds, and Atmospheric Effects
- Post-Processing the Milky Way for Natural Results
- Night Photography Ethics, Safety, and Fieldcraft
- Common Mistakes and How to Solve Them
- Frequently Asked Questions
- Final Thoughts on Choosing the Right Milky Way Astrophotography Setup
What Is Milky Way Core Astrophotography?
Milky Way astrophotography typically means photographing the bright central bulge of our galaxy—often called the Galactic Center—rising above a terrestrial landscape. The result is a wide-field nightscape that blends stars, nebulosity, and dust lanes with mountains, deserts, coastlines, or other foregrounds. It differs from deep-sky imaging (which focuses on small distant nebulae or galaxies at high magnification) and from star-trail photography (which intentionally blurs the stars through long exposures).

Attribution: Poljua
The challenge is to record the faint, intricate details of the Milky Way while keeping stars sharp and minimizing noise. This requires careful planning, dark skies, stable gear, suitable exposure settings, and purposeful post-processing. Some photographers favor single-exposure images; others combine multiple frames for noise reduction and dynamic range, or use a tracking mount to follow the stars for longer, cleaner exposures. You can pursue any of these approaches based on your goals and conditions.
In this guide, you’ll learn how to plan your session (When and Where to See the Galactic Center), choose reliable equipment (Essential Gear for Sharp, Low-Noise Nightscapes), set exposure confidently (Dialing in Night Sky Exposure), nail focus and composition (Tack-Sharp Focus and Compelling Composition), and process files for natural yet striking results (Post-Processing the Milky Way).
When and Where to See the Galactic Center
The Galactic Center lies in the direction of the constellations Sagittarius and Scorpius at approximately right ascension 17h45m and declination −29°. This southerly declination means it appears higher in the sky from the Southern Hemisphere and lower from the Northern Hemisphere. Planning around geography, seasons, and moonlight is crucial.

Attribution: NASA/JPL-Caltech/S. Stolovy (Spitzer Science Center/Caltech)
Seasonality and Hemisphere
- Northern Hemisphere: The Milky Way’s core is typically visible during the late spring through early autumn night hours, with peak visibility from about May to August. It often appears as a bright, vertical band in late spring (pre-dawn), arches across the sky in midsummer (near midnight), and tilts westward later in the season (evenings).
- Southern Hemisphere: The core is visible for a longer portion of the year and reaches higher altitudes. Winter months in the south often provide prime viewing windows with the core strikingly prominent.
At higher northern latitudes, the core remains low even at its highest point, and continuous twilight near midsummer can limit opportunities. Meanwhile, in tropical and subtropical latitudes, the core climbs significantly higher, making detail easier to capture.
Moon Phases and Darkness
- New Moon and crescent moon nights provide the darkest skies. Plan sessions when the moon is below the horizon during the hours you intend to shoot.
- The Milky Way is faint compared to city glow; even a gibbous moon can wash out contrast. Use a lunar calendar and pick windows when moonlight won’t overlap your target hours.
Dark Skies and the Bortle Scale
Sky quality is commonly described by the Bortle scale (class 1 = darkest, class 9 = bright city). The Milky Way is obvious to the naked eye in Bortle 1–4 skies and increasingly muted beyond that. While you can still photograph it near cities, haze and glow will reduce detail and add processing challenges. If possible, travel to darker skies for dramatically better results.
Altitude, Azimuth, and Timing
Use planning tools that show the altitude (height above horizon) and azimuth (compass direction) of the core at your location and date. This helps you visualize how the Milky Way aligns with a chosen landscape. For example, you might plan for an arching composition over a foreground feature at a specific hour when the core rises at a low angle. Rehearse your setup during twilight so you know where to stand and how to orient your tripod before darkness falls.
Quick tip: Note the local rise and set times of the core. During spring, the core rises before dawn; by midsummer, it’s up around midnight; by late summer and early autumn, you’ll catch it in the evening sky.
Essential Gear for Sharp, Low-Noise Nightscapes
You don’t need the most expensive equipment to photograph the Milky Way, but a few items make the process smoother and your results cleaner. Below are practical recommendations suitable for beginners and enthusiasts alike.
Cameras: Full-Frame vs. APS-C vs. Micro Four Thirds
- Full-frame sensors generally offer better high-ISO performance and wider fields of view with the same focal length, making them popular for nightscapes.
- APS-C and Micro Four Thirds cameras can achieve excellent results too, especially with fast, wide lenses and thoughtful exposure (see settings).
- Modern sensor technologies (including backside illumination and improved on-sensor noise handling) have made even mid-range bodies capable night performers.
Lenses: Fast, Wide, and Well-Corrected
- Focal length: Wide-angle lenses (typically 14–24mm on full frame; ~10–16mm on APS-C) capture the Milky Way’s sweep and allow longer exposures before star trailing becomes apparent.
- Aperture: Faster lenses (f/1.4–f/2.8) collect more light and enable lower ISO or shorter exposures. That said, sharpness and aberrations matter; many lenses improve when stopped down slightly (e.g., from f/1.4 to f/2 or f/2.8).
- Aberration control: Look for lenses with minimal coma and astigmatism toward the corners; these preserve star shapes.
Tripod and Head
- A sturdy tripod helps maintain precise framing over long sequences. Avoid extending the center column if possible; stability matters more than height.
- A ball head or low-profile head with independent panning helps with reframing and panoramas (see panorama tips).
Other Field Essentials
- Intervalometer or in-camera interval shooting to automate sequences and minimize vibrations.
- Extra batteries and memory cards—cold nights drain power.
- Headlamp with a red mode to preserve night vision.
- Lens heater or hand warmers with a strap to prevent dew.
- Simple tools: gaffer tape, microfiber cloth, and a small level.
Optional But Helpful
- Star tracker (single-axis equatorial mount) to enable longer exposures for cleaner skies. You can later blend tracked skies with untracked foregrounds (learn how).
- Panoramic head or nodal slide for precise multi-row Milky Way mosaics (panorama workflow).
- Portable power bank to run heaters or charge devices overnight.
Dialing in Night Sky Exposure: Settings That Work
There is no single “correct” exposure for the Milky Way because conditions vary, but there are reliable starting points. Your goal is to gather enough signal to separate the Milky Way’s dust lanes from the sky background while avoiding obvious star trailing and excessive noise. Practice on-site and review histograms to refine.
Start With These Baselines
- File format: Shoot RAW to retain maximum dynamic range and color fidelity.
- Mode: Manual exposure and manual focus. Disable auto-ISO.
- Aperture: Use your lens near wide open (e.g., f/1.4–f/2.8). Stop down slightly if the corners are soft.
- ISO: Typical starting range is ISO 1600–6400 on full frame, ISO 1600–3200 on APS-C. Use the lowest ISO that still brings the Milky Way off the left wall of the histogram.
- Shutter: 10–25 seconds for untracked wide shots, depending on focal length and pixel density. Longer exposures risk star elongation.
- White balance: Set a fixed value (e.g., 3500–4200K) for consistency; adjust during RAW processing later.

Attribution: 4300streetcar
Rules of Thumb for Shutter Time
The classic “500 rule” provides a fast estimate of the longest shutter before noticeable star trailing in an untracked image:
Max shutter (seconds) ≈ 500 / (focal_length_mm × crop_factor)
More conservative variations use 400 or 300. A more refined guideline, often called the NPF rule, considers sensor pixel pitch, aperture, focal length, and sky position:
NPF-style estimate (simplified):
Max shutter ≈ k × N / (focal_length_mm)
… with a constant k that depends on pixel size and sky region.
Dedicated planning apps implement the full NPF calculation and account for declination. The gist is that higher-resolution sensors and longer focal lengths require shorter exposures to keep stars round. If you need more light at a fixed shutter time, open the aperture or raise ISO, or consider stacking (noise reduction and stacking).
In-Camera Options
- Long-exposure noise reduction: This creates a dark frame after each exposure; it can help, but halves your shooting time. Many astrophotographers prefer turning it off and capturing separate calibration frames or stacking.
- Image stabilization: Turn off lens or in-body stabilization for tripod shots of the sky to prevent feedback-induced blur.
- Exposure delay or electronic front-curtain shutter: Reduces vibration; combine with a remote release or self-timer.
Histograms, ETTR, and Star Colors
Expose to the right (ETTR) modestly without clipping highlights. Your histogram should rise off the left edge, indicating you’ve captured sky background. Avoid severe overexposure that crushes star color. If your sky is bright from light pollution or moonlight, shorten the exposure or lower ISO to maintain headroom.
Tack-Sharp Focus and Compelling Composition
The best Milky Way images combine sharp stars with a foreground that tells a story. Achieving this requires deliberate focusing techniques and compositional choices that guide the viewer’s eye.
Achieving Critical Focus
- Live view magnification: Point at a bright star or distant light, magnify 5–15×, and adjust focus until the star is as small as possible. Make tiny adjustments and recheck after temperature changes.
- Infinity marks: Use as a reference only; actual infinity often differs slightly. Confirm in live view.
- Bahtinov masks: Helpful on longer lenses and telescopes. For wide lenses, live view is usually sufficient.
- Tape the focus ring to prevent drift and periodically check focus during long sessions.
Foreground and Depth
- Foreground choice: Develop a visual relationship between the Milky Way and a landmark—e.g., the Galactic Center rising over a rock arch or reflecting in calm water.
- Subject scale: Move the camera to adjust scale rather than relying on zoom. Wide focal lengths place the viewer in the scene while preserving sweeping sky context.
- Horizon placement: A lower horizon gives the sky dominance; include enough foreground to anchor the scene.
- Leading lines: Trails, rivers, dunes, or shorelines can lead the viewer toward the core.
Focus Strategies for Foreground
- Single focus: If your foreground is far, focusing at or near infinity can keep both stars and landscape acceptably sharp at wide focal lengths.
- Focus stacking: For nearby elements, capture a set focused on the foreground and another on the stars, then blend during processing. Keep the camera fixed to ease alignment.
- Blending tracked and untracked: If using a tracker for the sky, capture a separate untracked exposure for the foreground (see tracking details).
Composition tip: Visualize how the Milky Way rotates through the night. A vertical core near the horizon conveys drama; an arch overhead can feel grand and immersive.
Noise Reduction, Stacking, and Calibration Frames
Night images are inherently noisy because you’re working with low signal levels. Stacking multiple exposures is a powerful way to improve signal-to-noise ratio while preserving detail. You can stack just the sky, or the entire frame if nothing moves.
Stacking Approaches
- Sky-only stacking: Align on the stars to average noise while keeping stars crisp. If your foreground moves relative to the stars (it will), blend a separate foreground exposure.
- Full-frame stacking with masking: Stack a burst of frames with minimal camera movement. Afterwards, use masking to reconcile sky alignment with a static foreground.
Calibration Frames
- Dark frames: Captured with the lens cap on at the same exposure and temperature as your lights. They help subtract thermal noise and hot pixels.
- Flat frames: Evenly illuminated frames that correct vignetting and dust shadows; helpful if you plan significant stretching.
- Bias frames: Very short exposures with the lens cap on that characterize read noise (some workflows rely more on darks, but bias can still help).
Many astrophotographers use stacking software to align stars, apply median or sigma-clipping algorithms, and combine frames. This reduces random noise and can reveal delicate dust lanes and faint nebulosity in the core region. If you primarily shoot nightscapes, there are tools that simplify sky/ground separation for stacking and blending.
Practical Advice
- Capture at least 8–20 frames for a meaningful noise reduction, more if conditions allow.
- Keep intervals short so the sky doesn’t shift excessively between frames for untracked sequences.
- For tracked sequences, consider dithering between exposures to mitigate fixed-pattern noise, especially when guiding is available.
When to Use a Star Tracker vs. Tripod
A star tracker rotates your camera to follow the heavens, allowing longer exposures at lower ISO without star trailing. This can dramatically improve sky quality but introduces extra steps like polar alignment and blending.
Untracked (Tripod-Only) Advantages
- Speed and simplicity: Set up quickly, useful for travel and changing compositions.
- Natural foreground alignment: The landscape remains static; you can capture single frames or short stacks.
- Less gear: A sturdy tripod and fast lens often suffice.
Tracked Advantages
- Longer exposures: 1–3 minutes or more at wide focal lengths are feasible with good polar alignment, enabling lower ISO and cleaner skies.
- Fainter structures: Longer exposures reveal more texture in the dust lanes and faint hydrogen emission regions.
- Better color fidelity: Lower ISO and longer exposures can preserve star color and reduce noisy chroma.
How to Blend Tracked Skies With Foregrounds
- Mount the camera on the tracker and perform a careful polar alignment following your device’s instructions.
- Capture tracked sky exposures at your chosen settings.
- Turn the tracker off (or remove the camera) and capture untracked foreground exposures without moving the tripod position relative to the ground if possible.
- In post-processing, align and blend the sharp sky with the static foreground using masks. Watch for mismatched horizon lines or perspective shifts.
Tracked panoramas are possible but more complex due to rotation and alignment across multiple frames. Many photographers prefer untracked panoramas for simplicity, or they shoot tracked sky tiles and untracked foreground tiles separately.
Milky Way Panoramas and Time-Lapse Workflows
Panoramas and time-lapses expand creative possibilities. Panoramas let you capture the full arch of the Milky Way at high resolution; time-lapses reveal its motion and changing color across the night.
Panorama Fundamentals
- Overlap: Aim for 30–50% overlap between frames to give stitching software enough detail for alignment.
- Leveling: Level the tripod and use a head with panning capability to reduce horizon undulation across frames.
- Parallax: To minimize parallax (especially with close foregrounds), rotate around the lens’s entrance pupil using a nodal slide. This is most critical when foreground elements are near the camera.
- Exposure consistency: Lock exposure, white balance, and focus. Avoid auto settings that can change between frames.
- Single vs. multi-row: A single row may suffice for a partial arc; multi-row mosaics capture overhead arches and more foreground context.
Panorama Approaches
- Untracked panorama: Simple and effective for nightscapes. Shoot a sweep for the sky and, if needed, a separate sweep for the darker foreground at a longer exposure. Blend later.
- Tracked sky tiles: Use a tracker for the sky, capturing multiple overlapping tiles at lower ISO. Shoot a separate untracked panorama for the foreground, then blend in post.
Time-Lapse Considerations
- Interval: Choose an interval that produces smooth motion (e.g., 15–30 seconds between frames) depending on exposure time and desired speed-up.
- Flicker control: Keep settings manual and consistent. Avoid changes in aperture (which can introduce variation) by using lenses with manual aperture control if available.
- Battery and dew management: Use external power and a lens heater for multi-hour sequences.
- Composition: Consider foreground elements that complement the Milky Way’s motion—silhouetted trees, rock formations, or reflective surfaces.
Beating Light Pollution, Clouds, and Atmospheric Effects
The atmosphere is part of your optical system. Transparency (clarity of the air) and aerosols (dust, smoke, humidity) directly affect contrast and star visibility. While you can’t control the weather, you can choose your sessions wisely and adapt on location.
Light Pollution

Attribution: ESO/P. Horálek, M. Wallner
- Bortle classes: Seek lower Bortle numbers for higher contrast; even a short drive away from a city can help.
- Direction matters: Avoid shooting toward bright city domes. Position your composition so the brightest parts of the sky are out of frame or behind your foreground.
- Filters: Broadband light pollution filters can reduce older sodium/mercury emissions but are less effective for white-LED dominated skyglow and can shift color. Consider them on a case-by-case basis.
Moonlight
- A dark, moonless window is ideal for Milky Way contrast. If the moon is up, frame the sky away from it, or use it to illuminate the landscape while accepting a subtler Milky Way.
- Use the moon to your advantage: A thin crescent can gently light a foreground without overpowering the sky.
Transparency, Humidity, and Airglow
- Transparency: Dry, clear air enhances contrast. After cold fronts or in high desert environments, transparency can be excellent.
- Humidity and dew: Moist air scatters light and softens stars. Use lens heaters and check for fogging often.
- Airglow: Natural atmospheric emission can brighten the sky with greenish or reddish bands. It’s normal and sometimes adds character; other times it complicates processing. Work with it in post through gentle contrast control.
Clouds and Smoke
- Cloud forecasts: Partial clouds can be manageable; thin clouds may even add texture. Thick clouds will obscure the Milky Way—consider switching to star trails or scouting compositions for another night.
- Smoke and dust: Regional wildfire smoke and dust storms can significantly reduce contrast. Check air quality and be prepared to reschedule if needed.
Post-Processing the Milky Way for Natural Results
Post-processing transforms flat, noisy RAW files into expressive, natural-looking images. The goal is to reveal detail without introducing artifacts or unrealistic colors. Keep a light touch and evaluate on a calibrated display where possible.
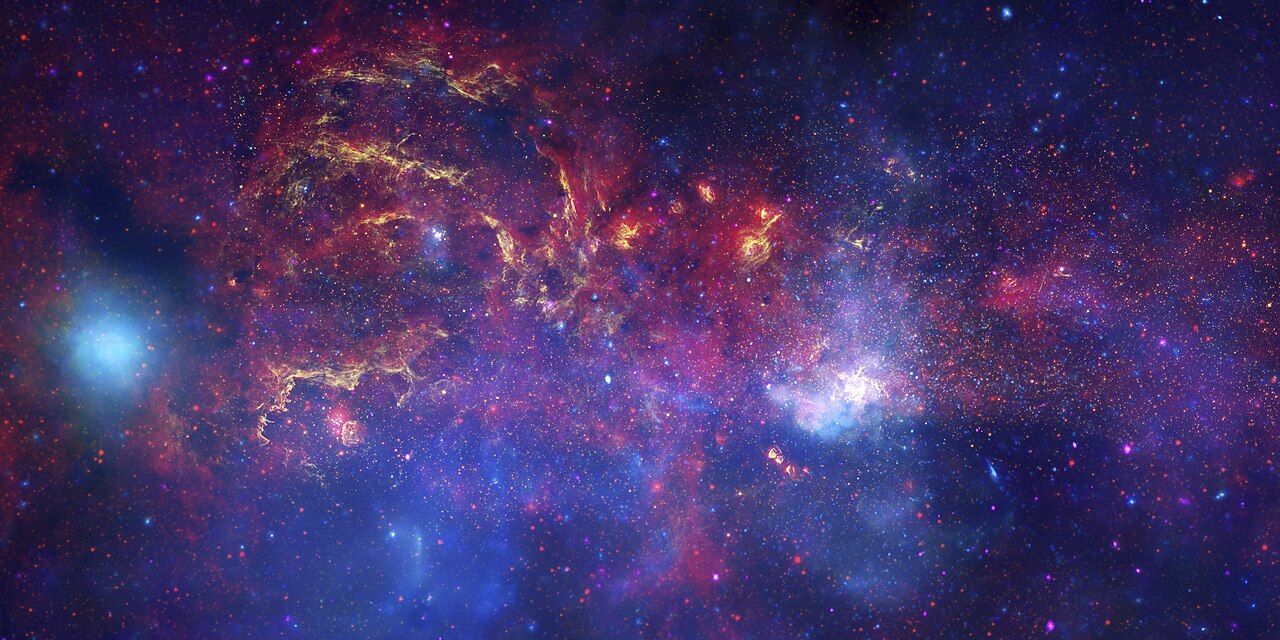
Attribution: NASA/JPL-Caltech/ESA/CXC/STScI
RAW Development
- Lens profiles: Correct vignetting and distortion judiciously—excessive vignetting removal can amplify noise in the corners.
- White balance: Set a consistent color temperature (e.g., around 3800–4200K) and fine-tune tint to keep the sky neutral. Aim for believable star colors (cooler blue-white for hotter stars, warmer hues for cooler stars).
- Basic tonal work: Raise exposure and shadows gently to reveal dust lanes; use highlights to control bright stars.
Contrast and Local Adjustments
- Curves: Use a gentle S-curve for global contrast, then add local contrast selectively in the Milky Way’s core using masking tools.
- Dehaze/clarity: Moderate use can bring out dust structure. Overuse may create halos and unnatural transitions.
- Color separation: Subtle HSL adjustments can help distinguish warm dust lanes from cooler star fields.
Noise Reduction and Sharpening
- Luminance noise: Apply noise reduction in smooth areas (sky background) and mask it away from stars and crisp edges.
- Chroma noise: Reduce color speckling, but preserve star color as much as possible.
- Sharpening: Reserve fine sharpening for the Milky Way structure and foreground textures; avoid oversharpening stars.
Blending Workflows
- Sky/foreground masks: Use luminosity or color range masks to separate the stars and landscape. Align carefully to avoid halos along the horizon.
- Tracked-untracked blends: Match brightness and color between layers. Use low-opacity brushes and feathered selections to create seamless transitions (see tracking section).
Final Polish
- Gradient cleanup: Remove light-pollution gradients gently to maintain natural sky color.
- Star reduction: A light touch can prevent stars from overwhelming the dust lanes.
- Check at multiple scales: Zoom in to fix artifacts and zoom out to evaluate overall balance.
Night Photography Ethics, Safety, and Fieldcraft
Respect for landscapes, wildlife, and other observers is essential when you work at night. Good fieldcraft keeps you safe and ensures you leave no trace of your visit.
Respect the Night Environment
- Leave No Trace: Stay on established paths, avoid trampling vegetation, and pack out everything you bring in.
- Light discipline: Keep headlamps dim and red if possible. Avoid shining bright lights into the sky in sensitive areas or during active observing sessions.
- Wildlife: Give animals space and avoid nesting or denning areas. Nighttime can be a sensitive period for many species.
Safety and Planning
- Tell someone your plan and expected return time. Remote dark-sky sites often lack cell coverage.
- Bring appropriate clothing, water, and navigation tools. Cold and dehydration are common hazards.
- Know local regulations: Some parks restrict after-dark access or prohibit light painting. Obtain necessary permits if required.
Community Etiquette
- Coordinate lighting with others nearby; avoid ruining someone else’s exposure.
- Mute camera screens or use a screen hood. Dim beeps and disable flash.
Common Mistakes and How to Solve Them
Milky Way sessions go smoother when you anticipate and prevent the common pitfalls below.
Star Trailing
- Cause: Shutter time too long for your focal length and pixel density.
- Fix: Shorten exposure, widen the lens, or use a tracker. Apply the 500 rule or a more conservative NPF estimate (see settings).
Soft Focus
- Cause: Inaccurate manual focus or temperature-induced drift.
- Fix: Refocus using live view magnification, tape the focus ring, and recheck throughout the night (focus tips).
Dew and Fog
- Cause: Temperature drops and high humidity.
- Fix: Use a lens heater and keep spare microfiber cloths. Monitor weather and airflow around the lens.
Noisy, Muddy Files
- Cause: Underexposure and high ISO amplification.
- Fix: Improve signal by opening the aperture, increasing exposure within trailing limits, and stacking multiple frames (stacking methods).
Color Casts and Unnatural Edits
- Cause: Aggressive dehaze, heavy color grading, or light-pollution gradients.
- Fix: Keep edits moderate, balance white point by sampling neutral sky regions, and use gradient removal tools sparingly (post-processing).
Panorama Stitching Errors
- Cause: Insufficient overlap or parallax with close foregrounds.
- Fix: Increase overlap to 30–50% and, if possible, rotate around the entrance pupil using a nodal slide (panorama workflow).
Frequently Asked Questions
Do I need a full-frame camera to photograph the Milky Way?
No. While full-frame sensors generally offer better high-ISO performance and a wider field of view for a given focal length, many APS-C and Micro Four Thirds cameras deliver excellent results with fast lenses and solid technique. Focus on acquiring a sturdy tripod, a lens with a wide aperture, and good exposure habits first. You can adopt stacking (see stacking) to further reduce noise regardless of sensor size.
Can smartphones capture the Milky Way?
Some modern smartphones include night or astro modes that combine multiple frames to reduce noise and enhance faint detail. They’re most effective under dark, clear skies. Results won’t typically match dedicated cameras with large sensors and fast lenses, but they can produce recognizable Milky Way images with careful stabilization (a small tripod) and patience. For the best quality, a dedicated camera remains advantageous.
Final Thoughts on Choosing the Right Milky Way Astrophotography Setup
Milky Way astrophotography rewards patience, planning, and practice. Start simple: a sturdy tripod, a wide, fast lens, and thoughtful exposure (settings). Learn to read the night sky and time your sessions for dark, transparent conditions (when and where to see the core). As you refine your craft, experiment with stacking (noise reduction and stacking), try a tracker for cleaner skies (tracking strategies), or build sweeping panoramas (panorama workflow).
Above all, pursue a natural look that honors the nightscape you witnessed. Keep fieldcraft respectful and safe (ethics and safety), and don’t be discouraged by early missteps—each session teaches something new. If you enjoyed this guide, consider subscribing to our newsletter for future articles on planning, shooting, and processing the night sky, as well as deep dives into gear and seasonal opportunities. Clear skies and thoughtful exposures will take you far.

Attribution: NASA/JPL-Caltech