Table of Contents
- What Is Narrowband Astrophotography and Why It Works in the City?
- Essential Gear for H-alpha, O III, and S II Imaging
- Choosing Targets and Planning Urban Narrowband Sessions
- Exposure Settings, Gain, and Sub Lengths for Narrowband
- Darks, Flats, Bias (or Flat Darks) and Dithering Best Practices
- Stacking and Preprocessing Workflow: From RAW to Masters
- Combining H-alpha, O III, and S II: SHO, HOO, and More
- Nonlinear Processing: Stretching, Noise Reduction, and Local Contrast
- Managing Stars, Halos, and Narrowband Artifacts
- A Nightly Workflow Case Study: Imaging the Rosette Nebula in HOO from Bortle 8
- Frequently Asked Questions
- Final Thoughts on Choosing the Right Narrowband Astrophotography Setup
What Is Narrowband Astrophotography and Why It Works in the City?
Narrowband astrophotography isolates specific wavelengths of light emitted by ionized gases in nebulae. By using filters with very small bandwidths—often 3 nm to 7 nm wide—your camera can selectively record emission from hydrogen (H-alpha), doubly ionized oxygen (O III), and ionized sulfur (S II), while rejecting most of the broadband skyglow caused by light pollution and moonlight. This is why narrowband imaging is such a powerful technique for urban and suburban observers who might otherwise struggle to capture faint deep-sky details.

Artist: Stephan Hamel
The key emission lines are:
- H-alpha (Hα): 656.28 nm (deep red). Produced by ionized hydrogen in H II regions—common in many emission nebulae.
- O III: 495.9 nm and 500.7 nm (blue-green doublet). Prominent in planetary nebulae and supernova remnants, and present in many star-forming regions.
- S II: 671.6 nm and 673.1 nm (red doublet). Often fainter than Hα and O III, but adds structural and compositional detail.
Why does this help under light pollution? Many city lights—especially older sodium-vapor lamps—emit strong light at distinct wavelengths and relatively narrow bands. Narrowband filters can largely reject those emissions. Modern white LEDs emit a broader spectrum; still, a 3 nm to 5 nm filter passes a tiny slice of the spectrum, dramatically reducing background compared to broadband imaging. Moonlight is also a continuum source; a tight filter bandwidth minimizes its impact, letting you image bright H II regions even near a full Moon, especially in Hα.
Another major benefit is contrast. Narrowband filters increase contrast between emission structures and the background sky. Structures like shock fronts, ionization fronts, and filaments in nebulae become easier to isolate than in broadband. Combined with long total integration times, narrowband imaging from the city can rival (and sometimes exceed) broadband results from darker skies, particularly for emission targets.
However, narrowband imaging is not a free lunch. You are only collecting photons within a very tiny portion of the spectrum. As a result, sub-exposure length and total integration time need to be long enough to bury read noise and build a clean signal. And because these are emission-line images, color rendition requires channel mapping rather than natural color balancing.
Essential Gear for H-alpha, O III, and S II Imaging
You can practice narrowband imaging with a range of setups—from small refractors on a portable star tracker to larger telescopes on full equatorial mounts. The gear choices below focus on what matters most for success under light-polluted skies.
Cameras: Monochrome vs One-Shot Color
- Monochrome CMOS camera + filter wheel: The gold standard for narrowband. Each pixel sees all incoming light, and you can swap dedicated Hα, O III, and S II filters. This maximizes efficiency in narrow bands, yields cleaner data, and gives full flexibility in color mapping.
- One-shot color (OSC) CMOS camera + multi-band filter: Dual-band (Hα + O III) or tri-band (Hα + O III + S II/Hβ) filters allow you to capture multiple lines with a Bayer matrix camera. It’s simpler and often cheaper up front, but less efficient than mono because each color pixel sees only part of the spectrum and the demosaicing step dilutes signal. Still, with sufficient integration time, OSC + dual/tri-band filters can produce excellent results.
Modern cooled CMOS sensors are preferred for their low read noise, high quantum efficiency, and regulated temperature control (important for building consistent dark libraries). DSLRs and mirrorless cameras can work too—especially with dual-band filters—but thermal noise and lack of cooling may limit long sessions in warm conditions.
Filters: Bandwidth, Halos, and Sizes
- Bandwidth: 3 nm filters provide the strongest rejection of skyglow and moonlight but require longer exposures and may clip shifted lines in very fast optics. 5–7 nm filters are more forgiving of bandpass shifts and admit more starlight, which can help with focusing and star color.
- Halo performance: Some filters produce halos around bright stars, especially in O III. This is usually an optical coating issue and varies by brand and filter lot. If halos are a concern, seek user reports specific to your optical speed and filter size.
- Filter size: Match to your sensor and optical train to avoid vignetting. Faster optics and larger sensors typically require larger filters (e.g., 36 mm unmounted or 2-inch mounted) to fully illuminate the field.
- Dual/tri-band filters: For OSC cameras, dual-band (Hα/O III) filters are common. Tri-band may include S II or Hβ. For faint S II structures, true mono S II imaging is generally more efficient.
Telescopes and Optics
- Small apochromatic refractors (e.g., 60–100 mm) are popular for wide-field nebulae. They are simple to use, tolerant of seeing, and keep stars tight across the field.
- Fast optics (f/4–f/6) reduce exposure time. However, very fast systems (f/2–f/3) can shift interference filter bandpasses toward shorter wavelengths. Extremely narrow O III or S II filters (e.g., 3 nm) may attenuate the line with fast systems. If you use a very fast astrograph, consult the filter’s published f-ratio compatibility.
- Flatteners/reducers help control field curvature and improve star shapes toward the corners. Ensure the specified backfocus spacing is met within tolerance.
- Backfocus and tilt control: Threaded connections, tilt adapters, and solid spacers minimize tilt and flexure that can bloat stars and cause elongated corners.
Mounts, Tracking, and Guiding
- Equatorial mounts with reliable tracking are ideal. Guiding via an off-axis guider (OAG) or a separate guide scope helps maintain round stars during long subs (3–10 minutes).
- Star trackers can work well with short focal lengths. Keep sub lengths shorter and pay attention to polar alignment. Dithering is still crucial (see dithering best practices).
Filter Wheels, Drawers, and Optical Train

Artist: Marie-Lan Nguyen
- Filter wheel: For mono cameras, a motorized filter wheel ensures repeatability and fast switching. Label and order filters consistently to simplify automation.
- Filter drawers/sliders: Useful for OSC cameras swapping between dual-band and broadband filters. Take new flats after every reconfiguration.
- Focusing: A Bahtinov mask or autofocus routine improves star sharpness, especially critical for narrowband where signal is lower. Focus can shift slightly with wavelength; refocus after filter changes.
Starter Configurations
- Mono path: 60–80 mm refractor (f/5–f/6), cooled mono CMOS camera, 1.25-inch or 36 mm Hα/O III/S II filters, motorized filter wheel, HEQ5/AVX-class mount or better, OAG/guide scope, and capture software with sequencing and dithering.
- OSC path: 60–80 mm refractor (f/5–f/6), cooled OSC CMOS camera, dual-band filter (Hα/O III), solid equatorial mount or tracker for short focal lengths, and guiding if possible. Consider adding a dedicated S II filter later with a mono camera if you love SHO palettes.
Choosing Targets and Planning Urban Narrowband Sessions

Artist: Brainandforce
Narrowband imaging thrives on emission-rich objects. Prioritize H II regions, planetary nebulae, and supernova remnants. Planning tools—planetarium apps, online catalogs, and weather services—help you maximize your clear-sky windows and pick targets that ride high for the longest time.
Match Emission Lines to Object Types
- H II regions: Star-forming complexes are dominated by Hα, often with O III at ionization fronts. Great in any season where visible.
- Planetary nebulae: Many are rich in O III; narrowband isolates shells and internal structures that are lost in broadband.
- Supernova remnants: O III and Hα filaments can be exquisite in narrowband. Some remnants also reveal S II in shock-heated regions.
Seasonal Targets (Northern Hemisphere examples)
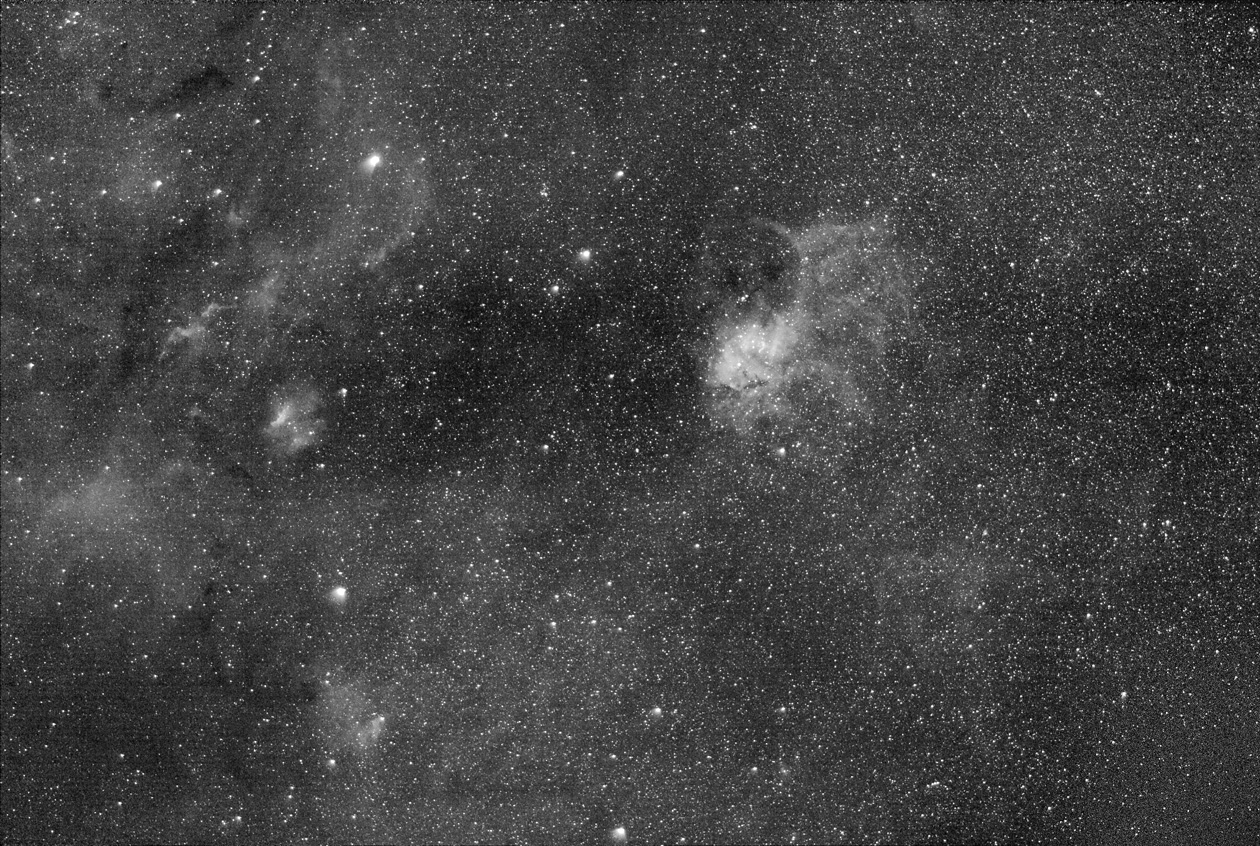
- Summer: North America Nebula (NGC 7000), Pelican (IC 5070), Veil Nebula (NGC 6960/6992), Eagle (M16), Lagoon (M8), Trifid (M20), Crescent (NGC 6888).
- Autumn: Heart (IC 1805), Soul (IC 1848), California (NGC 1499), Pacman (NGC 281), Elephant’s Trunk (IC 1396 region).
- Winter: Rosette (NGC 2237–2246 complex), Flaming Star (IC 405), Monkey Head (NGC 2174), Seagull (IC 2177), Orion complex (including Barnard’s Loop).
- Spring: Fewer large H II regions dominate the season; consider planetary nebulae (e.g., Owl Nebula M97) and supernova remnants where available above your horizon. Narrowband can still reveal faint structures even during “galaxy season.”
Use your planetarium software to verify target altitude at your location. Aim for imaging windows where your target is above ~40° altitude to minimize airmass and extinction. If you must image low in the sky, robust flats and later gradient removal can help manage differential skyglow.
Moon Phase and Transparency
- Hα is moon-tolerant: You can often image Hα under a bright Moon with minimal penalty using 3–5 nm filters.
- O III and S II are more sensitive: O III suffers more from moonlight and atmospheric scattering. S II is often faint, so prioritize dark or less moonlit nights.
- Transparency over seeing: For narrowband emission work, sky transparency (aerosols, humidity) usually matters more than sub-arcsecond seeing. Haze increases background and reduces contrast.
Framing and Field of View
Wide fields highlight nebula context—dust lanes, ionization fronts, and neighboring structures. Longer focal lengths isolate fine detail in planetary nebulae or small shock fronts. Use your capture software’s framing tools or online FOV calculators to rotate and center the composition. For mosaics, overlap by ~15–20% and keep the same rotation and filter sequence for each panel.
Exposure Settings, Gain, and Sub Lengths for Narrowband
Narrowband imaging demands thoughtful exposure strategy. Each filter’s signal strength and sky background differ, so plan per-filter sub lengths and total time. Below are practical, physics-informed heuristics.
Set Gain and Offset
- Gain: Many CMOS cameras publish a “unity gain” where 1 electron ≈ 1 ADU. That’s a good starting point. Some imagers increase gain slightly for narrower filters to reduce read noise; others reduce gain to maximize dynamic range for bright targets. Check your camera’s read-noise vs gain curve.
- Offset: Choose an offset that keeps the background above zero ADU. Most capture programs and camera vendors suggest defaults that work well.
How Long Should Sub-Exposures Be?
Artist: s58y
Rule of thumb: make each sub long enough that the sky background signal per pixel significantly exceeds the camera’s read noise. A simple model is:
# target: background_variance >> read_noise_variance

# choose k ~ 5 to 10 depending on tolerance

sub_exposure_time >= k * (read_noise_electrons^2) / (background_electrons_per_second_per_pixel)
In practice, with modern low-read-noise CMOS cameras, many urban narrowband imagers find success with:
- Hα: 180–420 seconds per sub.
- O III: 240–600 seconds per sub (often needs more time due to lower signal and moonlight sensitivity).
- S II: 300–600 seconds per sub (commonly the faintest channel).
Shorter focal lengths and faster optics permit shorter subs; longer focal lengths and slower optics push you toward longer subs. If your mount’s tracking/guiding is marginal, opt for slightly shorter subs and gather more of them. Total integration time matters at least as much as individual sub length.
Balance Total Time Per Channel
- HOO mapping: Hα is typically strong; O III may be weaker. Consider allocating similar or more time to O III than Hα to balance noise across channels.
- SHO mapping: S II is often the noisiest. You might split total time as S II ~40%, Hα ~30%, O III ~30%, then adjust based on your first night’s data.
Pixel Scale and Guiding Targets
Match guiding performance to your image scale. Estimate arcseconds per pixel:
arcsec_per_pixel = 206.265 * pixel_size_um / focal_length_mm
As a rough guide, try to keep your mount’s total guiding RMS below ~0.7–1.0 times your arcsec/pixel value. If your scale is 2.0″/pixel, an RMS of ~1.4″ or better usually yields round stars at modest sub lengths.
Dither Frequency and Amplitude
Dither between subs to break up fixed-pattern noise and mitigate “walking noise” during stacking. A practical recipe is:
- Frequency: dither every 1–3 frames per filter.
- Amplitude: a few to ~15–20 pixels, depending on your image scale and how strong pattern noise appears in test stacks.
Use random dithers in both axes. If imaging a mosaic, maintain consistent dither parameters across panels for uniform backgrounds.
Darks, Flats, Bias (or Flat Darks) and Dithering Best Practices
Calibration frames are essential for clean narrowband data, especially with interference filters that can accentuate dust shadows and vignetting patterns. Pair calibration discipline with robust dithering for best results.
Darks
- Build a dark library at your camera’s set temperature, gain, and common exposure times (e.g., 180 s, 300 s, 600 s). Refresh periodically to account for sensor changes over time.
- Make sure you match the exposure length and temperature to your lights. Cooled cameras make this repeatable.
Flats
- Capture filter-specific flats. Each filter can shift vignetting slightly and reveals different dust motes.
- Use a uniform light source: an electroluminescent panel, a flat panel, or sky flats at dusk/dawn.
- Aim for a mean level around 30–50% of full well or the ADU range recommended by your software and camera vendor.
- Do not change focus, filter orientation, or camera angle between flats and lights if you plan to reuse flats. If anything changes, capture new flats.
Bias vs. Flat Darks
- For many modern CMOS sensors, flat darks (a.k.a. dark flats) are preferred over ultrashort bias frames. Flat darks match the flat exposure length and help correct features like amplifier glow patterns or offset variability.
- If your camera’s bias frames are stable and recommended by the vendor, you can continue to use bias. When in doubt, test both methods in a small stack and inspect the result for residual gradients or pattern noise.
Dithering Recap
As noted in exposure settings, dither at least every few subs. Dithering is often the single most effective way to suppress correlated noise and avoid streaks after integration.
Stacking and Preprocessing Workflow: From RAW to Masters
Preprocessing organizes your raw lights and calibrations into high-quality master frames ready for combination and color mapping. You can use free tools like Siril or DeepSkyStacker, or advanced suites like PixInsight and AstroPixelProcessor. The core steps are similar everywhere.
Organize and Calibrate
- Sort frames by filter (Hα, O III, S II) and by night if needed.
- Calibrate each light: subtract darks, apply flats, subtract bias or flat darks.
- Cosmetic correction (if available): correct hot/cold pixels with an algorithm or a defect map.
Register and Normalize
- Star alignment/registration: Choose a high-SNR reference frame per filter. Ensure the algorithm can handle slight rotations and dithers.
- Normalization: Match the background and signal levels across subs to handle transparency variations and thin clouds.
Integrate with Robust Rejection
- Use sigma clipping or Winsorized sigma clipping to reject outliers (satellite trails, planes). Adjust rejection thresholds to avoid clipping nebulosity.
- Enable weighting by FWHM, SNR, or sky quality where possible. Let the software de-prioritize soft or hazy frames.
- If your scale and data warrant it, drizzle can help recover some resolution, especially with undersampled OSC data. It increases noise, so assess benefits vs. cost.
File Formats and Debayering
- FITS and XISF are common for astronomy data. Preserve bit depth (16-bit or 32-bit float) through preprocessing.
- For OSC + dual-band, ensure debayering is done with the correct Bayer pattern. Some workflows separate Hα and O III emissions from the RGB channels during or after calibration using specialized scripts or channel extraction.
Combining H-alpha, O III, and S II: SHO, HOO, and More
Narrowband color is created by assigning emission lines to RGB channels. The goal is to reveal structure and contrast while maintaining a visually pleasing, informative palette.
Common Mappings
- SHO (Hubble Palette): R = S II, G = Hα, B = O III. Highlights sulfur-rich regions and often produces green/cyan structures that can be tuned artistically.
- HOO: R = Hα, G = O III, B = O III. Naturally emphasizes blue-green O III fronts and red Hα regions—popular for dual-band OSC data.
- HSO or HSO-variant: Variations mapping Hα to luminance and S II/O III to color to emphasize detail.

Artist: s58y
Channel Weights and Synthetic Luminance
- Balance channel weights to equalize noise. If S II is noisy, reduce its weight or blend it with a denoised copy.
- Create a synthetic luminance by combining Hα, O III, and S II (e.g., an average or weighted sum). Use this high-SNR master as L in an LRGB-style workflow.
Equations for Channel Mixing
# Simple SHO mapping

R = SII

G = Ha

B = OIII
# HOO mapping
R = Ha
G = OIII
B = OIII
# Example synthetic luminance
L = w1*Ha + w2*OIII + w3*SII # weights w1+w2+w3 = 1
After combination, you may notice a dominant green cast in SHO images due to strong Hα in the green channel. There are two broad approaches to address this:
- Color balance via curves and channel blending: Reduce green midtones and lift blue/red where desired. Adjust selectively with masks to preserve natural gradients.
- Targeted chroma reduction: Tools that desaturate green (e.g., SCNR-style operations) can help. Use lightly to avoid losing subtle structure.
Stars and Color
Stars in narrowband are not true-color. Options include:
- RGB stars blend: Capture short RGB or broadband exposures just for stars and blend them over the starless narrowband nebulosity.
- Narrowband stars: Keep stars from your narrowband combination but reduce saturation and size for a restrained look.
- Continuum subtraction (advanced): If you have an off-band or broadband continuum image, subtract some continuum from narrowband channels to reduce star bloat. This requires careful scaling to avoid artifacts.
Nonlinear Processing: Stretching, Noise Reduction, and Local Contrast
Once your narrowband masters are combined, the data are still linear and look dark. Nonlinear processing—stretching and local enhancements—reveals the structures you captured. Work gently and iteratively to avoid artificial halos and clipped highlights.
Stretching Strategies
- Histogram/curves transformation: Conventional approach: raise the black point slightly, then increase midtones in small steps.
- Masked or soft stretch: Techniques that protect bright stars and cores while lifting faint nebulosity.
- Arcsinh/GHS-style stretches: Nonlinear functions that compress highlights and expand shadows smoothly. Useful for gradients of faint emission.
Noise Reduction Timing
- Apply noise reduction in the linear stage before stretching if your software supports it (e.g., multiscale algorithms that model noise statistics).
- After stretching, use masked, localized denoising on the fainter background regions. Avoid over-smoothing filaments and shock fronts.
Sharpening and Deconvolution
- Deconvolution can improve small-scale contrast using a measured or modeled PSF. Protect stars with masks to reduce ringing.
- Local contrast enhancement (unsharp masking, multiscale transforms) brings out edges in ionization fronts. Use masks to limit action to nebula zones.
Color and Tone Tuning
- Use curves with luminance masks to shape contrast without washing out color.
- Selective color adjustments tune SHO/HOO palettes. Nudging hue and saturation can separate overlapping Hα and S II structures.
- Keep black point conservative. True space backgrounds are rarely pitch black; allow a faint background level to preserve depth.
Managing Stars, Halos, and Narrowband Artifacts
Stars often dominate narrowband images if left unchecked. Good star management improves visibility of faint nebulosity and keeps the image natural.
Star Size and Reduction
- Capture choices: Good focus and guiding yield smaller stars from the start. Refocus after filter changes if necessary.
- Star masks: Apply morphological transforms, minimum filters, or dedicated star reduction tools with a mask so nebula edges remain unaffected.
- Blend RGB stars: If adding broadband stars, keep them small and not oversaturated to avoid color clashes with narrowband nebulosity.
Halos and Reflections
- Filter halos: O III filters are most prone. Halo severity depends on coatings, sensor window, and optics. If halos show, try a different filter or process halos locally with curves and masks.
- Internal reflections/ghosts: Minimize shiny surfaces in the optical path and keep sensor windows and filters clean. Threaded, well-blackened adapters help.
Bandpass Shift at Fast f-ratios
Interference filters shift toward shorter wavelengths at fast focal ratios. Ultra-narrow (e.g., 3 nm) O III filters in very fast systems may partially cut off the 500.7 nm line, dimming O III signal. Solutions include:
- Use 5–7 nm filters for very fast systems.
- Check manufacturer f/ratio recommendations and line-transmission charts.
- Test short subs and inspect O III histograms vs Hα to gauge signal.
A Nightly Workflow Case Study: Imaging the Rosette Nebula in HOO from Bortle 8
The following is a practical, example workflow to illustrate decisions and steps for a common target—the Rosette Nebula—shot in an urban environment (approximately Bortle 8). It’s not a prescriptive template; rather, a starting point you can adapt to your gear and sky.

Artist: Dylan O’Donnell, deography.com
Pre-Session Planning
- Target: Rosette Nebula (NGC 2237–2246), a bright H II region well-suited to Hα/O III imaging.
- Imaging window: Choose a night when the target culminates high, minimizing airmass.
- Moon: If the Moon is bright, plan to spend more time on Hα and defer O III to a night with less moonlight.
- Framing: With a short refractor, center the cluster and allow room for the surrounding petals. Consider a slight rotation for aesthetic balance.
Setup and Polar Alignment
- Assemble the optical train with your dual-band or Hα/O III filters. Confirm backfocus spacing and tighten all threaded connections.
- Cool the camera to your set temperature and wait for stabilization (use the same temperature as your dark library).
- Polar align carefully; accurate alignment allows longer subs and reliable dithering.
Focusing
- Use a Bahtinov mask or autofocus routine on a bright star. Narrowband signal can be faint; use Hα (or remove the filter for an initial focus, then fine-tune with the filter in place).
- Refocus after temperature changes or filter swaps. Autofocus per filter is ideal.
Acquisition Plan (Example)
- Mount: Equatorial with guiding via OAG or a guide scope.
- Camera settings: Gain near unity; offset per camera recommendation.
- Sub length: Hα 240 s, O III 300 s. Adjust based on histogram and guiding performance.
- Dithering: Every 1–2 subs; medium amplitude.
- Total time: Aim for ~4–6 hours per filter across one or more nights. If the night is bright with moonlight, bias more time to Hα and collect O III under darker conditions.
Calibration Frames
- Use matching darks at the same temperature and exposure.
- Capture flats for each filter configuration (same focus/rotation). Use flat darks to calibrate flats if your camera benefits from them.
Nightly Routine
- Center and plate solve to lock in framing; synchronize your mount’s model.
- Start with Hα if the Moon is up or transparency looks mixed.
- Switch to O III later in the night if the Moon sets and transparency improves. Refocus after the filter change.
- Dither between subs. Monitor star FWHM and guiding RMS; adjust exposure if trailing appears.
- Capture calibration frames (flats) at the end if using a flat panel, or the next day if your configuration is unchanged.
Preprocessing and Integration
- Calibrate Hα and O III lights with matching darks and flats.
- Register all subs to the best Hα frame or to a synthetic reference.
- Integrate Hα and O III stacks using sigma-clipping rejection and SNR-based weighting.
Combination and Processing (HOO)
- Combine R = Hα, G = O III, B = O III. Consider Hα + O III luminance for added detail.
- Linear noise reduction with masks, then stretch gradually.
- Local contrast to emphasize petals and cavities; protect stars.
- Star reduction to keep the central cluster tidy and maintain focus on nebulosity.
- Color tuning to balance red Hα petals with teal O III fronts, avoiding over-saturation.
Review at 100% and screen-fit scales to catch both small artifacts and overall tonal balance. Save intermediate versions so you can roll back a step if needed.
Frequently Asked Questions
Can I do narrowband imaging without guiding?
Yes—within limits. At short focal lengths and modest sub lengths (e.g., 60–180 s) on a well-aligned star tracker or mount, you can gather useful narrowband data unguided. However, for longer sub-exposures common in narrowband (e.g., 300–600 s), guiding markedly improves star shapes and overall efficiency. If you must go unguided, shorten subs, dither between frames, and keep focal length conservative.
Is a 3 nm filter always better than a 7 nm filter?
Not always. 3 nm filters reject more skyglow and are excellent under heavy light pollution and moonlight, especially for Hα. But they demand longer subs, can make focusing harder, and may be suboptimal at very fast f-ratios where bandpass shifts can attenuate the line. A 5–7 nm filter is more forgiving with fast optics, typically shows more starlight for easier focusing, and often costs less. Choose bandwidth based on your optics, skies, and targets.
Final Thoughts on Choosing the Right Narrowband Astrophotography Setup
Narrowband astrophotography turns light-polluted nights into productive imaging opportunities. By isolating Hα, O III, and S II emission, you dramatically increase contrast and suppress skyglow, revealing the structure and physics behind nebulae—ionization fronts, shock waves, and filaments—that are difficult to capture in broadband from the city.
Success comes from a few core habits: match your gear to your goals, plan targets by season and moon phase in planning, expose long enough to build clean signal as explained in exposure settings, calibrate thoroughly with darks, flats, and dithers, then combine and process deliberately with thoughtful channel mapping and restrained nonlinear adjustments. With steady practice and patient integration times, even a modest refractor can produce detailed SHO and HOO images from your backyard.
If you found this guide helpful, explore more of our step-by-step tutorials on deep-sky imaging, experiment with different palettes, and share your results. For future walkthroughs, processing tips, and seasonal target ideas, subscribe to our newsletter so you never miss a clear-sky opportunity.