Table of Contents
- What Is a Dobsonian Telescope and Why It Matters
- Aperture vs. Portability: Choosing Optical Size
- Focal Length, Eyepieces, and Magnification Math
- Essential Mount Features: Bearings, Balance, and Motions
- Collimation and Cooling: Keeping a Newtonian Sharp
- Finders, Filters, and Useful Accessories That Matter
- Urban and Suburban Observing: Beating Light Pollution
- Planning Targets by Season: What You Can See
- Astrophotography Reality Check with Dobsonians
- Care, Maintenance, and Storage Best Practices
- Frequently Asked Questions
- Final Thoughts on Choosing the Right Dobsonian Telescope
What Is a Dobsonian Telescope and Why It Matters

Credit: first uploaded on the English-speaking Wikipedia under the same filename
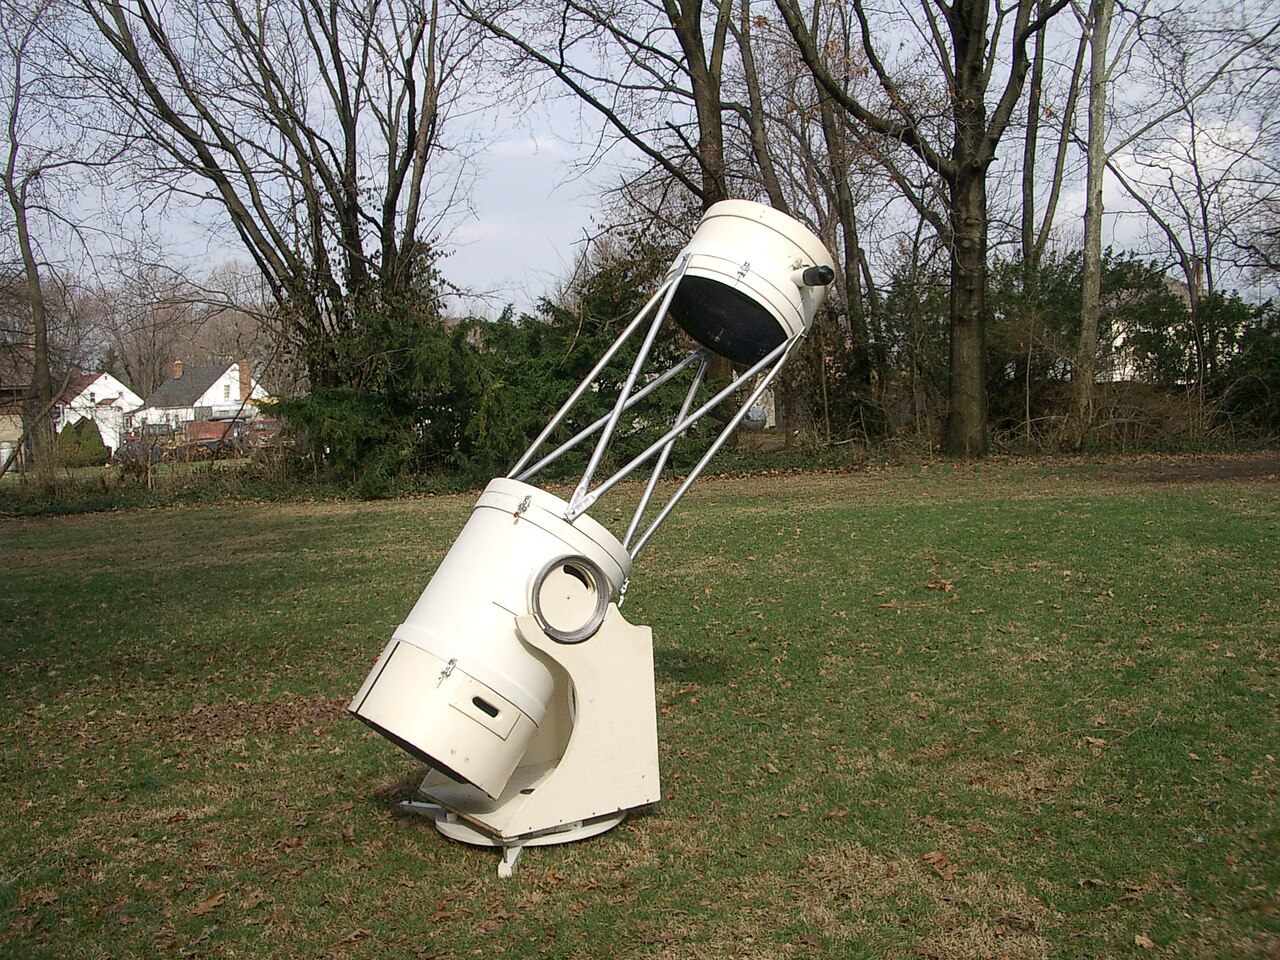
Among amateur astronomers, the Dobsonian telescope occupies a special place. It pairs a simple alt-azimuth wooden or composite mount with a Newtonian reflecting optical tube. The design’s hallmark is large aperture at low cost, making it a favorite for beginners and veterans who crave bright, deep-sky views without complicated setup. If you’ve heard terms like “8-inch Dob,” “Push-to Dob,” or “truss-tube Dobsonian,” they all refer to variations on this theme: a Newtonian reflector optimized for ease of use, smooth manual pointing, and maximal light-gathering power per dollar.
Unlike many tripod-based telescopes, a Dobsonian sits close to the ground on a rocker box. You nudge the tube in altitude (up–down) and azimuth (left–right) to track targets. Many models are “solid-tube” designs from 150 mm (6 inches) up to 300 mm (12 inches) and beyond. Larger, premium variants may be “truss-tube” designs that break down into smaller components for transport. The unifying philosophy is practicality: fewer moving parts, quick setup, and an observing experience that emphasizes the sky rather than the hardware.
Because the mount is alt-azimuth and the optical design is a Newtonian reflector, Dobsonians are visual observing specialists. They excel at the Moon, planets, star clusters, nebulae, and galaxies—particularly under dark skies. They can be paired with digital setting circles (“push-to” systems) for fast target acquisition or even full GoTo tracking on some models, though the purest form remains manual and intuitive.
Throughout this guide, we’ll demystify key specs, trade-offs, and practical tips so you can select the right Dobsonian and enjoy sharper, more satisfying views. If you’re deciding between apertures, skip ahead to Aperture vs. Portability. If eyepiece math or barlows puzzle you, jump to Focal Length, Eyepieces, and Magnification. And if you’re wondering whether a Dobsonian is good for long-exposure imaging, see our Astrophotography Reality Check.
Aperture vs. Portability: Choosing Optical Size
Choosing a Dobsonian often starts with one question: How big? “Aperture” means the diameter of the primary mirror, usually expressed in millimeters or inches. Light gathering scales with the area of the mirror, which grows with the square of the diameter. In practice, each step up in aperture reveals fainter objects and more detail—within the limits of seeing conditions, collimation, and thermal equilibrium. But bigger is also heavier and bulkier.
Common entry and mid-level sizes:

Artist: Wutthichai Charoenburi
- 6-inch (150 mm): Lightweight, easy to carry, cools quickly. Shows lunar/planetary detail, double stars, bright clusters, brighter nebulae and galaxies. Good for small cars and staircases.
- 8-inch (200 mm): Widely considered the beginner sweet spot. Noticeable jump in brightness over 6-inch. Manageable tube length (~1.2 m). Versatile for most targets; widely available and affordable.
- 10-inch (250 mm): Substantial upgrade in deep-sky performance. Faint galaxies start to show structural hints under dark skies. Heavier base and tube; consider transport and storage carefully.
- 12-inch (300 mm) and up: Serious light buckets. Under good skies, reveal spiral arms, knots in nebulae, and subtle planetary features. Truss-tube versions help with portability. Demands more effort in collimation and cooldown.
To find your ideal aperture, balance these factors:
- Transport: Will it fit through doors, into your car trunk, or up stairs? Measure actual dimensions and weight of both tube and base.
- Cooldown time: Larger, thicker mirrors take longer to reach ambient temperature, affecting image sharpness. See Collimation and Cooling for strategies.
- Storage and setup frequency: A scope you’re excited to set up will see more use, delivering more value than an oversized instrument that stays indoors.
- Budget allocation: Remember to budget for quality eyepieces, a finder, and collimation tools. An 8-inch Dob plus two solid eyepieces can outperform a 10-inch with poor accessories.
Rule of thumb: The best Dobsonian is the one you’ll use most often. For many observers, that’s an 8-inch solid-tube. For those with dark-sky access and room to store gear, a 10–12 inch can be transformative.
Focal Length, Eyepieces, and Magnification Math
Beyond aperture, two optical concepts shape your experience: focal length and focal ratio (f/number). Focal length is the distance light travels from the primary mirror to the focus point. The focal ratio is focal length divided by aperture. Typical Dobsonians span f/4.5 to f/8. Faster scopes (lower f/number) offer wider fields of view but place higher demands on eyepieces and collimation.
Here are the key relationships every observer should know:
Magnification = Telescope focal length / Eyepiece focal length

Exit pupil (mm) = Eyepiece focal length / Focal ratio
               = Aperture (mm) / Magnification

True field of view (approx) ≈ Apparent field / Magnification
These formulas help you build an eyepiece set that covers low, medium, and high power intelligently.
Choosing eyepieces by exit pupil

Artist: Morn
Eyepiece focal lengths and apparent fields (e.g., 50°, 68°, 82°) vary widely. Choosing by exit pupil is a practical strategy because it maps to how your eye uses the light.
- Low power, wide field (4–6 mm exit pupil): Ideal for star-hopping, large nebulae, and framing big open clusters. For an f/6 Dob, that’s a 24–36 mm eyepiece.
- Medium power, detail (2–3 mm): Great for globular clusters, small nebulae, galaxies. For f/6, that’s ~12–18 mm.
- High power, fine detail (1 mm or less): For planets, lunar craters, double stars in steady seeing. For f/6, that’s ~5–6 mm.
A quality Barlow lens (1.5×–2×) effectively doubles your eyepiece set. A 12 mm with a 2× Barlow becomes a 6 mm for high power, for instance. Zoom eyepieces (e.g., 8–24 mm) are convenient for dialing in magnification as seeing changes, though fixed focal lengths often deliver wider apparent fields and edge correction.
Focal ratio implications: f/5 vs. f/8
- f/5 and faster (e.g., f/4.7): Wide fields, compact tube length; more coma at the edge of the field; benefits more from premium eyepieces and precise collimation; may benefit from a coma corrector for wide-field observing.
- f/6–f/8: Narrower fields at a given eyepiece, but more forgiving of eyepieces; easier collimation tolerance; often better planetary contrast for beginners simply because the optical train is consistently better aligned.
If wide-field observing is your goal and you’re comfortable with collimation, a fast f/5 Dob with a 30–34 mm wide-angle eyepiece can yield sweeping views. If you value simplicity and sharpness at modest cost, an f/6–f/8 scope with mid-tier eyepieces is a safe path.
To understand how focal length shapes magnification with a specific eyepiece, practice quick calculations like those in the magnification formulas above. They become second-nature after a few nights out.
Essential Mount Features: Bearings, Balance, and Motions
Artist: JamesStewart669
The Dobsonian mount looks simple, but its ergonomics define your observing experience. You want motions to be smooth yet resist wind or accidental bumps. Three features stand out:
- Altitude and azimuth bearings: Larger bearings distribute weight, improving stability and smoothness. Teflon-on-laminate interfaces are common for buttery motion.
- Adjustable tension or springs: Allow you to balance the tube when swapping heavy eyepieces or adding a finder. Balanced motion prevents backlash and “altitude droop.”
- Sturdiness of the base: A rigid rocker box minimizes vibrations. Plywood or well-braced particleboard can perform well; composite and metal reinforcements add durability.
On many entry-level Dobs, azimuth motion can feel “sticky” until the base wears in. Simple tweaks—waxing the laminate, replacing pads, or adding a central bearing—can help. Likewise, adding a small counterweight (magnetic or strap-on) keeps balance with heavier eyepieces.
Two optional systems change how you navigate:
- Push-to digital setting circles (DSC): Encoders and a hand controller or app show where to push the scope. You still move manually; the electronics point the way. This preserves the Dob’s simplicity and avoids cabling and power draw.
- GoTo/tracking Dobsonians: Motorized motion finds and tracks objects. This can be helpful at public star parties or for high-power planetary work. It adds weight, cost, and complexity, and often requires power.
If you love star-hopping, a manual Dob with a good finder is pure joy. If your skies are light-polluted or time is short, a push-to system is a strong middle ground. Consider your observing style when comparing models.
Collimation and Cooling: Keeping a Newtonian Sharp
No matter how good the optics, a reflector will underperform if it’s not collimated and thermally stable. Thankfully, collimation looks more intimidating than it is. With a simple tool and a few minutes’ practice, you can align your optics for crisp, high-contrast views.
Collimation basics
Newtonian collimation typically involves three steps:

Artist: M. Tewes
- Center the secondary mirror under the focuser (rotation and fore–aft position). This is a one-time or rare adjustment.
- Align the focuser axis by tipping/tilting the secondary so the primary’s center spot is centered in your sight tube or laser.
- Align the primary mirror by adjusting its collimation screws so the center spot returns to the center of the tool’s target (e.g., Cheshire or laser’s return beam).
Tools range from a simple collimation cap (often included) to a Cheshire/sight tube combo, a barlowed laser, or high-precision tools. For fast scopes (f/5 and below), accuracy matters more. For f/6–f/8, tolerances are more forgiving.
Star testing and verification
Even if you use a laser or Cheshire, confirm collimation on a bright star at high power in good seeing. Defocus slightly inside and outside of focus; diffraction rings should appear concentric. Fine-tune primary collimation if needed. This “star test” is also a sensitive indicator of thermal currents and atmospheric steadiness.
Thermal equilibrium: why cooling matters
When you bring a warm telescope outside into cooler air, warm air layers inside the tube and above the mirror create shimmering currents that soften detail. Give the scope time to equilibrate:
- Allow 30–90 minutes for larger mirrors, less for small scopes. Open-truss designs cool faster.
- Use a rear fan (often included or easy to add) to gently pull air across the mirror’s surface.
- Shield from ground heat and wind: Grass is better than pavement. A lightweight shroud on truss scopes reduces stray light and drafts.
Planetary observing is particularly sensitive to seeing and thermal stability. If your Jupiter view is mushy, it might not be collimation—it could be tube currents or unsteady air. Return later in the night as temperatures stabilize, or pick higher-altitude targets to reduce atmospheric path length. See Planning Targets by Season for ideas.
Finders, Filters, and Useful Accessories That Matter
Accessories can elevate a good Dobsonian into a great observing system. Focus on items that enhance pointing, comfort, and contrast.
Finders and aiming aids
- Red-dot or multi-reticle finder: Projects a simple dot onto the sky for intuitive pointing. Pairs well with a wide-field eyepiece.
- Reflex finders (e.g., Telrad, Rigel QuikFinder): Circle reticles sized to known angular diameters enable precise star-hops using naked-eye charts.
- RACI (Right-Angle Correct-Image) finderscope: Magnified, upright view that matches star charts; comfortable neck posture. A 50 mm RACI is a common upgrade.
Many observers run a dual-finder setup: a reflex finder to get onto the right naked-eye star, then a RACI to refine the hop. This complements the wide, low-power eyepiece discussed in Eyepieces and Magnification.
Filters for contrast and comfort
- Moon filter or variable polarizer: Reduces glare on bright lunar phases; preserves dark adaptation during mixed sessions.
- UHC (Ultra High Contrast) filter: Narrowband filter that suppresses light pollution and boosts emission nebulae (e.g., Orion Nebula, Lagoon). Works very well on many targets.
- O III filter: Even narrower; excellent for planetary nebulae and certain supernova remnants (e.g., the Veil). Dark skies still help, but contrast often improves dramatically.
- Light-pollution broadband filter: Offers modest improvement on some emission targets, but limited help for galaxies, which emit broad-spectrum light. See Light Pollution for more.
Comfort and utility upgrades
- Adjustable observing chair: Stabilizes your body at the eyepiece; improves fine detail perception and reduces fatigue.
- Planisphere or astronomy app: Aids target planning, real-time sky orientation, and push-to navigation.
- Red headlamp: Keeps hands free while preserving night vision.
- Cheshire/sight tube or quality laser: For accurate collimation before each session, as explained in Collimation.
- Dew control: Dew shield for secondary, eyepiece heaters in damp climates, and caps when not in use.
Urban and Suburban Observing: Beating Light Pollution
Dobsonians thrive under dark skies, but many of us observe from cities and suburbs. You can still enjoy rewarding views with realistic expectations and a few strategies.
Know your sky quality
Sky brightness is often expressed by the Bortle scale from 1 (pristine dark) to 9 (inner city). Smartphone apps and online maps estimate your location’s class. Under Bortle 7–9, galaxies are challenging. The Moon, planets, double stars, and bright clusters become your best friends. Under Bortle 4–6, many nebulae and some galaxies are within reach, with filters improving contrast on emission objects.
Target selection and timing
- Observe when targets are highest (culmination) to look through less atmosphere and reduce extinction.
- Shield direct lights with portable screens or by choosing strategic spots in your yard or a local park.
- Use a UHC or O III filter on emission nebulae; it won’t fix light pollution, but it can make fainter structure pop.
- Choose brighter galaxies and clusters and aim for moonless nights. Even in the city, the Moon, planets, and double stars deliver satisfying sessions.
Star-hopping in bright skies
Star chains you can see naked-eye are scarce under city lights. Use a reflex finder plus RACI and a detailed chart or app with adjustable magnitude limits. Hop from known bright stars to fainter fields. Alternatively, a push-to Dobsonian helps bridge the gap between manual and GoTo when fewer landmarks are visible. For basic setup of aiming aids, revisit Finders and Aids.
Light pollution can’t stop you from building observing skills. Double stars, lunar rilles, and planetary detail scale with technique: thermal management, collimation, and patient seeing. Master those, and the sky opens up—even from your driveway.
Planning Targets by Season: What You Can See
What you can see on a given night depends on season, latitude, and sky quality. Below is a sampling of rewarding targets for a typical Northern Hemisphere observer with an 8–10 inch Dobsonian. Many are fine in a 6-inch, especially from darker locations. Southern Hemisphere observers will have different seasonal highlights; adapt with a star atlas or app.
Winter highlights (roughly December–February)
- Orion Nebula (M42): A showpiece emission nebula. Try multiple magnifications and a UHC filter to reveal extended structure and the Trapezium stars. Refer to Exit pupil tips for low-power framing.
- Crab Nebula (M1): A supernova remnant. Under suburban skies, look for a subtle oval glow; dark skies begin to hint at filamentary structure.
- Open clusters in Auriga (M36, M37, M38): Rich star fields that respond well to medium power.
- Double stars: Rigel’s companion and colorful doubles in Orion and Gemini provide satisfying challenges in steady seeing.
Spring galaxies (roughly March–May)
- Leo Triplet (M65, M66, NGC 3628): Three galaxies in one low-power field with a dark site and a wide eyepiece.
- Markarian’s Chain in Virgo: A sweeping gallery of galaxies. Start at M84/M86 and pan slowly.
- Sombrero Galaxy (M104): A bright core and dust lane in dark skies; use medium to high power to enhance contrast.
Summer nebulae and clusters (roughly June–August)
- Lagoon (M8) and Trifid (M20) Nebulae: Stunning with a UHC filter in Sagittarius; wide fields at low power show both in one sweep from dark sites.
- Omega (M17) and Swan Nebula: Strong O III and UHC responses. Look for shape and texture.
- Wild Duck Cluster (M11): A rich, compact open cluster; medium power resolves a sparkling triangle pattern.
- Globular clusters (M13, M92, M22): High surface brightness; raise magnification to resolve stars at the edges.
Autumn treasures (roughly September–November)
- Andromeda Galaxy (M31) with companions M32 and M110: Use a low-power, wide-field eyepiece to see the core and extended disk under darker skies.
- Triangulum Galaxy (M33): Low surface brightness; dark sites reward patience with hints of spiral structure.
- Pacman Nebula (NGC 281): Improves with a UHC filter; look for the characteristic “mouth.”
Planets and the Moon all year
Planetary apparitions vary by year. When visible and high in the sky, Jupiter’s belts and moons, Saturn’s rings and Cassini Division, and Mars’s polar cap can be impressive in a well-cooled, well-collimated Dob. The Moon is a tireless target; changing lighting angles reveal new rilles, domes, and craterlets night by night. For the best views, revisit Thermal management and select high-power eyepieces from your eyepiece set.
Astrophotography Reality Check with Dobsonians
Dobsonians are optimized for visual use. The alt-az mount causes field rotation during long exposures, and manual tracking makes deep-sky imaging impractical. That said, there are niches where a Dob can participate:
- Planetary imaging: With a high-frame-rate planetary camera and a Barlow, you can capture Jupiter, Saturn, Mars, and the Moon. Short video clips are aligned and stacked by software to exploit brief moments of stable seeing.
- Electronically Assisted Astronomy (EAA): Very short exposures (seconds) stacked in real time can reveal bright nebulae and clusters. A tracking base or equatorial platform helps; results vary with camera sensitivity and sky brightness.
- Equatorial platforms: Add tracking to a manual Dob for visual use and limited imaging. They are specialized, add weight, and require precise polar alignment.
If long-exposure deep-sky astrophotography is your primary goal, a German equatorial mount (GEM) with a small refractor or astrograph is a more appropriate path. Consider using your Dobsonian for visual observing while you learn astrophotography fundamentals on a separate rig. For guidance on eyepiece strategy for lunar/planetary imaging, see High-power magnification.
Care, Maintenance, and Storage Best Practices
Dobsonians are robust. A little care goes a long way toward maintaining optical performance and mechanical smoothness.
Mirror care and cleaning
- Dust is normal: Minor dust has minimal impact on views. Resist over-cleaning.
- When to clean: If the mirror looks hazy or has visible pollen, wash gently. Remove the mirror cell if the design allows. Rinse with distilled water before and after a mild detergent wash with clean cotton or fingertips. Avoid scrubbing.
- Drying: Stand the mirror nearly vertical; wick droplets with optical tissue by touching edges lightly. Do not rub.
Mirror coatings last years to a decade or more depending on environment. Recoating is specialized; consult a reputable coating service when reflectivity declines significantly.
Collimation screws and mechanical upkeep
- Primary and secondary screws: Learn which adjusters move which axes. Keep threads clean and snug but not overtightened.
- Bearings and pads: Inspect Teflon pads and laminate for wear. Replace pads if motion becomes gritty. Keep surfaces free of grit.
- Focuser maintenance: For Crayford focusers, adjust tension for zero slop while preserving smooth motion. Keep drawtube clean and collimated with respect to the tube.
Storage and transport
- Cap both ends to keep dust out; store in a dry, temperature-stable space.
- Use handles or a hand truck for large bases; consider wheelbarrow handles on big truss Dobs.
- Straps and padding help protect optics during car transport. Avoid leaving the scope in a hot trunk for extended periods.
Mechanical smoothness and well-aligned optics matter as much as mirror size. A tuned 8-inch can outperform a neglected 10-inch. A quick checklist before each session—collimation, cooldown plan, eyepiece selection—pays dividends at the eyepiece.
Frequently Asked Questions
Do I need to collimate a Dobsonian every time I observe?
You should check collimation before each session, especially after transport. Solid-tube f/6–f/8 scopes often hold alignment well; a quick primary tweak may be all that’s needed. Fast scopes (f/5 and below) and truss designs are more sensitive and benefit from regular checks. Using a Cheshire or barlowed laser makes the process fast. For finer points, revisit Collimation basics and Star testing.
What size Dobsonian is best for a beginner?
For many, an 8-inch (200 mm) solid-tube strikes the best balance of light-gathering, portability, cost, and cooldown. It reveals a wealth of deep-sky objects while remaining easy to move and store. If stairs or small cars are a factor, a 6-inch is an excellent lightweight choice. If you have room and dark-sky access, a 10-inch offers a meaningful performance bump—with added weight. For help evaluating trade-offs, see Aperture vs. Portability.
Final Thoughts on Choosing the Right Dobsonian Telescope
A Dobsonian telescope delivers what matters most in amateur astronomy: clear, contrasty views with minimal fuss. Choose the aperture that fits your lifestyle, match your eyepieces to observing goals, and commit to simple best practices—collimation and cooling—that unlock sharp performance. Add the right finders and filters, learn to work with your local sky conditions, and build an observing plan around seasonal highlights. With those pieces in place, your Dob becomes a reliable portal to the Moon’s stark relief, the swirling belts of Jupiter, and the dim island universes scattered through spring skies.

Artist: James Stewart 669
If this guide helped you clarify your path, consider bookmarking it for reference on your next gear night. We publish practical, research-based astronomy guides weekly—subscribe to our newsletter to get the latest deep dives on equipment, observing techniques, and sky events delivered straight to your inbox.